Before you can use the app to print or scan, there are a few things you will need to do.
Before you begin
-
Install the Canon PRINT app on your device. Go to Android™ or iOS®.
-
Connect to your printer. Get instructions for Android or iOS.
-
Make sure your original document or photo is loaded on the scanner.
Scan with the app
 Screenshots shown are from an iPhone 8 Plus. Screens on other iOS devices may differ. Tap
 at anytime during these steps to return to the main screen.
-
On your iOS device, tap to launch the Canon PRINT app.
-
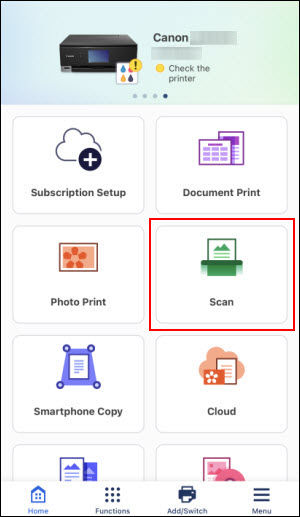
From the main screen, tap Scan.
-
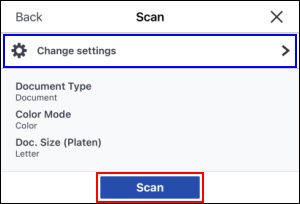
Use Change settings to make any needed adjustments before scanning. Tap Scan to begin the scan.
-
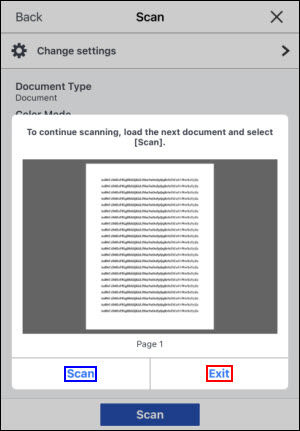
When the scan is complete, tab Scan to scan an additional document, or tap Exit to continue.
-
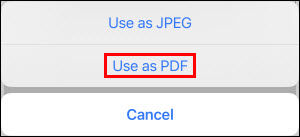
After tapping Exit in the prior step, tap the share icon.

-
Tap Use as PDF.
-
Choose what you'd like to do with the scanned data:
-
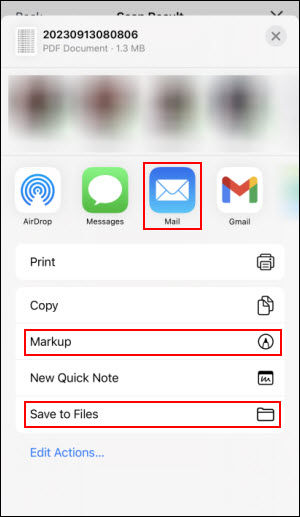
Tap Mail to email the scanned image.
-
Tap Save to Files to save the PDF on to your iOS device. You can reopen this later through the Files app if desired.
-
Tap Markup if you want to mark up the document before saving it.
-
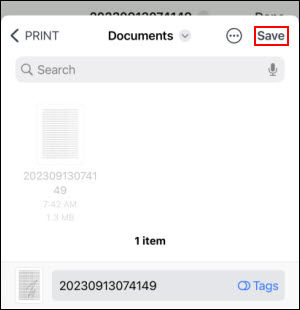
If you tap Save to Files, choose a location to save the file (on your iOS device or iCloud Drive). Tap Save to save the PDF.
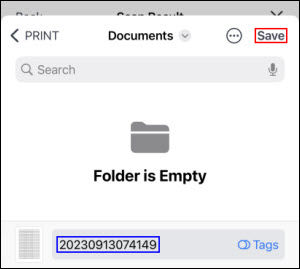
 Before saving, you can also tap the date, which is the default name for the scanned PDF. Provide a name for the document, then tap Done.
-
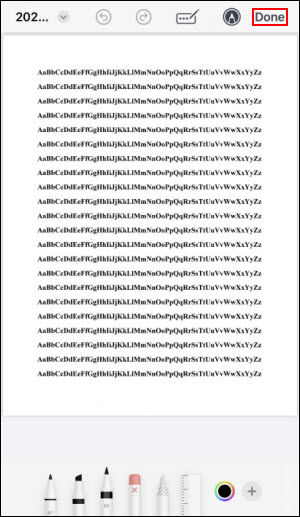
If you tapped Markup in step 7, make any desired adjustments to the document, then tap Done.
-
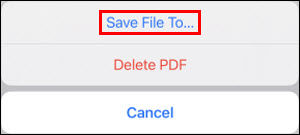
Tap Save File To... to save the PDF.
-
Choose a location to save the file. You can save it directly on your iOS device or on your iCloud Drive. Tap Save to save the file.
-
After saving the file, you can reopen it later using the Files app on your iOS device if desired.
For support and service options, sign into (or create) your Canon Account from the link below.
My Canon Account


