Follow the steps below to connect the PIXMA G series printer to a wireless network for use on a Mac®.
The setup process consists of two parts:
- Start Easy Wireless Connect on your printer.
- Download and run the setup file on your computer.
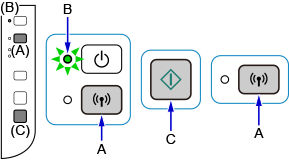
1. Start Easy Wireless Connect on the printer
-
Press and hold the Wi-Fi® button (A) on the printer until the ON lamp (B) flashes.
-
Press the Color button (C) then the Wi-Fi button (A).
-
Make sure the Wi-Fi lamp (D) flashes quickly and the ON lamp is lit.

-
Return to the application screen to continue the setup.
2. Download and run the setup file on your computer
-
First you'll need to get the setup file. Chose the Download button for the setup file that matches your version of macOS®.
-
Select Next from the Setup screen.
-
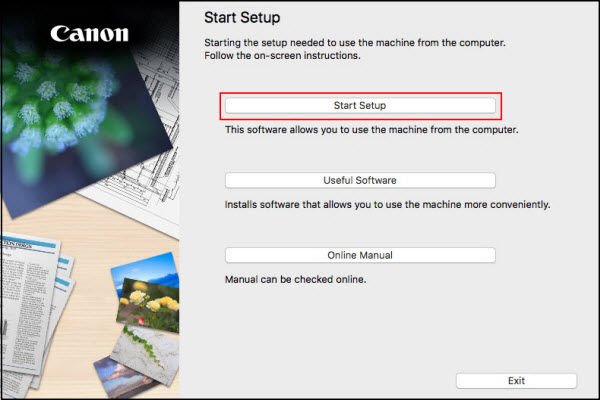
Select Start Setup.
-
Select your country from the list and choose Next.
-
Select Yes to the License Agreement.
-
Select Agree or Do Not Agree to the survey.
-
You will see the Status Check screen. Wait for the system to complete the status check.
-
Select Yes on the Connection Method screen.
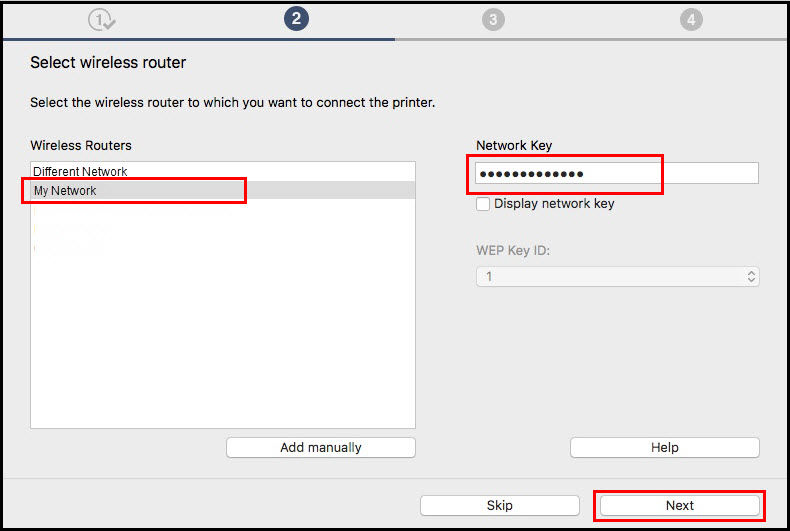
- If the Select wireless router screen appears, select your wireless network, enter the Network Key (password), then choose Next.
-
On the Network Connection Completed screen, select Next.
-
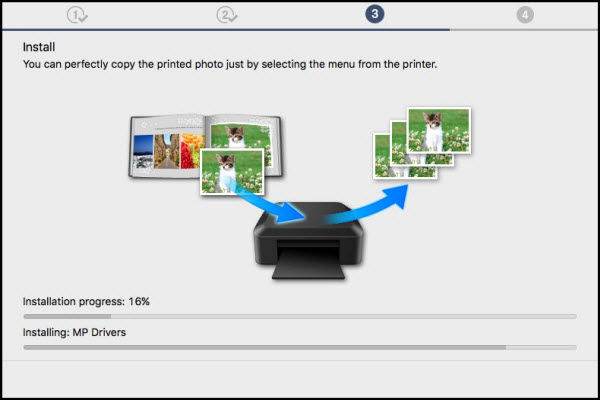
The Install screen appears. Wait for the install to finish.
-
Choose Add Printer on the Add Printer Screen.
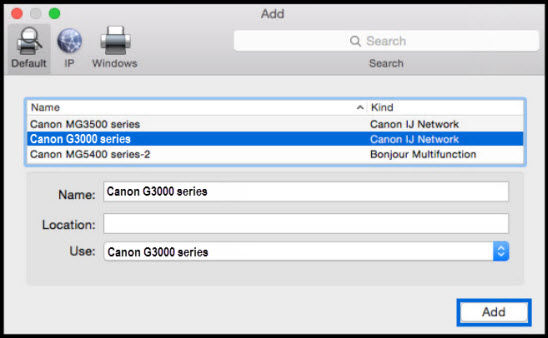
-
On the Add screen, select your G series with Canon IJ Network listed in the Kind column. Then select the Canon G3000 series (models may vary) from the Use drop-down and select Add.
-
Select Next on the Add Printer screen.
-
The Test Print Page appears. Choose Execute to run a test or Next to skip the test.
-
Select Next from the Setup Complete page.
-
Select any optional application software desired, then select Next.

-
On the You Can Print... page, select Next.
-
Select Skip or Next on the User Registration page.
-
The installation is complete. Select Exit.