Before Starting
Depending on the iOS device you are using, the interface may look slightly different than the images in this article.
To print a .doc file in Canon PRINT, follow the steps below
-
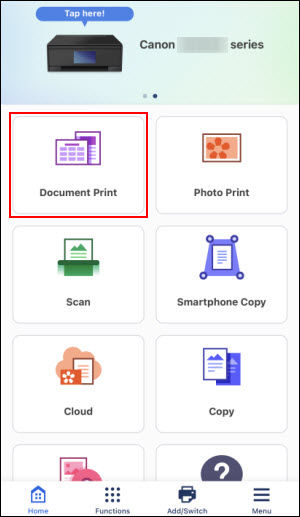
From the main screen, tap Document Print.
-
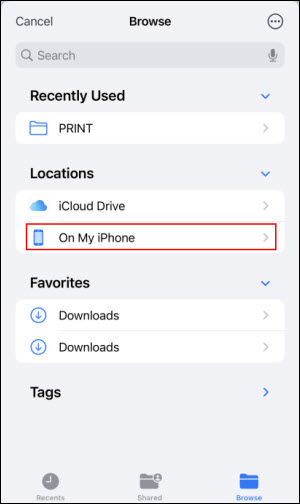
Select Documents or Cloud Services, depending on where your .doc file is saved. In this example, Documents will be selected.

-
Specify a location where you have a document saved. In this example, On My iPhone will be selected.
-
Browse through the folders displayed. When you see the document that you want to print, tap it.

-
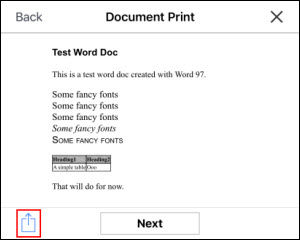
Tap the Share
 icon.
icon.
-
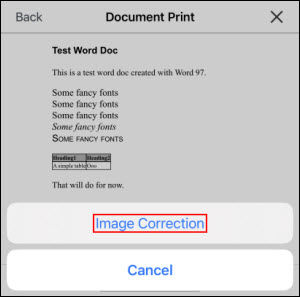
Tap Image Correction.
-
On the message that appears regarding the Data Conversion Service, tap OK.
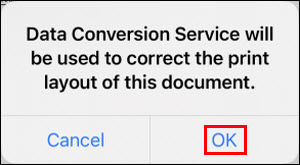
 Tapping
 will take you back to the main screen.
-
On the Confirmation screen, tap on either Terms of Use or Privacy Statement to view those respective documents. Tap Agree to continue.
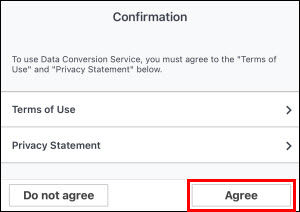
The Document Conversion Service will convert the document into a format that is supported by Canon PRINT.

-
When the process has finished, tap Next.
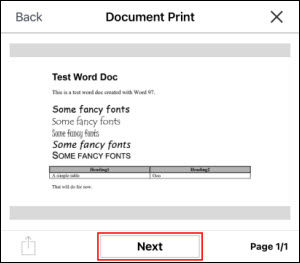
-
This will bring up the Print screen. Tap Change settings if you want to change settings such as the number of copies to print, the print range, etc. Tap Print when you want to print the document.
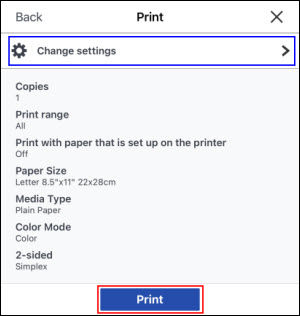
The document will be printed.
For support and service options, sign into (or create) your Canon Account from the link below.
My Canon Account


