Deleting /Adding the Printer to the Printer List (Mac OS X)
Note: After confirming that the cable is connected and the printer is powered on, perform the following:
*Instructions below are for Mac OS X 10.5.x and 10.6.x. Mac OS X 10.3.x and 10.4.x users, click here.
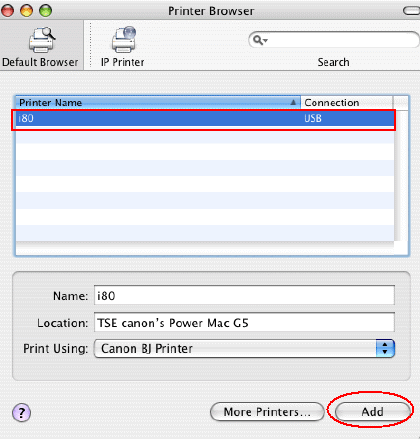
- In the Apple menu, open System Preferences.
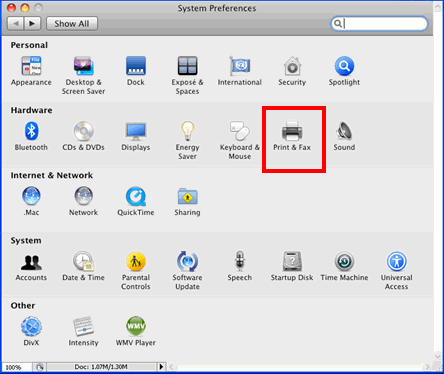
- Open Print and Fax.
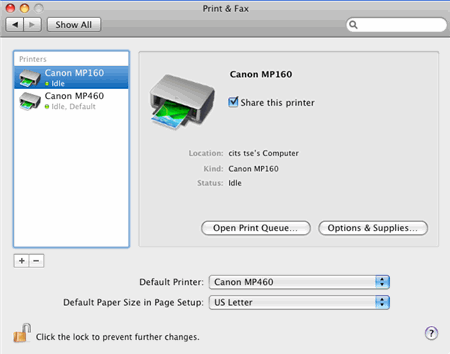
- Be sure that the printer to be deleted is highlighted in the Printers section.
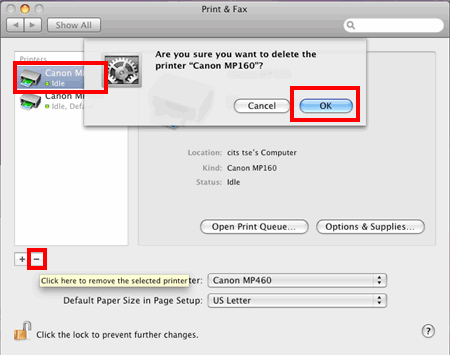
- Click the Minus (-) sign, then click 'OK' on the confirmation message. The printer is deleted.
- To add the printer, click the Plus (+) sign.
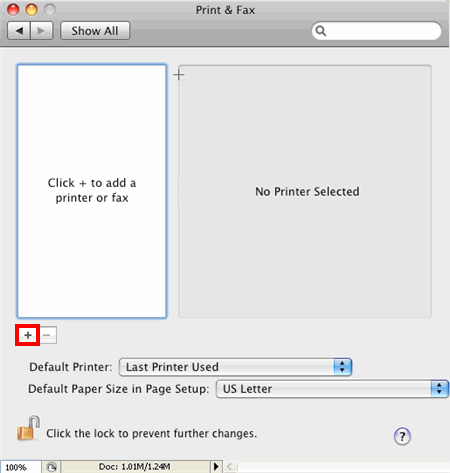
- Select the printer to add, then click 'Add'.
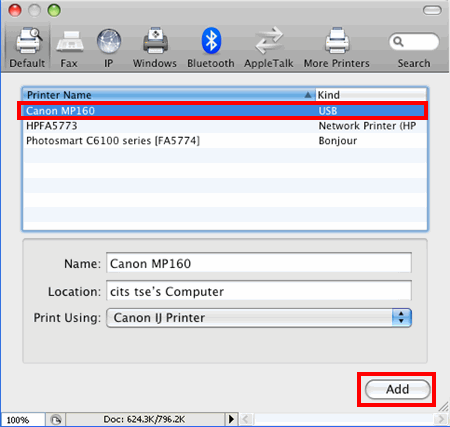
- The printer is added.
Deleting /Adding the Printer to the Printer List (Mac OS X ver 10.3.x and 10.4.x)
- Open Applications, and Utilities, and double-click the 'Printer Setup Utility' icon.
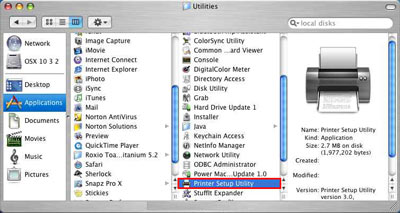
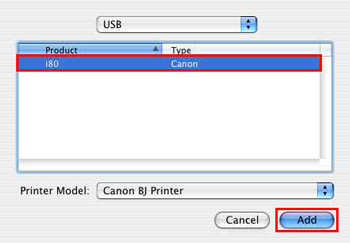
Note: Printer Setup Utility has a different name, depending on the Mac OS X version. In versions prior to Mac OS X 10.3.x, double-click the Print Center icon. The above is an image using Mac OS X Ver. 10.3.x. The display in prior versions appears different. The images are an example using the i80 model.
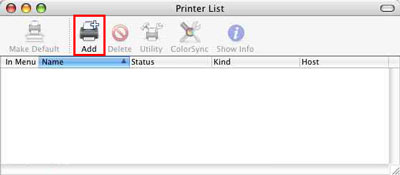
- Highlight the printer you wish to delete and click 'Delete' .

- Click 'Add' on the toolbar.
- Select 'USB' from the pop-up menu (10.2x and 10.3x OS's)
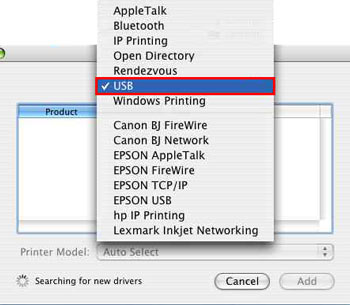
- Select the printer name you are using, and click 'Add' (The printer you are using is added to the Printer List dialog).
10.3 screen
10.4 screen
Re-adding the printer to the Printer List is complete.
