Documents, pictures and magazines, which are set on the platen glass, can be copied without borders using MP Navigator.
- Place the document face down on the platen glass.
Memo:
Place a scanning side facing down on the platen glass.
Align a document with the arrow (the alignment mark), which is at the bottom right corner of the platen glass.
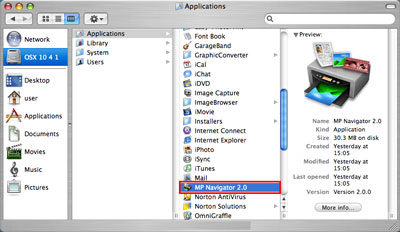
- To open the Applications folder, click the icon of the hard disk where MP Navigator is installed, and double-click the icon of MP Navigator 2.0.
- Click Scan Photo/Document.

* Display varies according to the printer model.
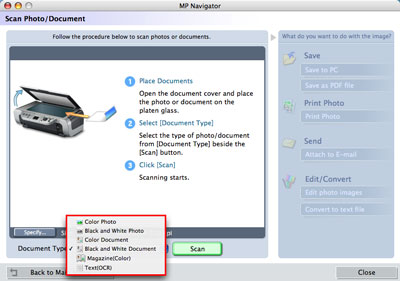
- Select the document type to be scanned.
Memo:
- Click Specify to specify the settings for the document type, the document size, or the resolution if necessary.
- Select Text(OCR) if you want to convert image data of original handwriting or printed letters to text data using the OCR software.
Note:
If Magazine(Color) is selected, Descreen scan setting is automatically checked. Descreen is a function of the driver to reduce the moire effect and will increase scan time.
To change the automatic setting, click 'Specify' and deselect 'Descreen' in the Scan Settings window.
* Display varies according to the printer model.
Color Photo | Select this to scan color photographs. |
Black and White Photo | Select this to scan black and white photographs. |
Color Document | Select this to scan color documents. |
Black and White Document | Select this to scan black and white documents. |
Text(OCR) | Select this to scan text documents. |
Magazine(Color) | Select this to scan color magazines. |
- Click 'Scan' to start scanning.

- At the Scan Complete window, perform one of the following:
- Load the next document to scan and then click 'Scan'.
- To complete the scan, click 'Exit'.
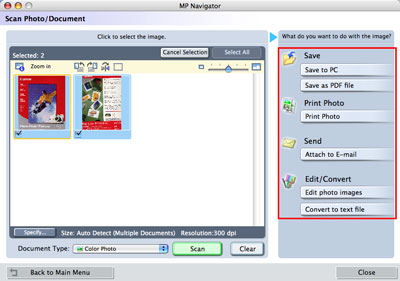
- The preview of the scanned image will be displayed when the scanned job is finished.
- Click on the appropriate button from the following options to complete scanned process.
* Save
* Copy
* Print Photo
* Send
* Edit/Convert