The instructions below will walk you through the steps needed to connect your printer to a wireless network (router).
Before you begin
The way you connect depends on whether the router is WPS®-compatible. Follow the steps below based on your router type:
- Router with WPS
- Router without WPS
1. If you have a WPS-compatible router
-
Check the router to confirm that it's on and ready to connect.
-
Remove any inserted memory cards or USB flash drives from you SELPHY printer.
-
Insert a loaded paper and ink cassette into your SELPHY printer.
-
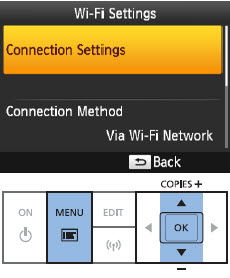
Press the Menu button, then the up / down arrow  buttons to select Wi-Fi Settings, and press OK.
-
Press the up / down arrow buttons to select Connection Settings, then press OK.
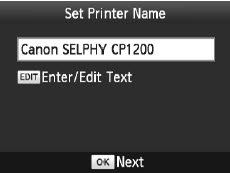
- Check the printer name to make sure it matches your printer and press OK. (Press Edit to change the printer name.)
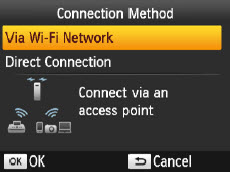
- Press the up / down arrow buttons to select Via Wi-Fi Network, then press OK.
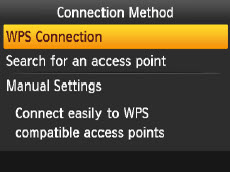
- Press the up / down arrow buttons to select WPS Connection, then press OK.
- Press the up / down arrow buttons to select PBC Method, then press OK.
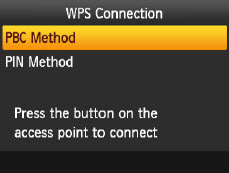
The screen below displays.
-
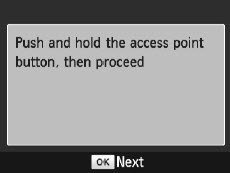
On the access point (router), hold down the WPS connection button for a few seconds. For details on where the button is located and how long to press it, check the router user manual.
-
On the printer, press the OK button.
-
Connecting displays on the printer, followed by Connected to access point when connected.
-
Press OK. The screen below displays, indicating the name of the access point.

2. If you don't have a WPS-compatible router
-
Follow steps 1-7 above.
-
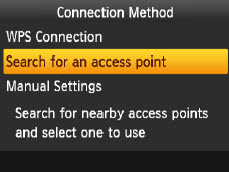
Press the up / down arrow buttons to select Search for an access point, then press OK. Nearby access points display.
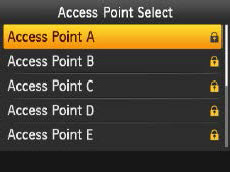
- Press the up / down arrow buttons to select the access point (router), then press OK. (The Access Points below are examples.)
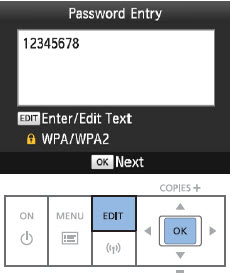
- Press the EDIT button to access the input screen, enter the password, and press OK.
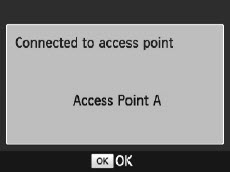
- Once the printer is connected to the access point, the screen below displays. Check the name to be sure it's correct, then press OK.
The screen is displays with the name of the access point.
