Installing the Printer Driver on Mac
Before using the printer, you must install the UFR II printer driver for it.
Important
If an older version of the printer driver has been installed, uninstall the older version before installing the newer version.
1. Click on the *.dmg file that was downloaded from the Canon website.
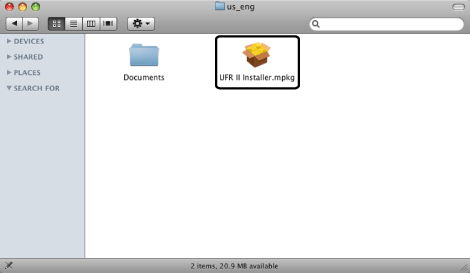
2. Open the following folders: [UFR II] ->[us_eng].
3. Double-click the [UFR II Installer.mpkg] icon.
Click [Continue] when the confirmation message appears. The Installed starts.
4. Read the software license agreement carefully -> click [Continue].

5. If you agree to the terms of the software license agreement, click [Agree].

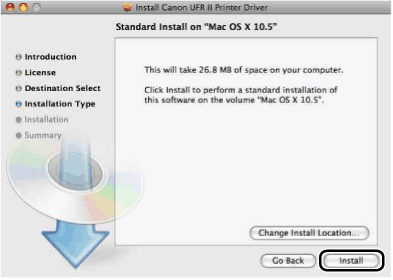
6. Click [Install].
7. Enter the administrators name and password -> click [OK].
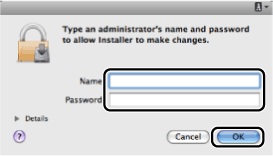
Installation starts.
Note:
Depending on the system environment, the [Authenticate] dialog box may not be displayed. In that case, proceed to next step.
8. Click [Close] when the confirmation message below appears.
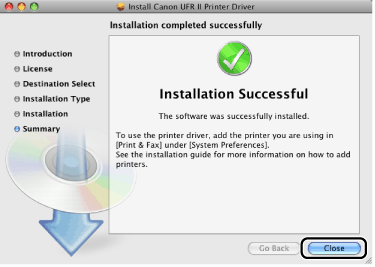
Installation is complete.
Before using the printer driver, you must add the printer in [System Preferences].
Note:
- The printer utility software "UFR II Printmonitor" is installed simultaneously.
- For details about using UFR II Printmonitor, see the Online Help.
