Depending on the settings in MP Navigator, your images may not always scan correctly.
If you get poor results, you will need to match the settings in MP Navigator to the document you want to scan.
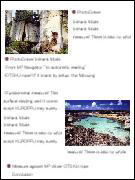
Examples of incorrect scan results
A scan that's crooked


A scan that doesn't fully print

An scan that's divided
To correct a scan, you'll need to check a few things:
-
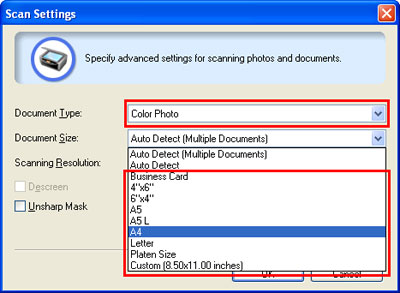
Does the Document Type on the scanner surface match the Document Type set in MP Navigator?
For example, when scanning a color photo, did you select Color Photo in Document Type of MP Navigator?
-
Does the Document Size on the scanner surface match the Document Size in MP Navigator?
For example, when the Document Size is A4, did you select A4 in Document Size of MP Navigator?
 Auto Detect is the default setting.
If the settings don't match, follow the appropriate steps below.
Change the Document Type or Size in MP Navigator
-
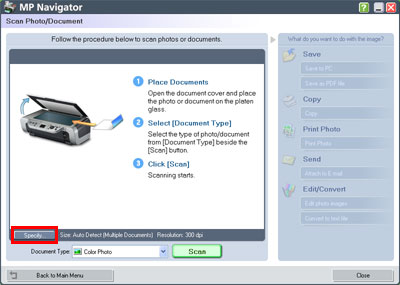
Launch MP Navigator and select Scan Photo/Document.
-
The Scan Photo/Document window displays. Select the Specify button.
-
Select the correct Document Type and Document Size from the drop-down.
Re-scan the document
-
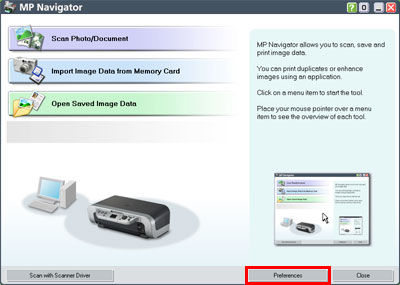
Launch MP Navigator.
-
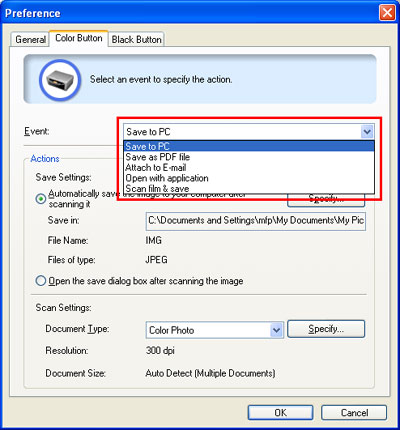
Select Preferences at the bottom right. The Preference window displays.
-
Select the Color Button or Black Button tab.
-
From the Event drop-down, select how you want to save the scanned file.
- Click Specify in the Scan Settings section.
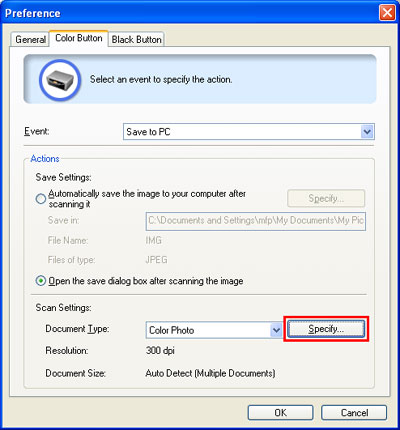
- The Scan Settings window displays. Select the Document Type and Size, then OK.
- When the Preference window displays, select OK. The Document Type and Size are now set.
