Registering Fax Numbers through the Address Book
1 Press  (Additional Functions).
2

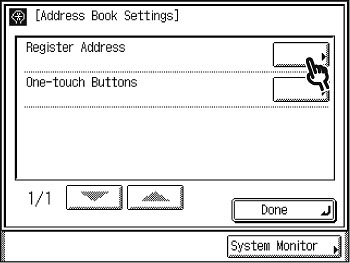
If a password has been set for the Address Book, enter the password using  -
-  (numeric keys), then press [OK] to enter the Address Book Settings menu.
3
4

5
6

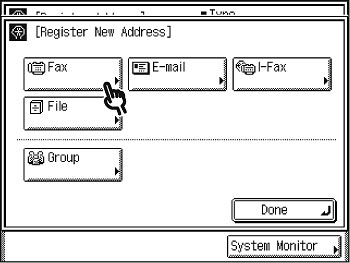
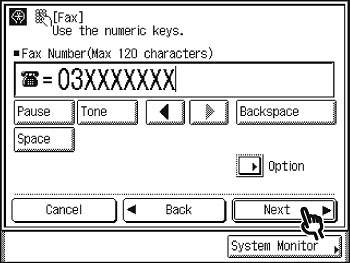
1 Enter the recipient's fax number (up to 120 characters) using  -
-  (numeric keys),
  , and
, and  .
.
[Pause]: Press to insert a pause of several seconds in the fax number you are dialing. If you insert a pause within the fax number, the letter <p> is displayed between the numbers. If you insert a pause at the end of the fax number, the letter <P> appears. When dialing an overseas number, insert a pause after the country code, and at the end of the fax number.
[Tone]: Press when you want to directly call an extension line that is connected to a PBX (Private Branch Exchange), which accepts only tone signals. If you press [Tone], the letter <T> appears.
[<] [>]: Press to move the position of the cursor.
[Backspace]: Press to delete the number or character immediately to the left of the cursor.
[Space]: Press to insert a space between numbers.
note:
- You cannot insert a pause or a space at the beginning of a number.
- If you enter a pause at the end of the number, the pause is always 10 seconds long.
- You can press (Clear) to clear your entry.
2 Press [Option] or [Next]. If you want to specify the sending speed, type of call, and ECM TX settings, press [Option] and proceed to step 7. Otherwise, press [Next] and skip to step 15.
7

8
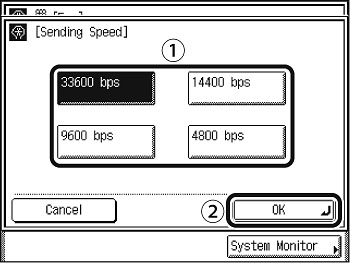
1 Select the desired sending speed.
2 Press [OK].
note:
If your document transmissions are slow in starting, this may mean that the telephone lines in your area are in poor condition. Select a slower speed. You can select [33600 bps], [14400 bps], [9600 bps], or [4800 bps].
9

10
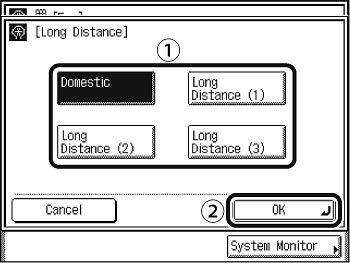
1 Select the type of call. Select [Domestic] for dialing domestic (local) telephone numbers. Select [Long Distance (1)] if communication errors frequently occur when you make overseas calls (when the overseas telephone number is registered in the Address Book). If errors persist, try selecting [Long Distance (2)] or [Long Distance (3)].
2 Press [OK].
11

12

1 Select [On] or [Off].
2 Press [OK].
13

14
15

1 Enter a name for the recipient of the fax (up to 16 characters).
2 Press [OK].
note:
The first character you enter for the name is used for sorting the destination list when you press keys, such as [ABC] and [DEF], on the Address Book screen.
16 Press [Done] repeatedly until the Send Basic Features screen appears.
