-
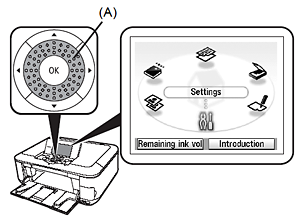
Use the Easy-Scroll Wheel (A) or the 
 buttons to select Settings, then press the OK button.
-
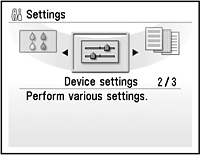
Select Device settings, then press the OK button.
-
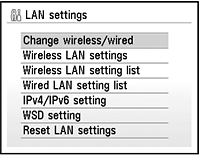
Select LAN settings, then press the OK button.

-
Select Change wireless / wired, then press the OK button.
-
Select Wireless LAN active, then press the OK button.
-
Turn on the computer, then insert the Setup CD into your computer. The setup program should run automatically. If the program does not start automatically, double-click the CD-ROM icon on the computer. When the Setup CD contents appear, double-click Msetup4.exe.
 If you do not have the Setup CD for your printer, or if your computer does not have a CD-ROM or DVD-ROM drive to read the disc, you can download the Mini Master Setup file from the Canon website. The Mini Master Setup file only contains the MP Drivers and the Canon IJ Network Tool. Additional software for your printer can be downloaded from the Canon website.
If an AutoPlay screen appears, or if you receive any prompts asking what to do after the Setup CD has been inserted, click Run Msetup4.exe. If any additional prompts appear asking you for permission to run the program, click Continue or the appropriate affirmative option.
-
Click Easy Install.
The drivers, applications, and on-screen manuals are installed automatically.
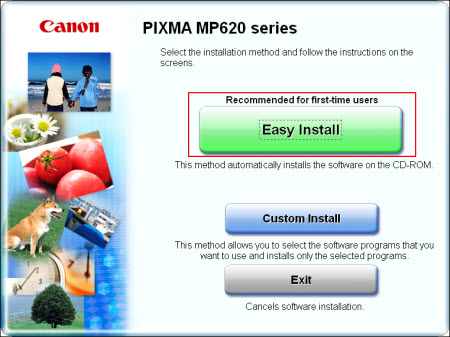
If you want to select particular items to install, click Custom Install and follow the on-screen instructions to proceed with the installation.
-
Click Install.
Move the cursor over items to display explanations.

-
Read the License Agreement screen carefully and click Yes.
Installation starts. Follow any on-screen instructions to install the software.
-
On the Setup Method screen, select Connect printer to the network for the first time, then click Next.

When a confirmation screen for the machine's LAN setting appears, click OK.
-
When the Printer Connection screen appears, connect the machine to the computer with a USB cable, then turn on the machine.

The USB port is located on the right side at the back of the machine.
When the machine is recognized by the computer, a message appears on the screen.
If you cannot go to the next procedure after 10 minutes, click Help and confirm the message.
-
When the Setup Preparations dialog box appears, confirm that preparation is complete, then click Next.
-
When the Access Points screen appears, select an access point to use, then click Connect.
When an access point is detected automatically, the Access Points screen does not appear. Proceed to the next step.
To connect to the access point with WEP or WPA displayed in the Encryption column, enter the network key (WEP key or WPA key) in Network Key, then click Connect.
-
If the Set Printer IP Address screen appears, click Connect.
If the machine is detected automatically, the Set Printer IP Address screen does not appear.
-
The following screen appears only if you are using Windows XP or Windows 2000. If you are not using either version, proceed to the next step.
When the Network Setup of the Card Slot dialog box appears, specify the drive letter, then click Next.
-
When the Setup Completion dialog box appears, remove the USB cable, then click Next.
-
Turn off the machine, then place the machine in the location where you will use it, and turn it on.

-
On the Connection Performance Measurement screen, click Next.
The signal strength between the printer and access point is measured. This may take a few minutes.
You can cancel measuring by clicking Cancel.
-
Confirm the measurement results, then click Finish.

Make sure that  is displayed in Connection performance between the printer and the access point.
If any other symbol is displayed, refer to displayed comments and Help for improving the connection performance.
Click Remeasurement to measure the signal strength again.
When any message on Overall network performance appears in the measurement results, rearrange the printer and other network devices following the instructions on the screen.
-
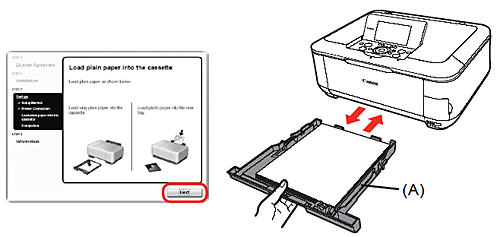
When the Load plain paper into the cassette screen appears, load plain paper in the Cassette (A) and click Next.
-
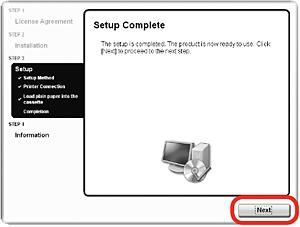
Click Next.
It may take a while for the next screen to appear. Click Next only once.
-
Click Next.
If the computer is connected to the Internet, the user registration page appears. Follow the on-screen instructions to register your product. You will need your product serial number, which is located on the inside of the machine.

To register later, click Cancel. User Registration can be started from the Solution Menu icon.
-
When the Extended Survey Program screen appears, confirm the message. If you can agree, click Agree.
If you click Do not agree, the Extended Survey Program will not be installed. This has no effect on the machine's functionality.

-
Click Exit.
If Restart is displayed, make sure that the Restart the system now (recommended) check box is selected, then click Restart.
After restarting the computer, remove the Setup CD-ROM and keep it in a safe place.