Learn how to reseat or replace a print head in the PIXMA G3260. If you're experiencing poor print quality (streaked / banded prints, incorrect / missing colors, blank pages, etc.), or if you're seeing certain error codes on your computer, reseating or replacing the print head may resolve the problem.
Solution
Reseat / Replace the Print Head
If the print quality is not improved even after maintenance such as cleaning, replace a print head (black / color).
For some errors, you may be able to reseat (remove and reinsert) the print head(s) you're currently using rather than replacing them.
Replacement Procedure
The following video will walk you through the procedure described below.
Don't touch the electrical contacts (A) or print head nozzle (B) on a print head.The printer may not print properly if you touch them.
If you need to replace a print head, do so immediately and don't leave the printer with the print head removed.
Make sure that printer is powered on.
Press the Setup button, use the buttons to select Maintenance, and then press the OK button.
Use the buttons to select Start replacement, and then press the OK button.
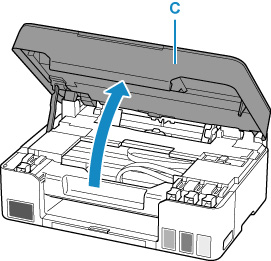
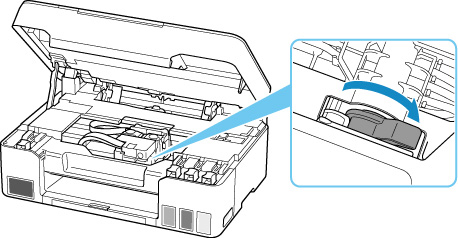
Open the scanning unit / cover (C).
If the ink stains the print head and / or the inside of the printer, wipe them using a soft cloth dampened with water before installation.Be careful not to get ink on your clothing or surroundings when replacing the print head.
Don't touch the metallic parts or other parts inside the printer.
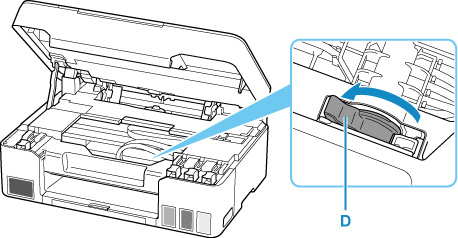
Turn the ink valve lever (D) to the left.
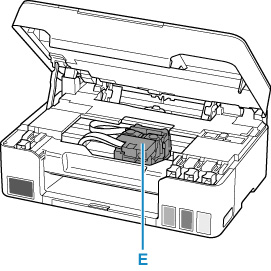
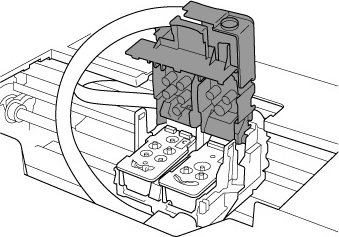
The print head holder (E) moves.
Don't hold the print head holder to stop or move it forcibly while the print head holder is working.Don't touch the print head holder until it stops completely.
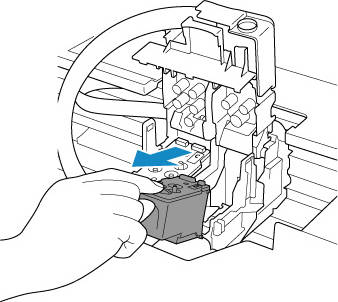
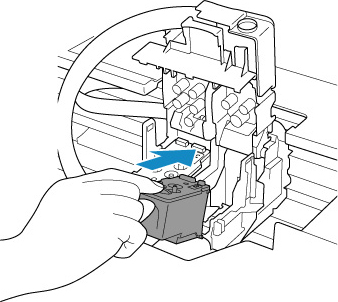
Remove the print head.
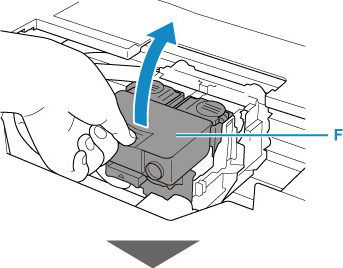
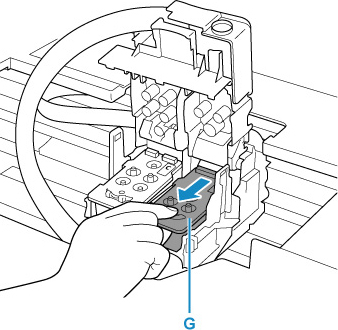
Pinch the tabs and open the print head locking cover (F).
Pull the print head (G) and shift it slightly toward you.
Take out the print head.
Handle the print head carefully to avoid staining of clothing or the surrounding area.
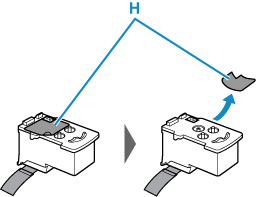
Prepare a new print head.
Take a new print head out of its package and gently peel the label (H).
Install the print head C (color) in the left print head holder and the print head B (black) in the right print head holder.Make sure to check the label and install the print heads correctly.
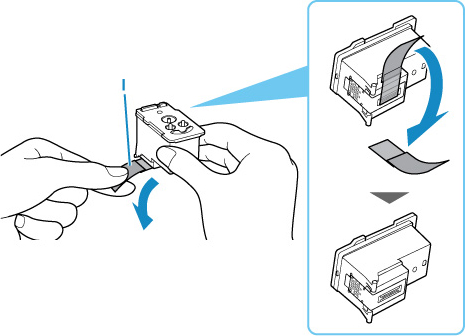
Gently remove the protective tape (I).
Don't touch the electrical contacts or print head nozzle on a print head.The printer may not print properly if you touch them.
Install the print head.
Put a new print head in the print head holder.
Close the print head locking cover to lock the print head into place.
Push down the print head locking cover until it clicks.
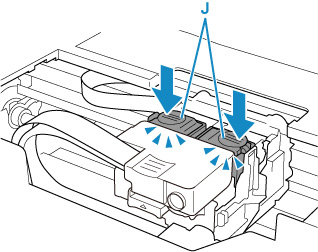
Push the joint buttons (J).
Push down the joint buttons until they click.The printer may not print.
Check that both the left and right joint buttons are pushed down.
Turn the ink valve lever to the right.
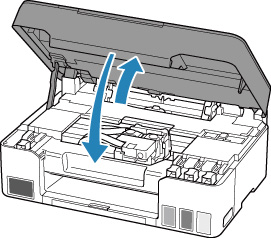
Close the scanning unit / cover.
If the print head is out of alignment, as indicated by misaligned printed ruled lines or similar symptoms, adjust the print head position from the operation panel, a Mac or a Windows PC.
If your product issue was not resolved after following the steps above, or if you require additional help, please create or log in to your Canon Account to see your technical support options.
Or if you still need help, visit our Canon Community by clicking the button below to get answers:

 For some errors, you may be able to reseat (remove and reinsert) the print head(s) you're currently using rather than replacing them.
 The following video will walk you through the procedure described below.
 Don't touch the electrical contacts (A) or
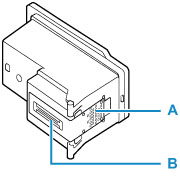
 button, use the

 If the