Good to know
 If you cut plain paper into small size such as 4" x 6" / 10 x 15 cm, 5" x 7" / 13 x 18 cm, or Card size to perform trial print, it can cause paper jams.
Prepare your paper
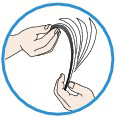
- When loading two or more sheets of paper, flip through the pages before loading them.
-
Make sure the paper stack does not exceed the paper load limit. However, proper feeding of paper may not be possible at this maximum capacity depending on the type of paper or environmental conditions (either very high or low temperature and humidity). In such cases, reduce the sheets of paper you load at a time to less than half of the paper load limit.
-
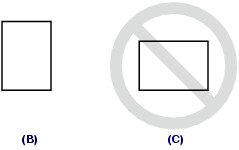
Always load the paper in portrait orientation, regardless of the printing orientation (B). Loading paper in the landscape orientation (C) can cause paper jams.
Load your paper
- Align the edges of paper neatly by tapping them on a flat surface before loading to prevent paper jams.

 If paper is curled, hold the curled corners and gently bend them in the opposite direction until the paper becomes completely flat.
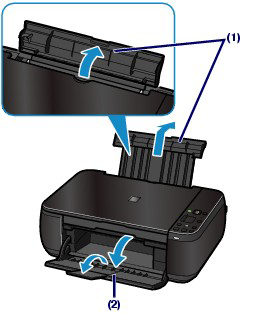
- Open the Paper Support, raise it, then tip it back (1).
-
Open the Paper Output Tray gently, and open the Output Tray Extension (2) as shown in the above image.
-
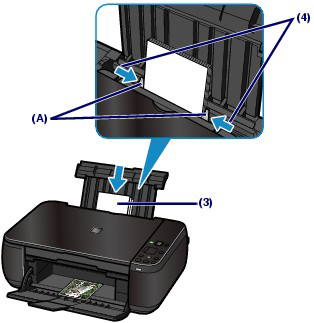
In the image below, slide the Paper Guides (A) to open them, and load the paper in the center of the Rear Tray with the print side facing you (3).
-
Then, slide the Paper Guides (A) to align them with sides of the paper stack (4).
Don't slide the Paper Guides too hard or the paper may not feed properly.
-
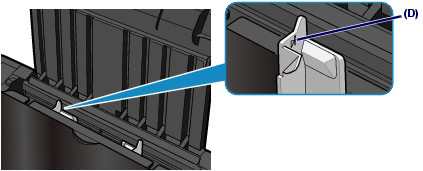
Do not load sheets of paper higher than the Load Limit Mark (D).
The machine may make an operating noise when feeding paper.
Ready to print
-
When copying, select the size and type of the loaded paper using the Operation Panel on the machine.
-
When printing with a computer, select the size and type of the loaded paper in Printer Paper Size and Media Type in the printer driver.