Set up the MP495 / MP499 to work with additional Macs on a wireless network
Article ID: ART133377
|
Date published: 05/13/2015
|
Date last updated: 04/20/2020
Description
Once your PIXMA MP495 / MP499 is connected to a wireless network, you'll need to download and install drivers, then add the printer to your printer list to be able to use additional Macs with the printer.
Solution
If your PIXMA MP495 / MP499 is connected to your wireless network, you can set up additional Macs to work with the printer. Here's how to do it:
Go to the support site to download the drivers for your printer.
After the files have downloaded, open them. A new window will appear on your screen with a .pkg (package) file.
Double-click on the .pkg file. Follow all on-screen instructions to install. If you are prompted to enter your computer's password to install the drivers, enter that password. Please note that installation may take several minutes.
After the drivers have been installed, select System Preferences... from the Apple menu.
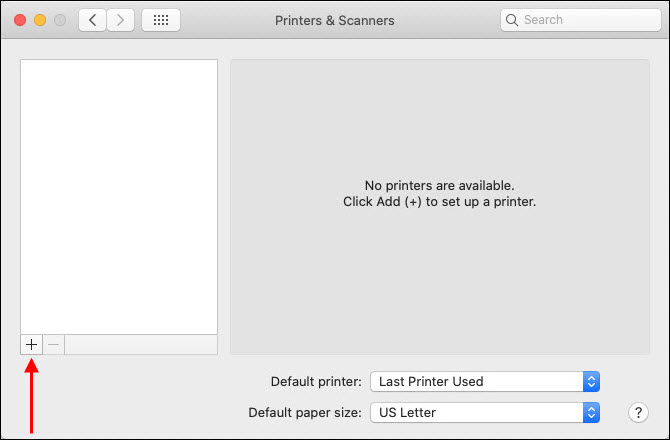
Select Print & Fax / Print & Scan / Printers & Scanners (the name will vary depending on which version of macOS is installed on your computer).
Click the plus sign on the left side of the window.
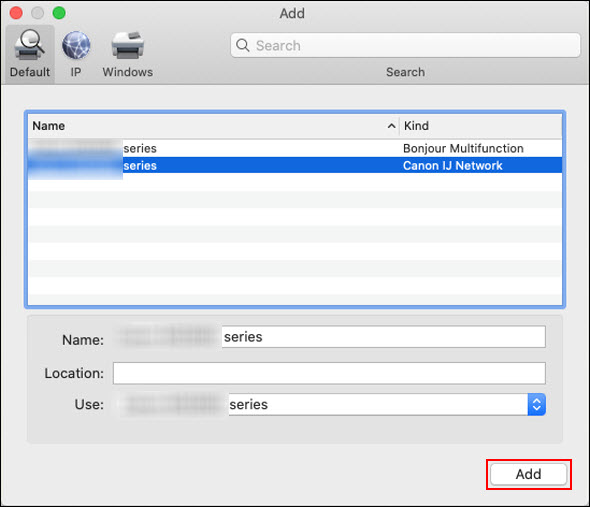
In the Add window, wait for the Canon IJ Network listing to appear for your printer. Select it and make sure that you see your printer listed in the Use: pop-up menu. Select Add.
After a few moments, your printer will be added to your computer's printer list. You will be ready to print from your Mac.
After adding your printer to the printer list, it is recommended that you download MP Navigator EX from the support page for your printer. Click the Software tab on that page and you'll see it in the list.