6S5K-00F
Paper Jams in a Paper Source
Remove the jammed paper according to the procedure that matches the location at which a paper jam occurred.
Paper Jams in the Multi-Purpose Tray
If there is paper loaded in the tray, remove it first. If the jammed paper cannot be removed easily, do not forcibly pull it out, but follow the procedure for a different paper jam location indicated by the message.
1
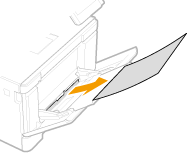
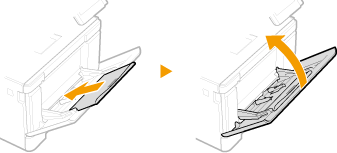
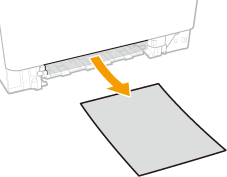
Remove the jammed paper in the multi-purpose tray.
1
Gently pull out the paper.
2
Close the tray.
2
Remove the jammed paper inside the machine.
1
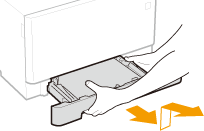
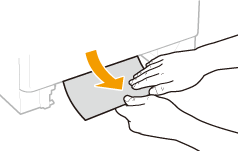
Pull out the paper drawer until it stops, and remove it while lifting the front side.
2
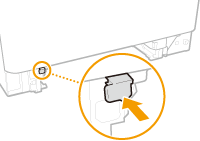
Press the green button.
The transport guide lowers.
3
Gently pull out the paper.
3
Push the transport guide back in.
Firmly press the transport guide until it clicks into place.
4
Set the paper drawer.
When you insert the paper drawer with <Notify to Check Paper Settings> set to <On>, a confirmation screen is displayed.
5
Select <Yes> when the <Is all of the jammed paper removed?> message is displayed on the screen.
Paper Jams in the Paper Drawer
If the jammed paper cannot be removed easily, do not forcibly pull it out, but follow the procedure for a different paper jam location indicated by the message.
1
Pull out the paper drawer until it stops, and remove it while lifting the front side.
2
Gently pull out the paper.
When the optional cassette feeding module is attached, gently pull out the paper in the same way.
3
Set the paper drawer.
When you insert the paper drawer with <Notify to Check Paper Settings> set to <On>, a confirmation screen is displayed.
4
Select <Yes> when the <Is all of the jammed paper removed?> message is displayed on the screen.

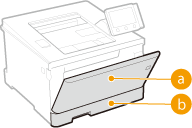
 Multi-purpose tray
  Paper drawer