|
CAUTION
 Do not connect the USB cable yet.
You will be prompted to connect it during the installation using the Setup CD-ROM.
Windows
IMPORTANT
- Quit all applications before installation.
- Log on using an administrator account.
REFERENCE
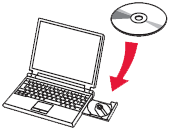
If the computer is equipped with a CD-ROM drive, you can use CD-ROM for installation.
- Click [ Run Msetup4.exe ] on the AutoPlay screen, then click [ Yes ] or [ Continue ] on the User Account Control dialog box.
If the CD-ROM does not autorun:
Double-click [ (My) Computer ] > CDROM icon > [ MSETUP4.EXE. ]
Go to Step 5 and follow the instructions.
2. Select your region, printer name, and computer OS.
3. In the Product Setup section, click Download. The setup file will be downloaded.
4. Double-click the downloaded .exe file.
The setup will start automatically. Follow the on-screen instructions to complete installation.
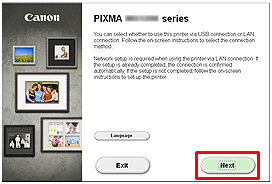
5. Click [ Next ].
6. Click [ USB Connection ].
REFERENCE
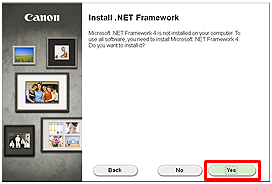
When the .NET Framework screen appears, click [Yes].
7. Click [ Next ].
REFERENCE
Easy-WebPrint EX is Web print software that is installed on the computer when installing the supplied software. Internet Explorer 7 or later (Windows) is required to use this software. An Internet connection is required for installation.
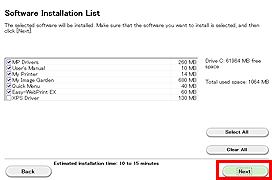
Follow any on-screen instructions to proceed with the software installation.
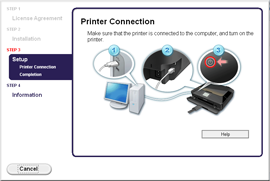
8. When the Printer Connection screen appears, connect the machine to the computer with a USB cable.
After connecting the cable, TURN ON THE MACHINE.
9. Click [ Next ].
- Important Information for the installation
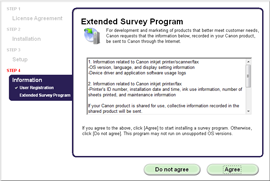
- If the Extended Survey Program screen appears
If you can agree to Extended Survey Program, click [ Agree ].
If you click [ Do not agree ], the Extended Survey Program will not be installed.
(This has no effect on the machine's functionality.)
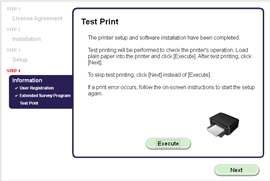
- When the Test Print window is displayed
Test printing will be performed to check the printer's operation.
Load plain paper into the printer and click [ Execute ].
After test printing, click [ Next ].
To skip test printing, click [ Next ] instead of [ Execute ].
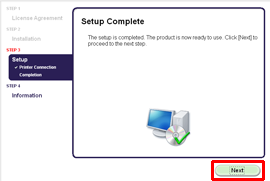
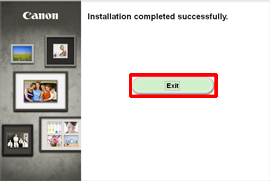
10. Click [ Exit ] to complete the installation.
The software is installed in your Windows computer.
Mac OS X
IMPORTANT
- Quit all applications before installation.
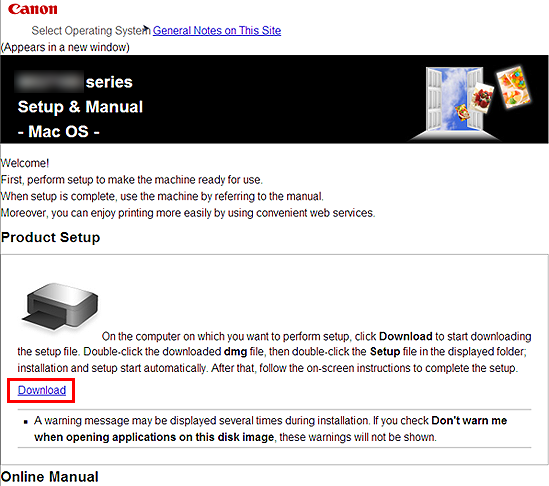
2. Select your region, printer name, and computer OS.
3. In the Product Setup section, click [ Download ]. The setup file will be downloaded.
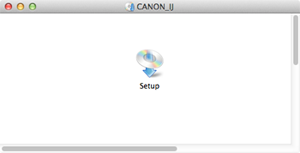
4. Double-click the downloaded .dmg file.
5. Double-click the [ Setup ] icon.
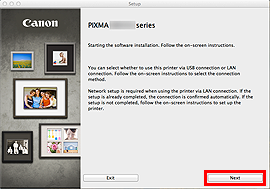
6. Click [ Next ].
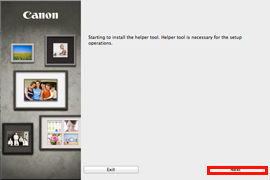
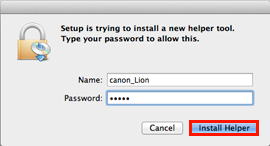
7. In the subsequent screen, enter the administrator name and password. Then click [ Install Helper ].
8. Click [ Next ].
9. Click [ USB Connection ].
10. Click [ Next ].
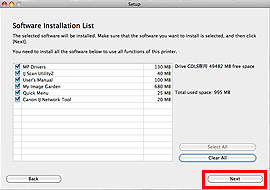
Follow any on-screen instructions to proceed with the software installation.
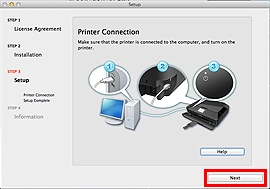
11. When the Printer Connection screen appears, connect the machine to the computer with a USB cable.
After connecting the cable, TURN ON THE MACHINE.
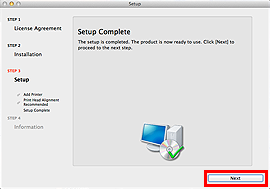
12. Click [ Next ].
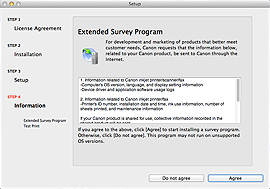
- Important Information for the installation
- If the Extended Survey Program screen appears
If you can agree to Extended Survey Program, click [ Agree ].
If you click [ Do not agree ], the Extended Survey Program will not be installed.
(This has no effect on the machine's functionality.)
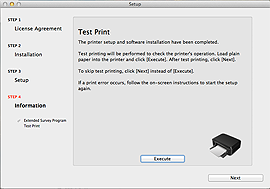
- When the Test Print window is displayed
Test printing will be performed to check the printer's operation.
Load plain paper into the printer and click [ Execute ].
After test printing, click [ Next ].
To skip test printing, click [ Next ] instead of [ Execute ].
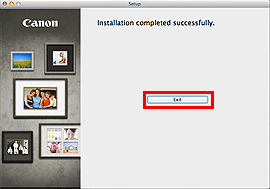
13. Click [ Exit ] to complete the installation.
Remove the Setup CD-ROM and keep it in a safe place.
The software is installed in your Mac OS X computer.
|