Screen Descriptions
There are two areas in the CaptureOnTouch main screen, [Scanning Shortcut] and [Standard Scanning].
Use the [>] [<] at the top right of the main window to move between sections.
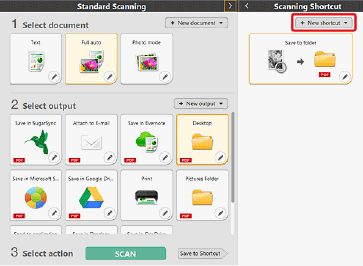
Various panels have been prepared according to the scan types and outputs in each section.
Click the [New document] button, and a [New document] panel will be added.
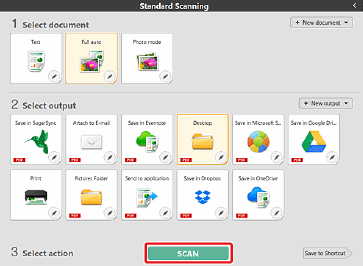
Standard Scanning
Operations:
Selecting the Select document panel -> Selecting the Select output panel -> Start scanning
1. Place the document in the scanner.
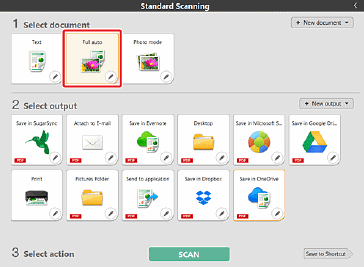
2. Click the select document panel for the document to be scanned from [1 Select document].
The selected [Select document] panel will be displayed in orange.
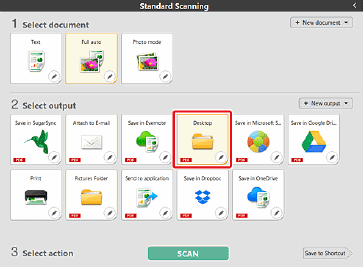
3. Click the output panel for the scan image application from [2 Output].
The selected [Output] panel will be displayed in orange.
4. Click the [SCAN] button.
The document is scanned. While scanning is in progress, the number of pages scanned is displayed in addition to the scanner settings.
When the scan is finished, the [Scanned image preview screen] opens.

If using the same document selection and output combination the next time, click the [Save to Shortcut] button.
The selected [Output] and [Select document] will be added to the [Scanning shortcut] panel.

- If you configure scanning conditions that consume a large amount of the computer's memory, scanning may stop because of insufficient memory. If an error message appears due to insufficient memory while scanning is in progress, stop scanning, change the scanning conditions, and then try scanning again.
- A multi-page scan cannot be saved when it reaches the file size of 2 GB. Change the save settings if an error message is displayed.
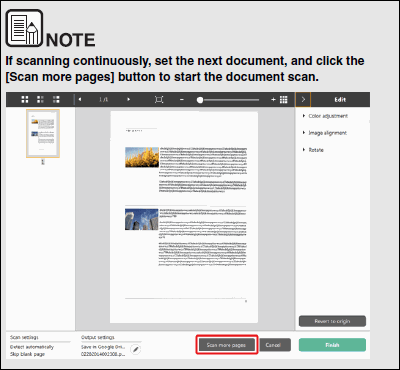
5. To check the scanned image, click the [Finish] button.

Click the [ ] button to edit the output settings -> "Setting the output"
Click the [Cancel] button to discard the scanned image and return to the main window.
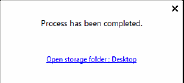
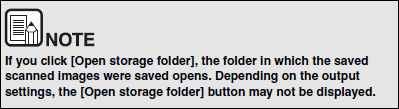
When the output has finished, a popup window will be displayed. If saving the scanned image, a link to open the save destination folder will be displayed.
This completes the Standard Scanning.

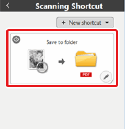
Scanning Shortcut
Operations:
Save [Scanning Shortcut] -> Scan the document -> Output the scanned images
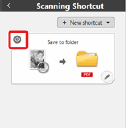
By adding scanning shortcuts that combine frequently-used document selections and outputs, you can scan just by clicking the Scanning Shortcut panel.
Registering and editing scanning shortcuts
Multiple scanning shortcuts can be allocated to CaptureOnTouch.
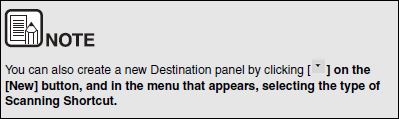
1. Either click the [New shortcut] button in [Scanning shortcut], or select the document scan and output in [Standard Scanning], and click the [Save to Shortcut] button.
A scanning shortcut panel will be created.

2. The Edit Scanning Shortcut Panel dialog box appears when you click the Edit button.

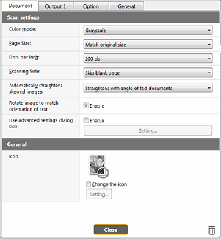
3. Click the [Document] tab to set the Select document settings.
4. Click the [Output] tab to set the outputs.

5. Click the [Option] tab to set the options.
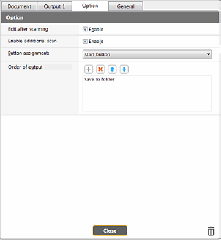
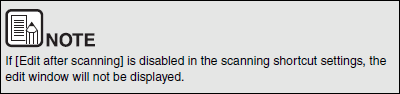
[Edit after Scanning]
Check it on to enable modifying the scanned images in Scan Editing screen. When unchecked, the Edit window is not displayed in Scan Editing screen.
[Enable additional scan]
Check it on to display [Scan more pages] button in the Scan Editing screen to enable continuing scanning.
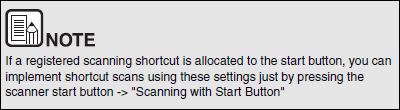
[Button assignment]
You can allocate one of the settings registered in scanning shortcuts to the scanner start button.
If a scanning shortcut is allocated to the start button, its icon will be displayed in the scanning shortcuts panel.
[Order of output]
Click each button to configure "Adding and Deleting output", and "Order change".
6. Click the [General] tab to make other settings.

[Name]
Enter the Scanning shortcut panel name.
Selecting and scanning shortcuts
1. Place the document in the scanner.
2. Click the scanning shortcut panel.
The document is scanned. While scanning is in progress, the number of pages scanned is displayed in addition to the scanner settings.
When the scan is finished, the 'Scanned image preview screen] opens.

- If you configure scanning conditions that consume a large amount of the computer's memory, scanning may stop because of insufficient memory. If an error message appears due to insufficient memory while scanning is in progress, stop scanning, change the scanning conditions, and then try scanning again.
- A multi-page scan cannot be saved when it reaches the file size of 2 GB. Change the save settings if an error message is displayed.

3. To check the scanned image, click the [Finish] button.

Click the [ ] button to edit the output settings -> "Setting the output"
Click the [Cancel] button to discard the scanned image and return to the main window.
When the output has finished, a popup window will be displayed.
This completes the shortcut scans.