Scanning an Image from an Application (Windows XP Only)

If white lines appear on one edge of the scanned image, check that the document is correctly placed on the platen glass. A document should be placed approximately 1/8" (3 mm) from the front edge (i.e., the edge closest to the control panel) of the platen glass.
- Open the [Scanners and Cameras] folder.
- Double-click the scanner icon ([WIA Canon MF3110]).
- Click [Next].
- Select a picture type.
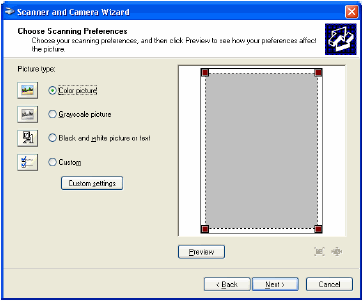
You can select from the following:
-[Color picture]
-[Grayscale picture]
-[Black and white picture or text]
-[Custom]
When selecting [Custom], click [Custom settings] to make detailed settings in the [Properties] dialog box.
- Specify the scanned area.
Click [Preview], then drag  to specify the scanned area.
- Click [Next].
-
Specify a name, file format, and the location for saving the group of pictures.

 |
Enter a name for the group of pictures. |
| |
When you save more than one picture in the same location, sequential numbers are automatically added at the ends of file names (e.g. numbers 001, 002, ....are added from the second picture on.) |
| |
|
|
Select a file format for the pictures. |
| |
You can select from the following:
-[BMP (Bitmap Image)]
-[JPG (JPEG Image)]
-[TIF (TIF Image)]
-[PNG (PNG Image)] |
| |
|
|
Select the location where you want to save the pictures. |
| |
To change the location, click [Browse], select the new location, then click [OK]. |
- Click [Next].
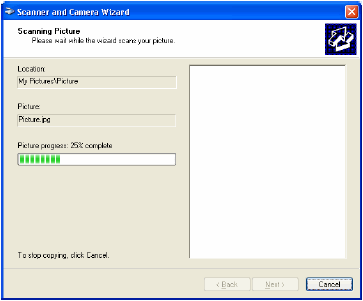
Scanning starts.
To cancel scanning, click [Cancel].
- Click [Next].

If you want to publish these pictures to a Web site or order printouts online, select the corresponding option.
- Click [Finish].

The location selected in step 7 will appear.
