Note: Gently open the paper output tray while holding it.
After confirming that the print head holder has moved to the center, open the inner cover.
Remove all the ink tanks.
Raise the print head lock lever to remove the used print head from the print head holder.
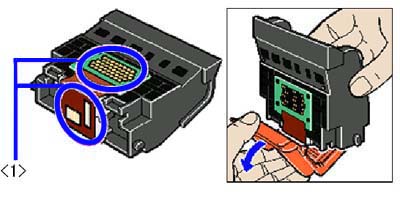
Remove the new print head from its package and remove the orange protective cap.
<1> Electrical Contacts and Print Head Face's Nozzle Area <2> Ink Supply Filters
Note: To avoid any damage, do not touch the print head face's nozzle area, electrical contacts, and ink supply filters. After removing the protective cap, set the print head into the print head holder immediately. Do not re-attach the protective cap after it has been removed.
Set the print head into the print head holder, and lower the print head lock lever until a click sound is made.
Insert the ink tank into the slot at the right end, and push down on the PUSH mark on top of the ink tank until a click sound is made.
Install the other ink tanks in the same manner.
Close the inner cover and top cover.
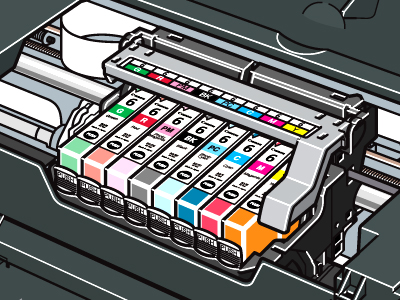
Ink Tanks' installation order
Note: Check that each ink tank is installed in the correct position.
Ink Tanks' installation status
Properly installed:
Improperly installed:
Left Image: The M ink tank is not fully seated. Right Image: All ink tanks are not fully seated.