Follow the steps below to perform a Manual Print Head Alignment (Mac OS X)
The print head alignment can be performed either automatically or manually. The automatic print head alignment is recommended. The manual print head alignment enables the correction of margin of errors which cannot be corrected by the automatic print head alignment.
Note: If the alignment cannot be improved by the automatic print head alignment, perform the print head alignment manually.
Automatic Alignment (Recommended) - Click here to proceed to Manual Alignment.
- In the Apple menu select System Preferences
- Open Print & Fax.
- Make sure the correct printer is selected and, depending on OS version, click 'Open Print Queue...' or 'Print Queue...'.
- Click the Utility icon.
- Select the printer, then click 'Maintenance'.
- From the pop-up menu, select 'Test Print'.

- Click the 'Print Head Alignment' icon. Confirm that Letter sized plain paper is set in the sheet feeder, and click 'OK'.

- Click 'Check Setting' to print the pattern with the current adjusted values.
Note: The power lamp flashes, and print head cleaning is started. After cleaning has finished, the head alignment pattern will be printed. Do not perform other operations until printing is completed.

- Refer to he printed sheet, and select the pattern with the fewest visible vertical stripes in the column A box.

<1> Example of highly visible vertical stripes in the pattern.
<2> Example of the fewest visible vertical stripes in the pattern.
- Enter the selected pattern's number in the column A box.

- Similarly, enter the selected numbers in the boxes for the other columns.
- After all numbers have been entered, click 'Send'.

Note: The remaining process will be executed automatically.
- Click 'OK'.

Note: The power lamp flashes, and print head cleaning is started. After cleaning has finished, the head alignment pattern will be printed. Do not perform other operations until printing is completed.
The automatic print head alignment is completed.
Click here to return to the top.
Manual Alignment
- In the Apple menu select System Preferences
- Open Print & Fax.
- Make sure the correct printer is selected and, depending on OS version, click 'Open Print Queue...' or 'Print Queue...'.
- Click the Utility icon.
- Select the printer, then click 'Maintenance'.
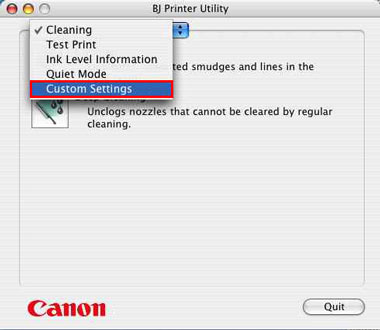
- From the pop-up menu, select 'Custom Settings'.
- Check 'Align heads manually', and click 'Send'.
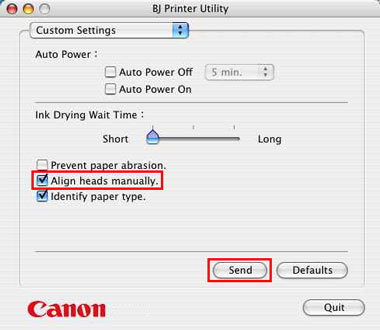
- Click 'OK'.
Note: The settings are sent to the printer.

- From the pop-up menu, select 'Test Print'.
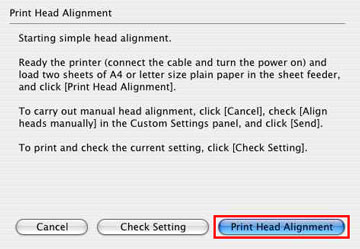
- Click the 'Print Head Alignment' icon.
- Confirm that Letter sized plain paper is set in the sheet feeder, and click 'OK'.
Note: Click 'Check Setting' to print with the current adjustment values.
- The power lamp flashes, the print head cleaning will start and the following message will appear on screen.
- After cleaning has finished, the head alignment pattern will be printed.
Note: Do not perform other operations until printing is completed.
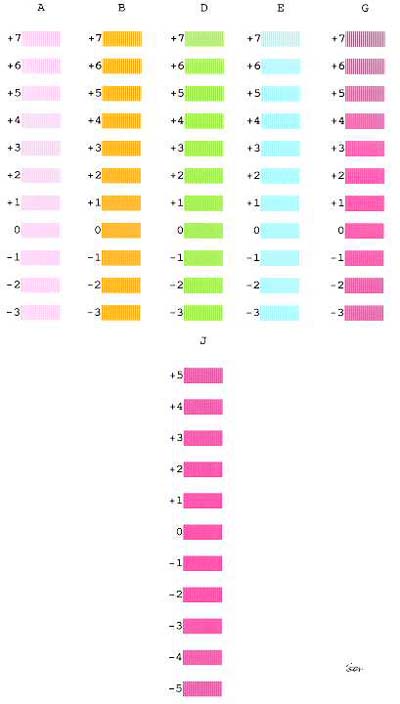
- Refer to the printed sheet, and select the pattern with the fewest visible vertical stripes in column A.

<1> Example of highly visible vertical stripes in the pattern.
<2> Example of the fewest visible vertical stripes in the pattern.
- Enter the selected pattern's number in the column A box.

- Similarly, enter the selected numbers in the boxes for column B to K.
- After all numbers have been entered, click 'Send'.
The manual print head alignment is completed.
Click here to return to the top.
