You can scan the left and right halves of an item larger than the platen and combine them back into one image. Items up to approximately twice as large as the platen are supported.
 Note
Note
- The following explains how to scan from the item to be placed on the left side.
-
Start IJ Scan Utility.
-
Click Settings..., then set the item type, resolution, etc. in the Settings (Scan and Stitch) dialog box as required.
When setting is completed, click OK.
-
Click Stitch.
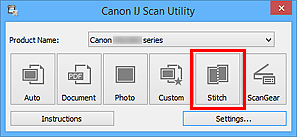
The Image Stitch window appears.
-
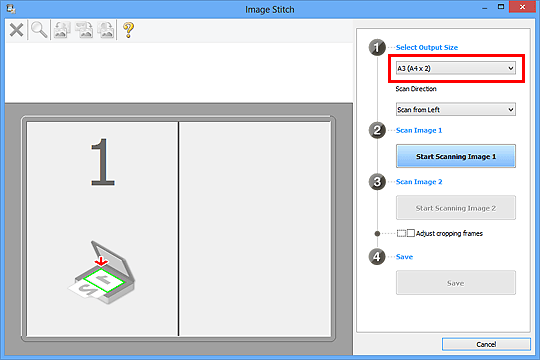
In Select Output Size, select an output size according to the paper size.
-
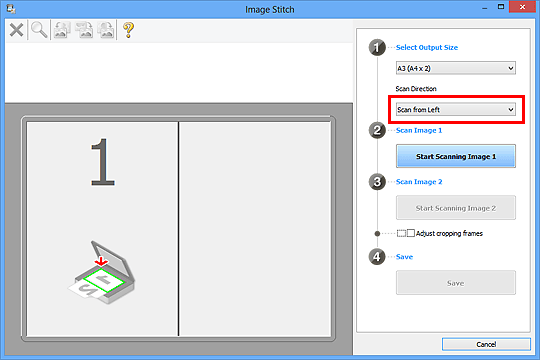
Make sure that Scan from Left is selected in Scan Direction.
-
Place the item that is to be displayed on the left side of the screen face-down on the platen.
-
Click Start Scanning Image 1.
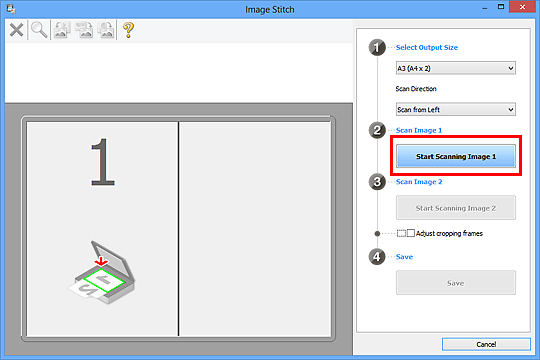
The first item is scanned and appears in 1.
Note
- Click Cancel to cancel the scan.
-
Place the item that is to be displayed on the right side of the screen face-down on the platen.
-
Click Start Scanning Image 2.
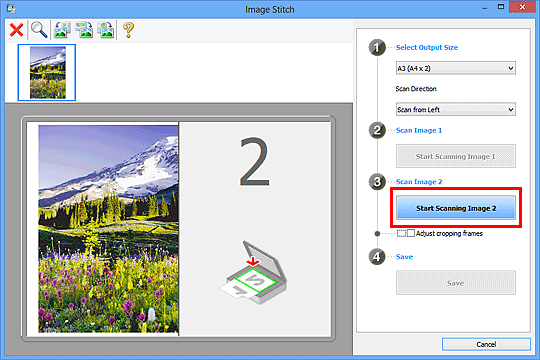
The second item is scanned and appears in 2.
Note
- Click Cancel to cancel the scan.
-
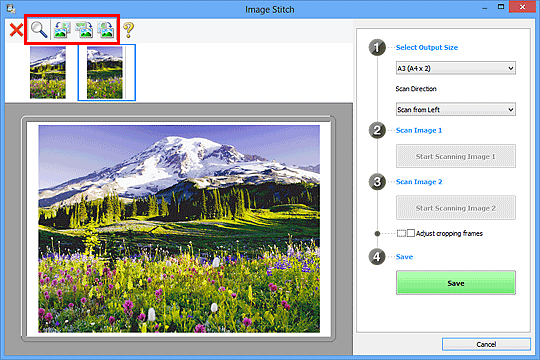
Adjust the scanned images as required.
Use the Toolbar to rotate or zoom in/out, or drag the images to adjust their positions.
Note
-
Click Save.
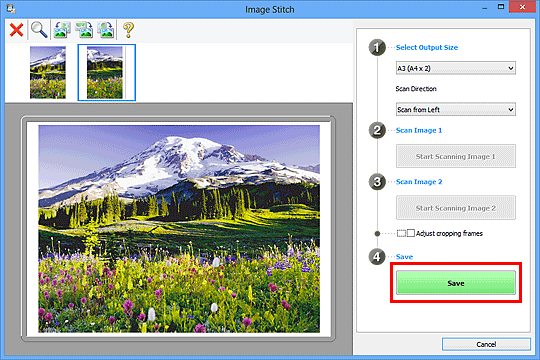
The combined image is saved.
Note
- You can make advanced scan settings in the Settings (Scan and Stitch) dialog box displayed by clicking Settings....
