Fan paper prior to inserting it into the MP250 / MP270
Article ID: ART132465
|
Date published: 05/12/2015
|
Date last updated: 08/17/2015
Description
Fan paper prior to inserting it into the printer.
Solution
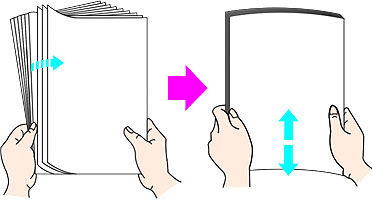
Fan paper thoroughly
Fan paper prior to inserting it into the rear tray.
Remove paper from the rear tray.
Divide the stack of paper into two or three piles.
Fan out the sheets of paper so that they do not stick together.
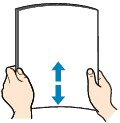
Align the edges of paper. If paper is curled, flatten it.
Note:
Align the edges of paper neatly before loading. Loading paper without aligning the edges may cause paper jams.
If paper is curled, hold the curled corners and gently bend them in the opposite direction until the paper becomes completely flat.
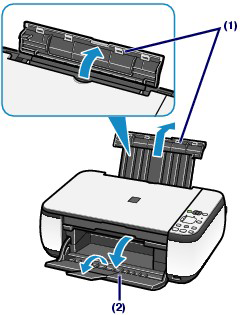
Load paper.
Open the Paper Support, raise it, then tip it back (1).
Open the Paper Output Tray gently, and open the Output Tray Extension (2).
Slide the Paper Guides (A) to open them, and load the paper in the center of the Rear Tray WITH THE PRINT SIDE FACING YOU (3).
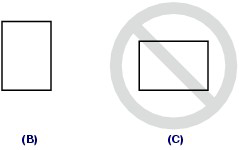
Important: Always load paper in the portrait orientation (B). Loading paper in the landscape orientation (C) can cause paper jams.
Slide the Paper Guides (A) to align them with sides of the paper stack (4). Do not slide the Paper Guides too hard. The paper may not be fed properly.
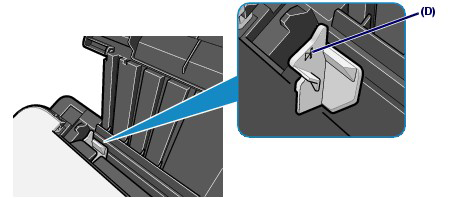
Note: Do not load sheets of paper higher than the Load Limit Mark (D).
Note: The machine may make operating noise when feeding paper.
After loading paper
When copying, select the size and type of the loaded paper using the Operation Panel on the machine.
When printing with a computer, select the size and type of the loaded paper in Printer Paper Size (or Paper Size) and Media Type in the printer driver.