You can connect your printer to a wireless network with the WPS push button method. This will allow you to connect the printer wirelessly to your network without having to enter in your wireless network password. Follow the steps below to use this method to connect the printer to the wireless network.
-
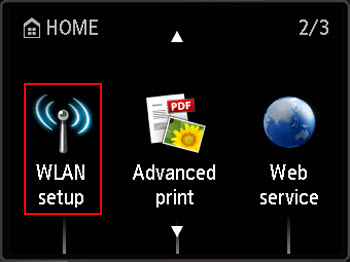
With the printer powered on and displaying the HOME screen, use the up or down arrows until WLAN setup appears, then press the Function button underneath it.
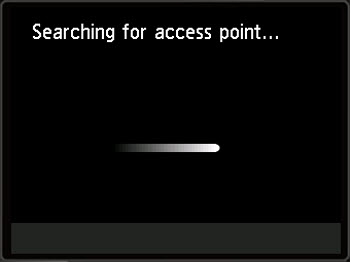
The printer will search for nearby wireless networks.
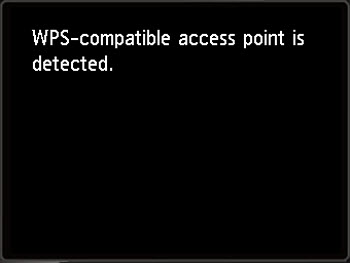
The printer will detect a WPS-compatible network.
 If a WPS-compatible network wasn't found, click here for instructions on how to proceed.
-
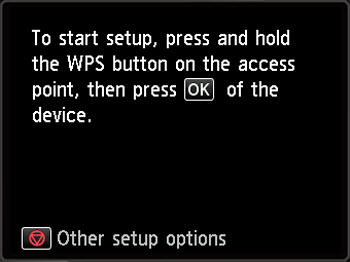
Go to your wireless router and press the WPS push button on it for about 5 seconds. Then, press the OK button on the printer.
 If you're not sure if your router has a WPS push button on it, check the documentation that came with your router.
The printer will attempt to connect to the network.
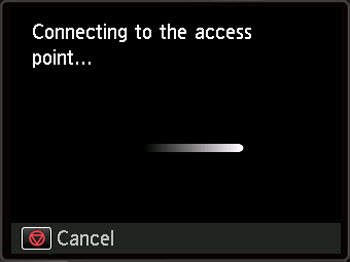
-
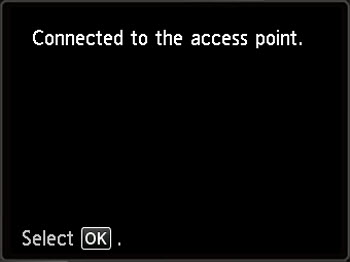
When the printer connects to the network, press the OK button.
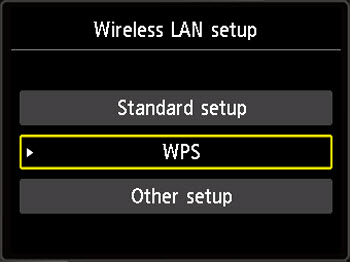
If a WPS-compatible Router Wasn't Found
If your printer didn't detect a WPS-compatible network in step 1, select WPS in the Wireless LAN setup menu, then press the OK button.
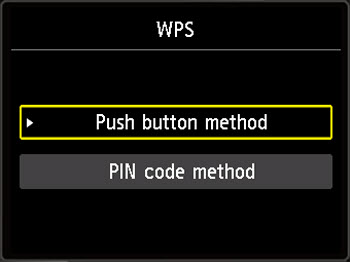
Push button method will be selected. Press the OK button.
When this message appears, press the OK button.
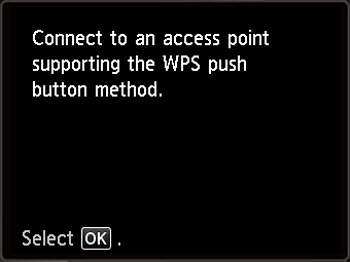
Go to your wireless router and press the WPS push button on it for about 5 seconds. Then, press the OK button on the printer.

The printer will attempt to connect to the network.
When the printer connects to the network, press the OK button.
If your product issue was not resolved after following the steps above, or if you require additional help, please create or log in to your Canon Account to see your technical support options.
Or if you still need help, visit our Canon Community by clicking the button below to get answers:

____________________________________________________________________________________________
