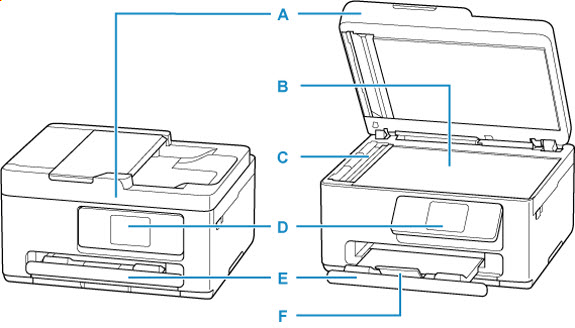
Use to change the settings of the printer or to operate it.The panel is pushed open by the paper output tray before printing starts
E: Paper Output Tray
Printed paper is ejected.Pull it out before printing.
F: Output Tray Extension
Open to support ejected paper.
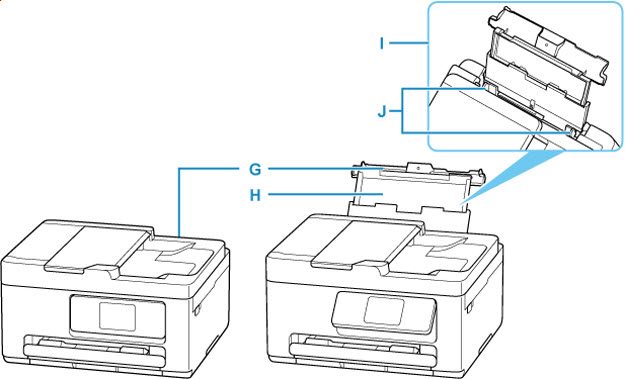
G: Rear Tray Cover
Open to load paper in the rear tray.
H: Paper Support
Extend to load paper in the rear tray.
I: Rear Tray
Two or more sheets of the same size and type of paper can be loaded at the same time, and fed automatically one sheet at a time.
See how to load
paper or envelopes in
the rear tray.
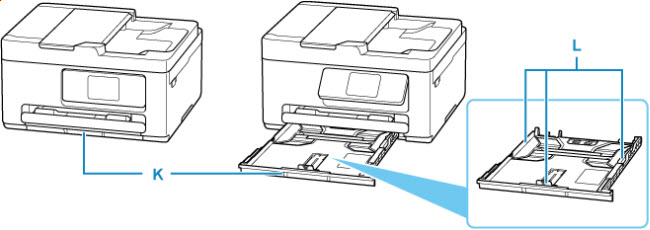
Align with right/left/front sides of the paper stack.
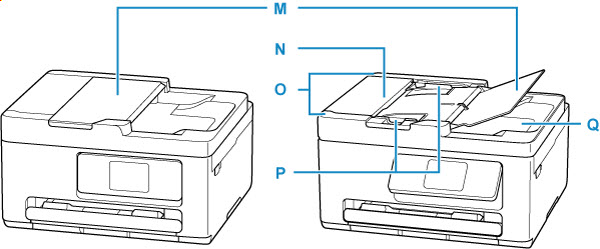
M: Document Tray
Open to load a document in the ADF.You can load two or more sheets of document of the same size and thickness.Load the document with the side you want to scan facing up.
N: Document Feeder Cover
Open when clearing jammed documents.
O: ADF (Auto Document Feeder)
Load a document here.The documents loaded in the document tray are scanned automatically one sheet at a time.
P: Document Guide
Adjust this guide to match the width of document in the ADF.
Q: Document Output Slot
Documents scanned from the ADF are delivered here.
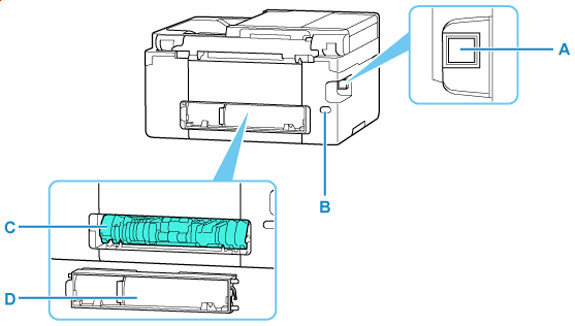
A: USB Port
Plug in the USB cable to connect the printer with a computer.
B: Power Cord Connector
Plug in the supplied power cord.
C: Transport Unit
Open when removing jammed paper.When removing the unit, do so after placing a finger on the depression in the center right.
D: Rear Cover
Detach when removing jammed paper.
Do not touch the metal casing.
Do not plug in or unplug the USB cable while the printer is printing or scanning with the computer.This can cause trouble.
A: Scanning Unit / Cover
Scans originals.Open when replacing the FINE cartridge or maintenance cartridge and to remove jammed paper.
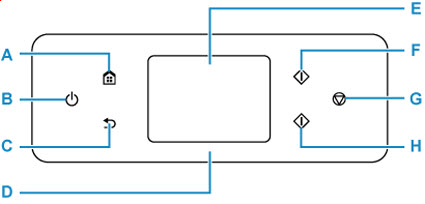
Turns the power on or off.Before turning on the power, make sure that the document cover is closed.
C: Back button
Returns to the previous screen.
D: Status light
Lights when the power is turned on.
E: Touch Screen
Displays messages, menu items, and operating status.Touch the screen lightly with your finger to select a menu item or button.
F: Black button
Starts black & white copying, scanning, etc.
G: Stop button
Cancels operation when print, copy, or scan job is in progress.
H: Color button
Starts color copying, scanning, etc.
If your product issue was not resolved after following the steps above, or if you require additional help, please create or log in to your Canon Account to see your technical support options.
Or if you still need help, visit our Canon Community by clicking the button below to get answers: