Align the Print Head
When you align the print head, it adjusts the print head position to correct poor print results when printing graphs, lines, and text.
 To align the print head, load paper into the Auto Sheet Feeder (not the front tray).
Follow these steps to perform an alignment:
-
Make sure the inner cover on the printer is closed.
-
Turn the printer ON and load two sheets of letter-sized plain paper into the ASF (Auto Sheet Feeder).
-
Hold down the Resume / Cancel button until the POWER lamp flashes green four times, then quickly release it.
Automatic alignment starts. The task is complete when two alignment sheets print. They will look similar to those below.
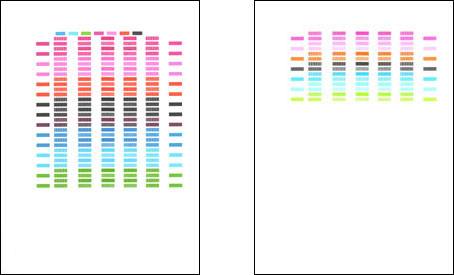
If this is your first print head alignment (you didn't perform one during printer driver installation), the printed pattern will look like the one below.
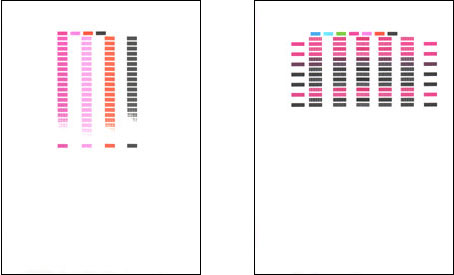
If the alignment hasn't improved after performing this process, you can try to perform a manual print head alignment from a computer.
Learn how to perform a manual print head alignment from a Windows PC.
Learn how to perform a manual print head alignment from a Mac®.
If your product issue was not resolved after following the steps above, or if you require additional help, please create or log in to your Canon Account to see your technical support options.
Or if you still need help, visit our Canon Community by clicking the button below to get answers:

____________________________________________________________________________________________
