Instructions for replacing the ink tanks correctly.
The ink tanks suitable for the printer are as follows:
Black Ink Tank BCI-6BK
Cyan Ink Tank BCI-6C
Magenta Ink Tank BCI-6M
Yellow Ink Tank BCI-6Y
Photo Cyan Ink Tank BCI-6PC
Photo Magenta Ink Tank BCI-6PM
Replacing the ink tanks
Note: The example used is replacing the BCI-6Y ink tank.
Check that the printer is powered on, and open the front cover. Wait until the print head moves to the center.
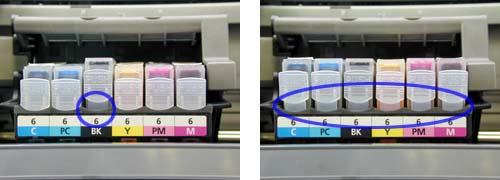
Push the tab of the empty ink tank and remove it.
Note: When replacing the ink tank, be careful not to raise the print head lock lever. When replacing multiple ink tanks, to avoid mis-installation of ink tanks, replace ink tanks one by one.
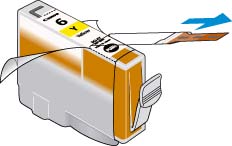
Unpack a new ink tank and remove the orange tape in the direction shown by the blue arrow below, and remove the remaining wrapper.
Note: Remove the orange tape completely. If the orange tape is not completely removed, it may interfere with printing.
<1> Removed correctly <2> Removed incorrectly
Hold the ink tank as shown in the image below. Twist the orange protective cap in the direction of the arrow, and remove it.
Note: Remove the protective cap while holding it, so that fingers will not be stained by the ink.
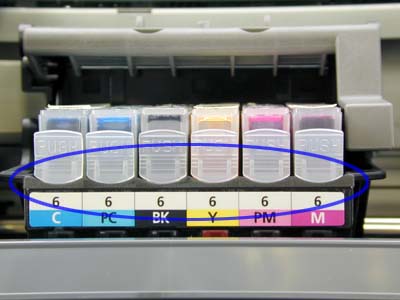
Insert the ink tank into the slot at the right end, and push down on the PUSH mark on top of the ink tank until a click sound is made. Install the other ink tanks in the same manner.
Close the inner cover and top cover.
Note: Check that each ink tank is installed in the correct position: