Follow the instructions below to load paper in the cassette.
Load paper in the cassette
-
Check the paper size (P) on the paper cassette (such as Postcard Size or Card Size) to make sure it matches the size of the ink cassette.
-
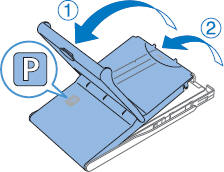
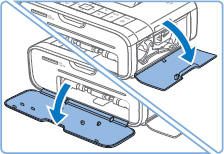
There are two layers of covers. Open the outer cover  , then the inner cover
  .
.
- When you load the paper, make sure to:
-
Load no more than 18 sheets. More sheets may damage the printer or cause malfunction.
-
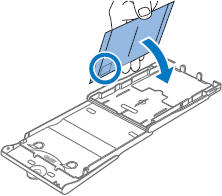
Hold the paper as shown, and load it with the glossy side up. (Avoid touching the glossy side of the paper as it may affect print quality.)

-
Remove any protective sheets from the paper, and load only paper into the cassette.
-
For postcard prints where the paper has a space for a stamp, load the paper with the stamp area facing down as shown.
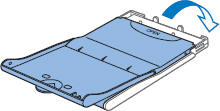
- Close the inner cover firmly until it clicks into place. Leave the outer cover open when printing.
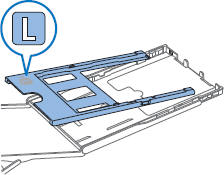
 To print on postcard paper, remove the adapter as shown.
 Cautions
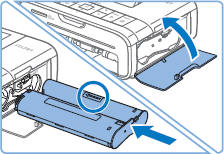
Insert the ink and paper cassettes
Follow these steps to insert the ink and paper cassettes.
-
Open the ink and paper compartment covers.
-
Insert the ink cassette into the printer in the direction of the arrow on the cassette until it clicks into place.
-
Close the ink cassette compartment cover.
-
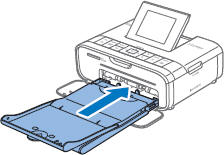
Make sure the outer cover is open, and insert the paper cassette all the way into the compartment.
Before beginning your printer job, it's good to know a few things.
Good to know
-
To get the best quality prints, we recommend the use of genuine Canon Color Ink/Paper Sets for SELPHY CP printers.
-
Canon Color Ink/Paper Sets for SELPHY ES are not compatible with this printer.
-
You can use Paper Cassette PCPL-CP400 (sold separately) to print on L-size paper.
