|
|
EOS R7: Creative Filters Mode
| Article ID: ART182540 |
| |
Date published: 05/11/2023 |
| |
Date last updated: 09/13/2023 |
Description
Creative Filters Mode
Solution
|
Creative Filters Mode
You can shoot with filter effects applied. Filter effects can be previewed before you shoot.
-
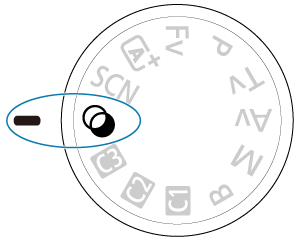
Set the Mode dial to  . .
-
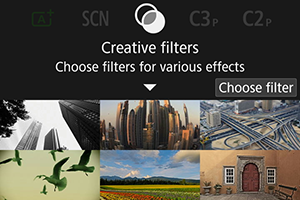
Press the  button. button.
-
Select a filter effect.
- Turn the
 dial to select a filter effect (), then press the button. dial to select a filter effect (), then press the button.
- The image is shown with the filter effect applied.
-
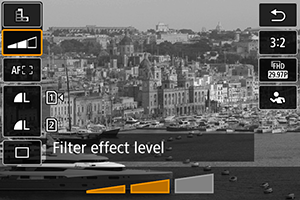
Adjust the effect and shoot.
- Press the button and select an icon below [Creative filters] (except
 / / , ,  , ,  , or , or  ). ).
- Turn the dial to adjust the effect, then press the button.
Note
- With [Grainy B/W], the grainy preview will differ somewhat from the appearance of your shots.
- With [Soft focus] or [Miniature effect] options, the blurred effect preview may differ somewhat from the appearance of your shots.
- No histogram is displayed.
- A magnified view is not available.
- In Creative Zone modes, some Creative filter settings are available from the Quick Control screen ().
Creative Filter Characteristics
-
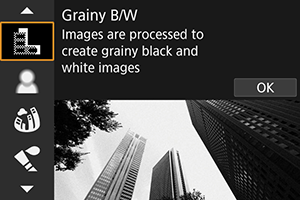
 Grainy B/W Grainy B/W
Makes the image grainy and black and white. By adjusting the contrast, you can change the black-and-white effect.
-
 Soft focus Soft focus
Gives the image a soft look. By adjusting the blur, you can change the degree of softness.
-
 Fish-eye effect Fish-eye effect
Gives the effect of a fish-eye lens. The image will have barrel distortion.
Depending on the level of this filter effect, the area trimmed along the periphery of the image changes. Also, because this filter effect magnifies the center of the image, the apparent resolution at the center may degrade depending on the number of recorded pixels, so set the filter effect while checking the resulting image. One AF point is used, fixed at the center.
-
 Water painting effect Water painting effect
Makes the photo look like a watercolor painting with soft colors. By adjusting the effect, you can change the color density. Note that night scenes or dark scenes may not be rendered with a smooth gradation and may look irregular or have significant noise.
-
 Toy camera effect Toy camera effect
Shifts colors to those typical of toy cameras and darkens the four corners of the image. Color tone options can be used to change the color cast.
-
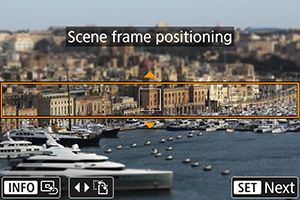
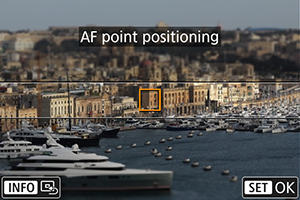
Miniature effect
Creates a diorama effect.
Shooting under the default setting will keep the center looking sharp.
To move the area that looks sharp (the scene frame), see Adjusting the Miniature Effect. [1-point AF] is used as the AF area. Shooting with the AF point and scene frame aligned is recommended.
-
 HDR art standard HDR art standard
Photos retain more detail in highlights and shadows. With reduced contrast and flatter gradation, the finish resembles a painting. The subject outlines will have bright (or dark) edges.
-
HDR art vivid
Colors are more saturated than with [HDR art standard], and the low contrast and flat gradation resemble graphic art.
-
HDR art bold
The colors are the most saturated, making the subject pop out, and the picture looks like an oil painting.
-
HDR art embossed
The color saturation, brightness, contrast and gradation are decreased to make the picture look flat, so that the picture looks faded and old. The subject outlines will have intensely bright (or dark) edges.
|
SIMS Doc Id
1679066370090047539
|