LAN Setting
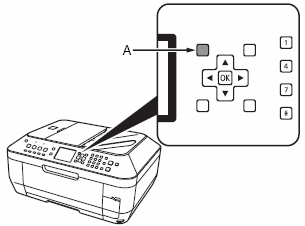
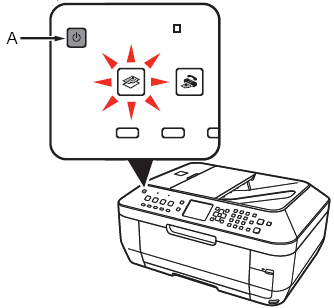
1. Press the Menu button (A).
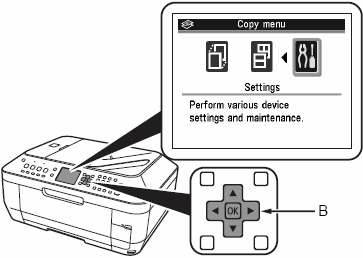
2. Use the  or
or  button (B) to select Settings, then press the OK button.
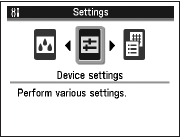
3. Select Device settings, then press the OK button.
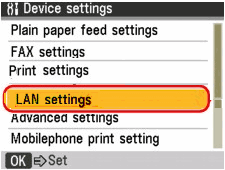
4. Use the  or
or  button (B) to select LAN settings, then press the OK button.
5.Make sure that Change WLAN/LAN is selected and press the OK button.
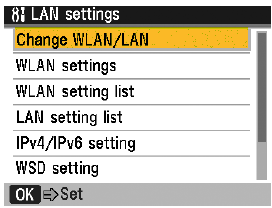
6. Select the Wired LAN active, then press the OK button.

Installing the Software
 note: If the Found New Hardware or Found New Hardware Wizard screen appears:
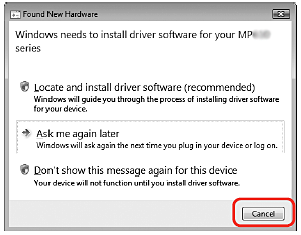
(1) Remove the USB cable connected to your computer. The screen may close. In this case, proceed from 1.
(2) Click Cancel to quit the screen.
(3) Proceed from 1.
1. TURN OFF THE MACHINE (A) .
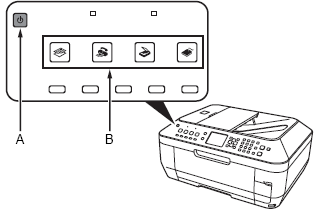
 important: Operating noise continues for about 30 seconds until the machine turns off. Make sure that the POWER lamp (B) stops flashing.
2. Turn on the computer, then insert the Setup CD-ROM into the CD-ROM drive. The setup program should run automatically.
-
Windows Vista:
Go to Step 3
-
Windows XP/2000:
Go to Step 5
note:
If the program does not start automatically, double-click the CD-ROM icon on the computer. When the CD-ROM contents appear, double-click MSETUP4.EXE.
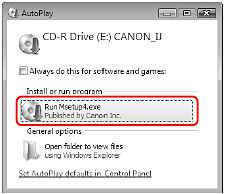
3. AutoPlay screen appears, click Run Msetup4.exe.
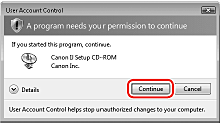
4. User Account Control screen appears, click Continue. If the same screen reappears in subsequent steps, click Continue.
5. Click Easy Install. The drivers, application software, and on-screen manuals are installed automatically.
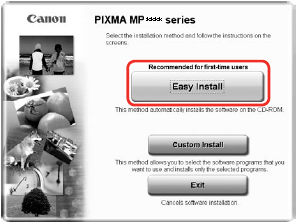
Note : If you want to select particular items to install, click Custom Install and follow the on-screen instructions to proceed with the installation.
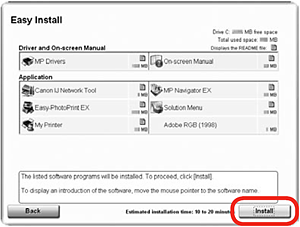
6. Click Install. Move the cursor over items to display explanations.
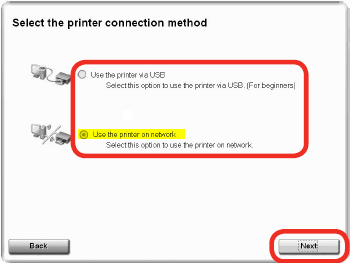
7. Select a Use the printer on Network and click Next.
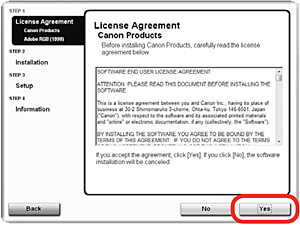
8. Read the License Agreement screen carefully and click Yes. Installation starts.
important: Follow any on-screen instructions to install the software.
9. When the Please Allow All Install Wizard Processes screen appears, click Next.
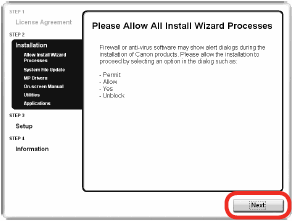
Installation starts.
Wired Connection
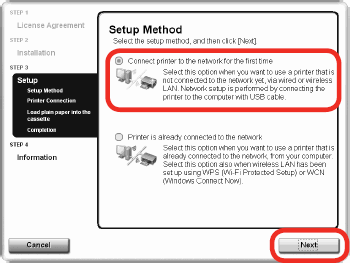
1. On the Setup Method screen, select Connect printer to the network for the first time, then click Next.
When a confirmation screen for the machine's LAN setting appears, click OK.
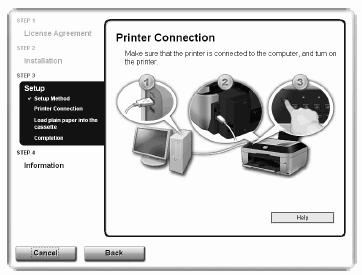
2. When the Printer Connection screen appears, connect the machine to the computer with a USB cable. When a confirmation screen for the machine's LAN setting appears, click OK.
Set up the machine over a USB connection until the network connection is complete.

3. Turn on the machine (A).
When the machine is recognized by the computer, a message appears on the screen
If installation does not continue after 10 minutes, click Help on the screen in step 2 , then confirm the message
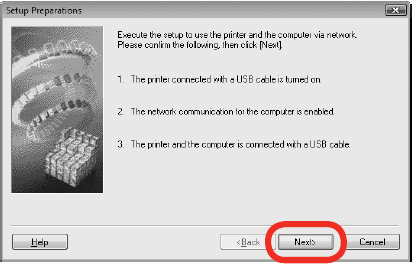
4. When the Setup Preparations dialog box appears, confirm that preparation is complete, then click Next.
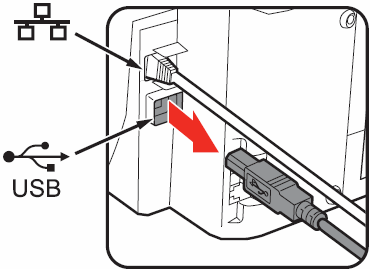
5.Remove the LAN connector cap (B) of the machine, connect with a LAN cable (C), then click Yes.

If the following dialog box appears
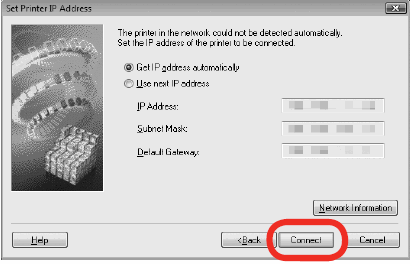
When the Set Printer IP Address dialog box appears, click Connect.
If the machine is detected automatically, the Set Printer IP Address dialog box does not appear.
If no connection is established even after Connect is clicked, refer to "5.6 The Set Printer IP Address screen is displayed during setup" in the printed manual: Network Setup Troubleshooting
Windows Vista : Go to step 7
Windows XP/2000 : Go to step 6
6. Windows XP/2000
When the Network Setup of the Card Slot dialog box appears, specify the drive letter, then click Next.

Note : If an error message appears, refer to "5 The following screen is displayed during setup" in the printed manual: Network Setup Troubleshooting
7. When the Setup Completion dialog box appears, remove the USB cable, then click Finish
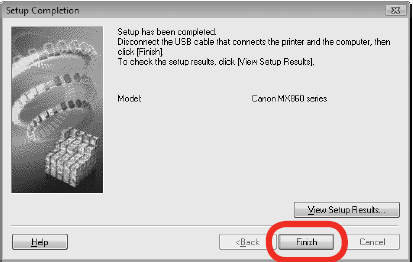
Note : To change the port name, click View Setup Results, then click Set Port Name. For details, refer to "8 Changing the port name" in the printed manual: . Network Setup Troubleshooting
I f Unsafe Removal of Device is displayed, click OK.
Installation is completed.
