Adjusting Projected Images with Partial Distortion Correction
This feature enables precise correction of partial projected image distortion in your specified areas. Red, green, and blue are adjusted together.
- Correction separate from [Advanced registration] is possible.
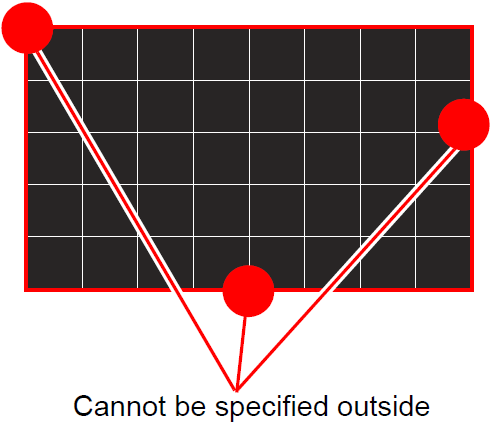
- Correction is not possible from adjustment points on the outermost edge toward the outside of the projected image
 Correcting Partial Distortion
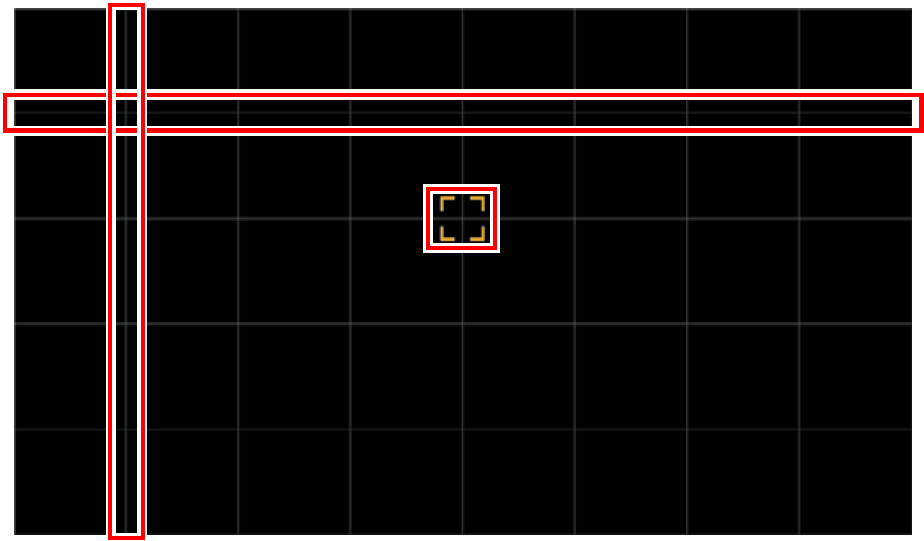
Select one of the 54 adjustment points (in a 6 x 9 grid) for precise distortion correction.
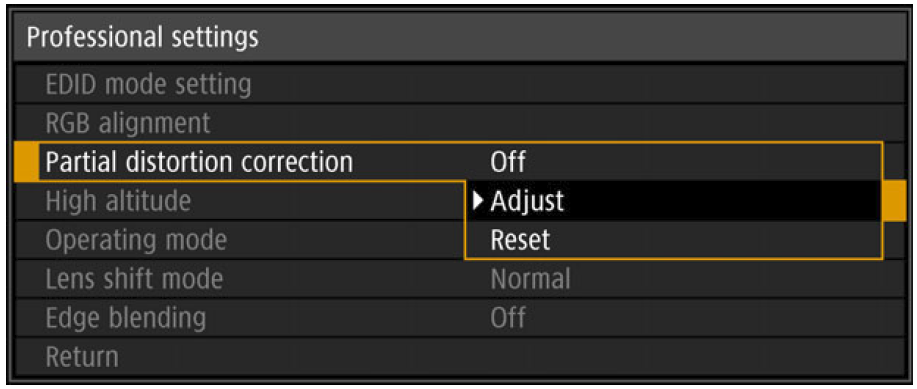
1 In the [Install settings] menu, select [Professional settings] > [Partial distortion correction] > [Adjust].
The projector enters partial distortion correction point selection mode, and a window is displayed for selection of areas to correct.
 2 Use the
  buttons to select the point to fine-tune.
 3 After selecting the point to fine-tune, press the OK button.
The projector is now in partial distortion correction mode.
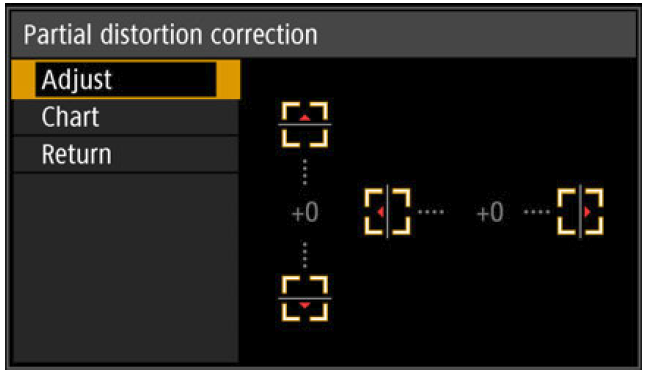
- To return to selection of the point for partial distortion correction, press the MENU button.
- Each time you select [Chart] and press the OK button, display switches between the chart and the source signal.
- Accessing the partial distortion correction window during test pattern projection will show the test pattern instead of your supplied signal.
4 Use the buttons to fine-tune the adjustment point for partial distortion correction.
5 Select [Return] to return to point selection.
6 Repeat this process to correct other areas.
Resetting Image Registration
Clears the values set in partial distortion correction.
1 In the [Install settings] menu, select [Professional settings] > [Partial distortion correction] > [Reset].
A confirmation message for resetting is displayed.
2 Select [OK] to reset the adjustment.

