Using PC-Free Multi Projection
A JPEG image on a USB flash drive can be divided among up to nine projectors and combined into a single, large image.
When projectors are connected via a wired LAN, the projector that produces the image in the upper left is called the Primary projector and the other eight, Secondary projectors. The image as a whole is controlled by the Primary projector.
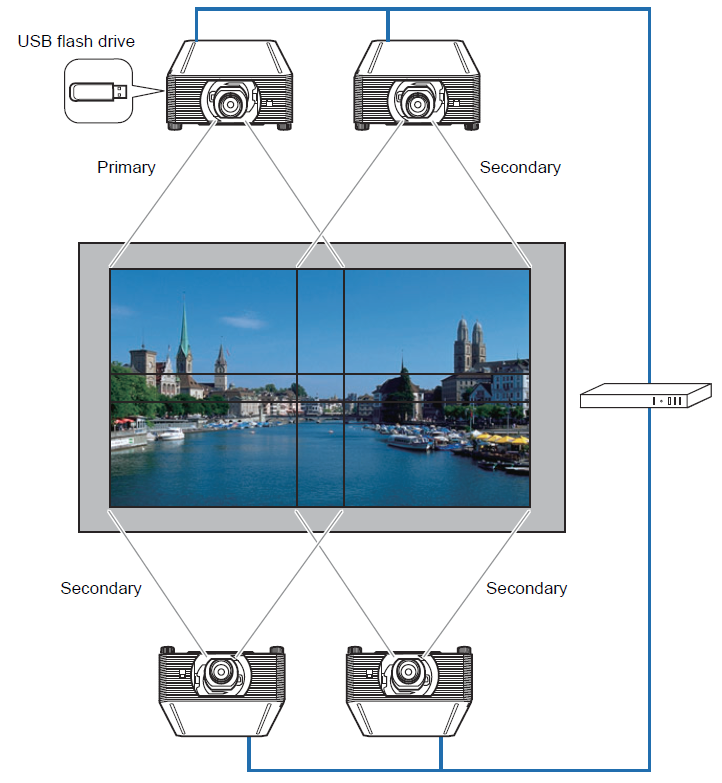
PC-free multi projection is not available over a wireless LAN.
This feature is available with the following number of projectors and layout patterns.
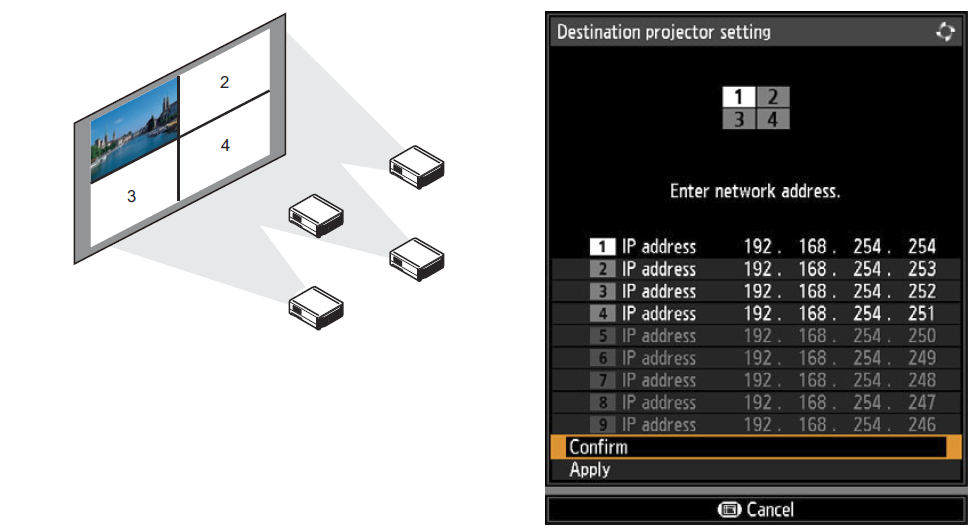
The projector you assign as the Primary projector, identified in the layout pattern as [1], always projects the upper-left image.

Set up the projectors as follows.
1 On each projector, configure installation and image adjustment settings such as edge blending and keystone correction to blend overlapping areas.
2 Connect the projectors with LAN cables and set [Network (wired/wireless)] to [On/Off] or [On/On (Pj AP)]
3 Configure some projectors as Secondaries.
Select [Input settings] > [PC-free multi projection] > [Mode setting] > [Secondary].
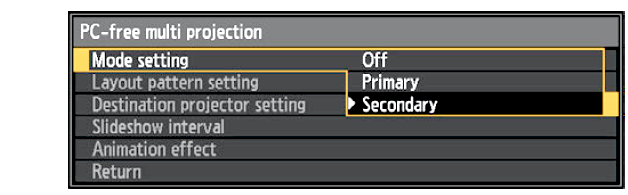
Complete this setting on each Secondary projector.
4 Configure one projector as the Primary projector.
(1) Select [Input settings] > [PC-free multi projection] > [Mode setting] > [Primary].

(2) Configure the following settings in [PC-free multi projection].
• [Layout pattern setting]
Specify the total number of projectors and the layout pattern
• [Destination projector setting]
Specify Secondary projector IP addresses.
• [Slideshow interval]
Specify the slideshow interval (5 seconds to 10 minutes).
• [Animation effect]
Specify the transition to use for slideshows
5 On the Primary projector, select [Input settings] > [PC-free multi projection] > [Destination projector setting] > [Confirm] and check the number assigned to each projector.
• If the projector is turned off and then on again during projection, the slideshow automatically resumes from the first image in the folder last used for projection.
• If the image does not switch to the image for the corresponding number, adjust the IP address setting.
