Install the print head by following the procedure below.
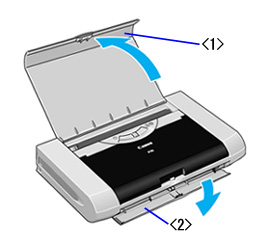
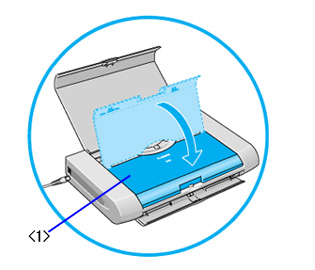
Open the paper support and paper output slot cover of the printer.
<1> Paper Support <2> Paper Output Slot Cover
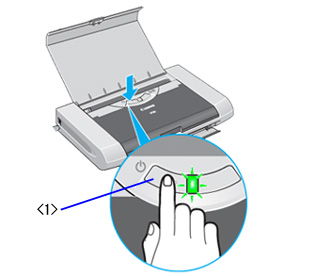
Power the printer on.
<1> Power Button
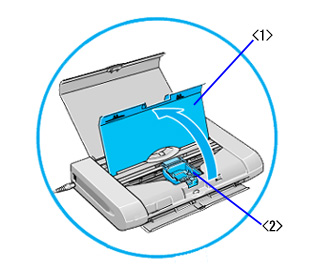
Open the print head cover. The print head holder moves to the center.
<1> Print Head Cover <2> Print Head Holder
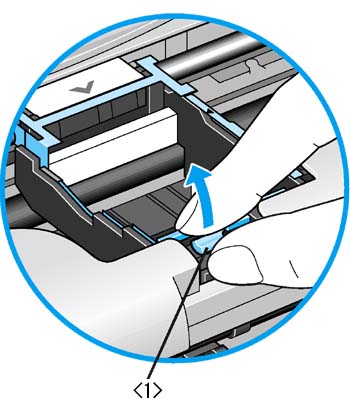
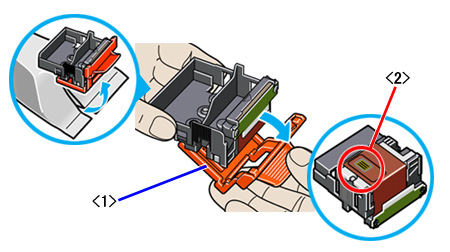
Pinch and lift the print head lock lever at the front of the print head holder.
<1> Print Head Lock Lever Note: If the print head cover remains open for more than 10 minutes, the print head holder moves to the right. In such a case, close the print head cover and open it again.
Remove the print head from its package and remove the orange protective cap that covers the bottom of the print head.
<1> Protective Cap <2> Print Head Face
Note: To avoid print problems, never touch the face of the print head.
Insert the print head into the print head holder so that the "^" mark faces the "V" mark.
<1> Print Head Arrow <2> Ink Supply Filter
Note: To avoid printing problems, never touch the print head ink supply filter.
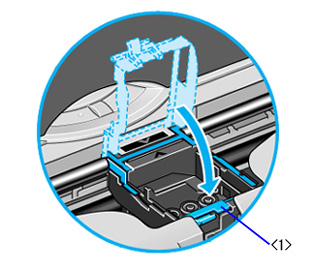
Lower and close the print head lock lever fully until you hear a click.
<1> Print Head Lock Lever
Next, set the ink tanks.
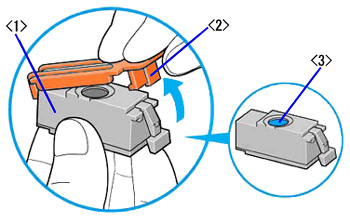
Remove the black ink tank (BCI-15 Black) from its package. Hold the ink tank as shown in the illustration, and remove the orange protective cap, while lifting in the direction of the arrow.
<1> Black Ink Tank (BCI-15 Black) <2> Protective Cap <3> Ink Outlet
Note: To avoid ink supply problems, never touch the ink outlet.
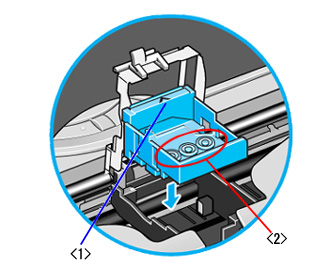
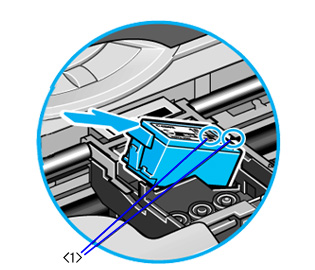
Set the Black ink tank at an angle in the back so that the ">" mark on the ink tank faces the "<" mark on the print head lock lever.
<1> Ink Tank and Print Head Lock Lever Marks
Press down on the <PUSH> mark on the ink tank until you hear a click.
<1> <PUSH> Mark
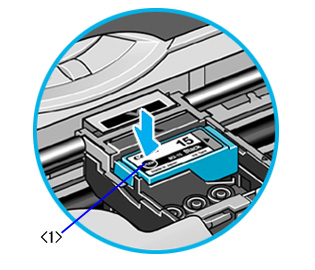
Insert the color ink tank (BCI-16 Color) in the same way.
<1> Color Ink Tank (BCI-16 Color) <2> <PUSH> Mark
Note: Do not set the BCI-15 Color ink tank. Using the BCI-15 Color ink tank may adversely affect color hue.
Close the print head cover. The print head moves to the right.