Resizing Images
You can resave images that were recorded at high recording pixel settings at lower settings.
 |
1600 x 1200 pixels |
 |
640 x 480 pixels |
 |
320 x 240 pixels |
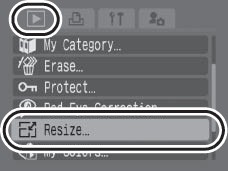
1. Select Resize
- Press the <MENU> button and use the  or
or  button to select
  in the
  (PlayBack) menu, and press the <FUNC./SET> button.
2. Select an image.
- Use the  or
or  buttons to select the image you wish to resize and press the <FUNC./SET> button.

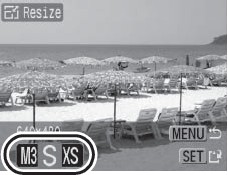
3. Select the recording pixel option you wish to resize the image to.
- Use the or buttons to select , or . Then press the <FUNC./SET> button.
4. Save the image.
- Use the or buttons to select [OK] and press the <FUNC./SET> button
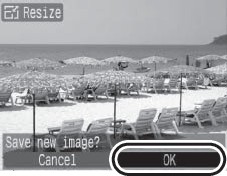
- The resized image will be saved as a new file.
- Some recording pixel settings cannot be selected depending on the available space of the memory card.
5. Display the saved image.
- Press the <MENU> button and use the or buttons to select [Yes] and press the <FUNC./SET> button.

- If you select [No], the display will return to the Play menu.

Movies and images shot in WideScreen cannot be resized.
|
