Setting Auto ISO Shift / Changing the ISO Speed with One Touch.
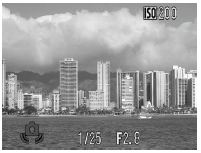
If the camera shake warning icon ( ) displays while shooting, you can raise the ISO speed simply by pressing the
  button to record at a shutter speed that avoids the effects of camera shake.
1. Power the camera on in the  (Record) mode, press the <MENU> button and select [Auto ISO Shift] and set the feature to [On].

2. Press the shutter button halfway.
- If the (Camera Shake) warning appears the (Print Share) button will blink in blue.
3. Press the (Print Share) button while holding the shutter button down halfway. When the button lights up, press the shutter button down all of the way.
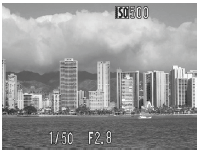
- With the shutter button pressed halfway, pressing the button again returns the ISO speed to the original setting.
- If you set the AE Lock after raising the ISO speed, the button will continue to light blue until you release the AE Lock, even if you release the shutter button.

- The Auto ISO Shift does not work with
 , ,  , ,  , in Long Shutter mode, or with the flash. , in Long Shutter mode, or with the flash.
- Depending on the shooting conditions, the camera shake warning icon () may not disappear even when the ISO speed is elevated.
|
