If you are having difficulties in accessing Professional Print & Layout for Windows after installing it for Photoshop, follow the steps below to install or reinstall the plug-in.
-
To install Professional Print & Layout, please close Photoshop.
-
Once closed, download the latest version of the Professional Print & Layout Plug-in from Canon's web site. Enter your product name at the top of the page, click Support, then click Software & Drivers. Select your operating system in the drop-down menu, select Software for Download Type, then click the Download button to the right of Professional Print & Layout.
-
Run the file that was just downloaded. Follow the on-screen instructions to install Professional Print & Layout.
-
Once installed, click on the Windows Start button, the Canon Utilities folder, then click on Professional Print & Layout Plug-in Install.
 You can also start typing Professional Print & Layout in the Start menu to find the Plug-in Install option.
-
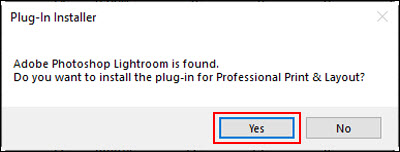
The Installer will find compatible programs to install the plug-in to, for example, Lightroom.
Click Yes to install.
-
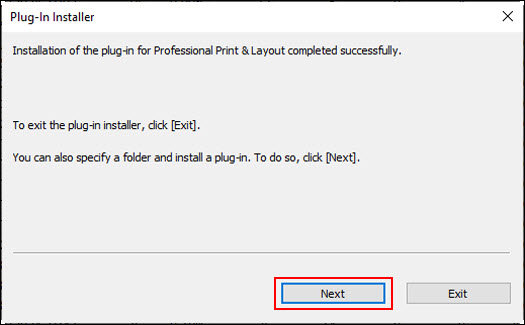
Alternatively, browse to the location to install the Plug-in:
Click Next.
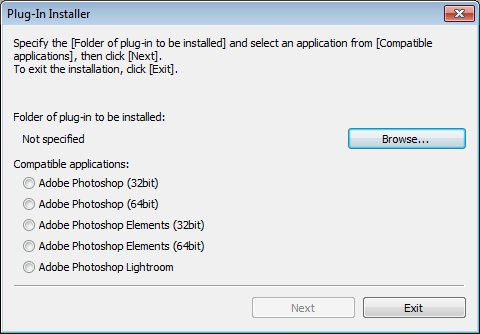
Select which version of Photoshop you are using and then click Browse. In this example, Photoshop 2024 will be used.
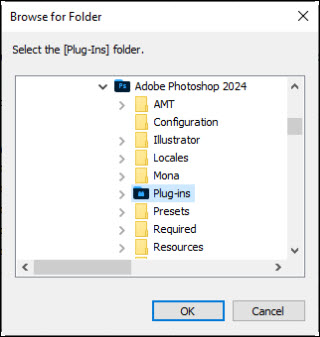
On a 64-bit Windows PC (used in this example), browse to the C:\Program Files\Adobe\Adobe Photoshop 2024\Plug-ins folder. Then, click OK.
Select the version of Photoshop that is installed on the computer and click Next.
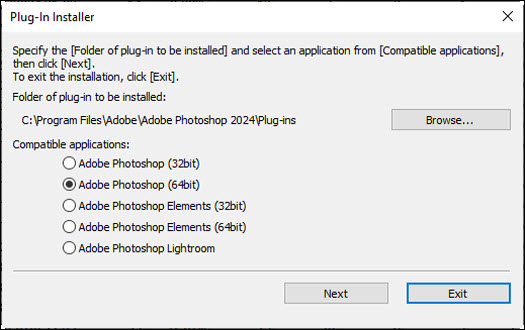
Click OK.
Click Exit.
-
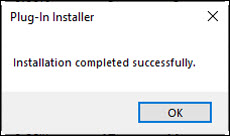
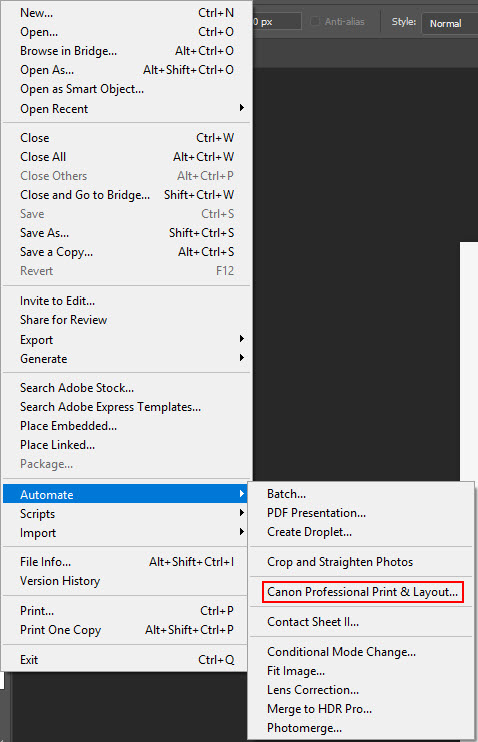
Launch Photoshop again. Professional Print & Layout will now be available.
If your product issue was not resolved after following the steps above, or if you require additional help, please create or log in to your Canon Account to see your technical support options.
Or if you still need help, visit our Canon Community by clicking the button below to get answers:

____________________________________________________________________________________________
