You can specify if you want to print using only the black cartridge, the color cartridge, or both when printing from a Windows PC. Follow the steps below to specify which ink cartridge(s) you want to print with.
-
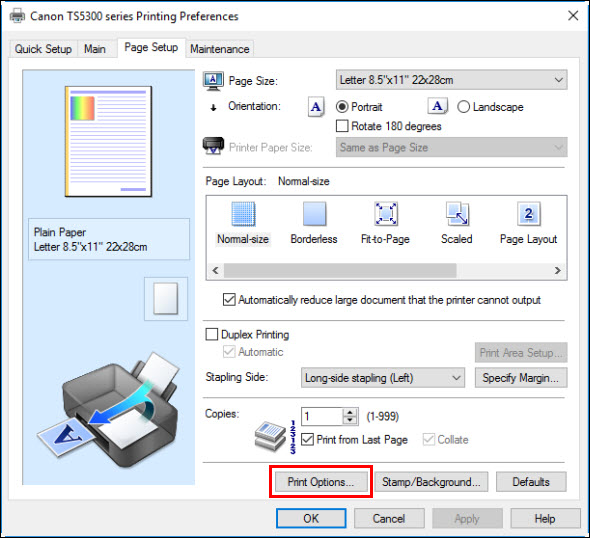
Open the printer driver setup window.
-
Click Print Options... on the Page Setup tab.
-
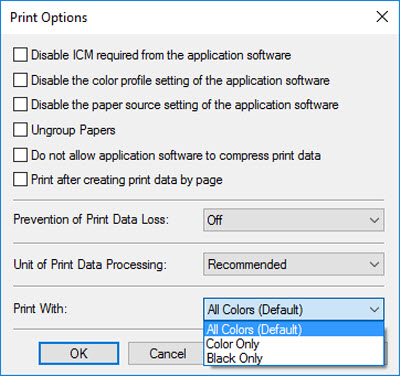
Select the ink cartridge(s) to be used for printing and click OK.
-
Click OK on the Page Setup tab.
When you print, the specified ink cartridge(s) will be used.
 When the following settings are specified, Black Only does not function because the printer uses the color cartridge to print documents.
-
Other than Plain Paper, Envelope, Ink Jet Hagaki (A), Hagaki K (A), Hagaki (A), or Hagaki is selected for Media Type on the Main tab
-
Borderless is selected from the Page Layout list on the Page Setup tab
Both ink cartridges must be installed in order to print. If you remove the ink cartridge that you don't want to use, you won't be able to print.
If your product issue was not resolved after following the steps above, or if you require additional help, please create or log in to your Canon Account to see your technical support options.
Or if you still need help, visit our Canon Community by clicking the button below to get answers:

____________________________________________________________________________________________
