
Changing the flash modes in the ELPH 2
| Article ID: ART151012 | | | Date published: 05/22/2015 | | | Date last updated: 02/05/2016 |
Solution
Changing the Flash Mode
You can switch the flash off or set it to fire each time you take a picture . Select the mode that best suits your subject and your surroundings .
- The
 and
and  settings can be stored in the camera's memory. At shipment, the camera is set so that the flash mode is when you switch the camera on . However, if you switch the camera off while the flash mode is set to it, , that setting is stored in the camera's memory and the flash mode will begin from when you switch the camera back on .
 - You can use the CF2 custom function setting to specify that whichever flash mode is active when you switch off the camera should be stored in the camera's memory.
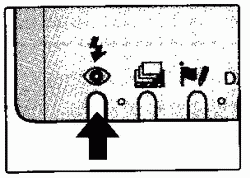 |
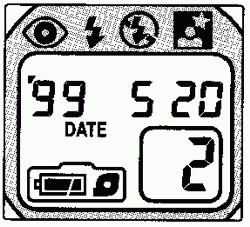
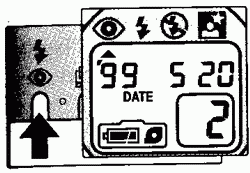
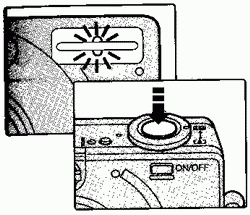
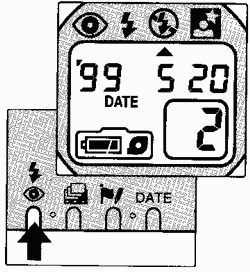
Select the flash mode.
|
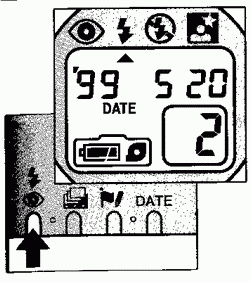
When the flash mode is selected so that the flash fires automatically, the black pointer appears under the t icon when you press the stutter button down halfway.
Changing the Flash Mode
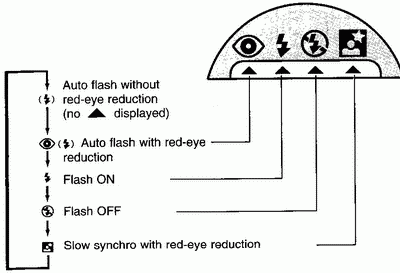
Auto Flash Without Red-eye Reduction
Use this mode to take pictures of subjects other than people, or to photograph people without using the redeye reduction lamp . In this mode, the shutter releases immediately.
In backlit or low-light conditions, the flash fires automatically when you press the shutter button

Switch the camera on.
Set the flash mode to Auto flash without red-eye reduction
The pointer
, is not displayed on the LCD panel .
If the flash is going to fire automatically, the pointer
" Take the picture.
Use this mode to reduce the red-eye effect when you are taking pictures of people in low-light conditions . When you press the shutter button, the red-eye reduction lamp lights and then the flash fires .
Set the flash mode to 
- Press the
button until the pointer
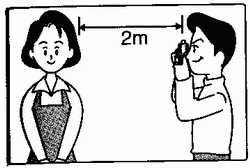
Move to within 2 m (6 .6 ft .) of your subject.
- The effective range of the red-eye reduction lamp is 2 m.
Get your subject to look at the camera.
- The red-eye reduction function is only effective if the subject is looking directly at the camera
Slowly press the shutter button down fully.
- The red-eye reduction lamp lights and, after about a second, the shutter releases .
- Keep the shutter button pressed down until you hear the film advance to the next frame.
Red-eye Reduction Function
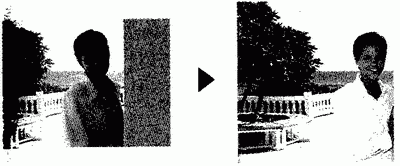
When you use the flash to take photos of people in low-light conditions, their eyes sometimes glow red in the photograph . This is referred to as the red-eye effect and is caused by the light of the flash being reflected off the retina .
In
- When the red-eye reduction lamp lights, shutter operation is delayed for approximately 1 second to heighten the effectiveness of the lamp. To make the shutter operate immediately, use the
Important guidelines for using the red-eye reduction function
1. Because this function is not effective unless the subject is looking directly at the lamp, attract the subject's attention so that he or she looks at the camera .
2. Take the picture from within 2 m (6.6 ft.) of your subject.
3. The effectiveness of the red-eye reduction function varies from person to person.
4. Set the lens to the wide-angle setting.
5. Raise the ambient light level as much as possible .

In this mode, the flash fires regardless of the light conditions when the picture is taken . Use this setting for fill-in flash in daylight or to soften the outline of the subject .
Set the flash mode to
- Press the
- Take the Picture-
 Flash OFF Mode
In this mode, the flash does not fire regardless of how dark conditions are when the picture is taken . Use this mode for sunset shots, for places where flash use is prohibited, or for available-light photography
 |
Set the flash mode to
|
- Because a slow shutter speed is used (up to 2 seconds) when the flash is set to Flash OFF mode in low light conditions, take care to avoid camera shake.
- If the orange indicator is blinking (camera shake warning), set the camera an a steady surface or use a tripod
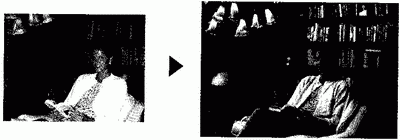
 Slow-synchro Made with Red-eye Reduction
This function is useful when you are taking pictures of people against a sunset or nighttime background . The combination of slow shutter speed and flash illuminates the subject while still capturing the background .
Set the flash mode to 
- Press the I button until the pointer
- After approximately 1 second, pointers appear under the and
- Take the picture
- Because a slow shutter speed (up to 2 seconds) is used in this mode, always use a tripod to prevent camera shake. Take care also to ensure that the subject does not move in the moment after the flash fires.
- The red-eye reduction function operates when the mode is set to
- In some conditions
