
Sending Images to a Smartphone (Wireless Connection) (EOS Ra)
| Article ID: ART176847 | | | Date published: 05/27/2020 | | | Date last updated: 06/10/2020 |
Description
Sending Images to a Smartphone (Wireless Connection) (EOS Ra)
Solution
| Solution |
Introduction Send images to a smartphone as follows.
< Connecting to a Bluetooth-compatible Smartphone via Wi-Fi >
< Connecting to a Smartphone via Wi-Fi from the [Wi-Fi function] Menu >
Illustrations and screenshots in this manual may differ slightly from the actual equipment.
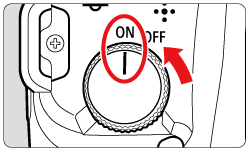
Preparing the Camera 1. Set the camera's power switch to <ON>.
2. Press the <
 > button to display the menu screen. > button to display the menu screen.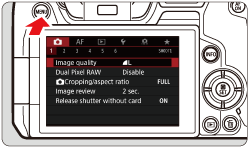
3. Press the <
 > button to select the > button to select the  tab. tab.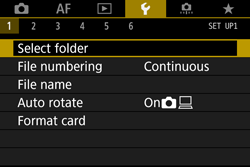 ã ã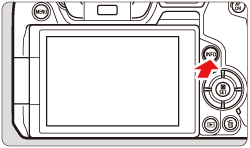
4. Turn the <
 > dial to select the [ > dial to select the [  ] tab. ] tab.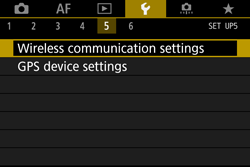 ã ã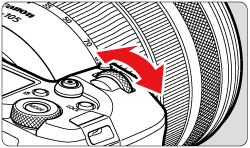
5. Turn the <
 > dial to select [Wireless communication settings].ã > dial to select [Wireless communication settings].ã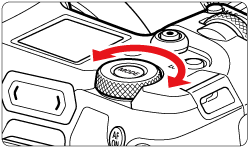
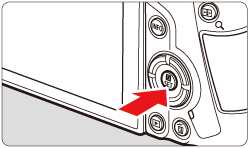
6. Press <
 >. >.
7. Turn the <
> dial to select [Wi-Fi settings], then press < >.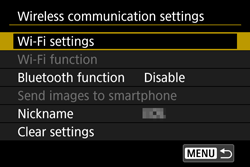
8. Turn the <
> dial to select [Wi-Fi], then press < >.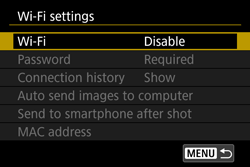
9. Turn the <
> dial to select [Enable], then press < >.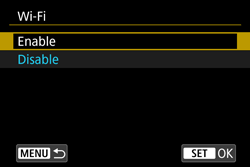
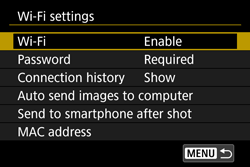
10. Turn the <
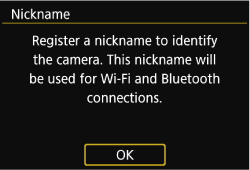
> dial to select [Nickname], then press < >.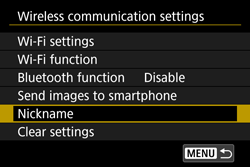
Connecting to a Bluetooth-connected Smartphone via Wi-Fi  1. Install Camera Connect. 1. Install Camera Connect.
 2. Turn the < > dial to select [Bluetooth function], then press < >. 2. Turn the < > dial to select [Bluetooth function], then press < >.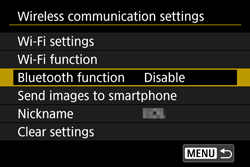
3. Turn the < > dial to select [Bluetooth function], then press < >.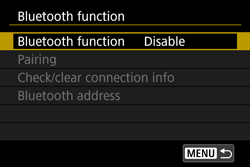
4. Turn the < > dial to select [Smartphone], then press < >.
5. Turn the < > dial to select [Pairing], then press < >.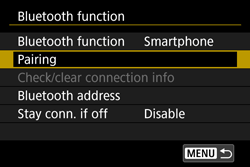
6. Turn the < > dial to select [Do not display], then press < >.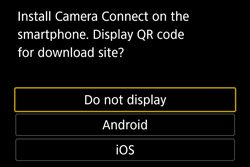
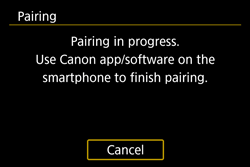
7. Activate Bluetooth on the smartphone, and then start Camera Connect on the smartphone.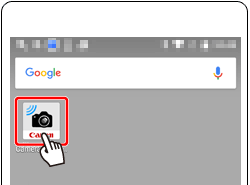
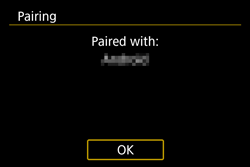
8. Complete the pairing process for the smartphone.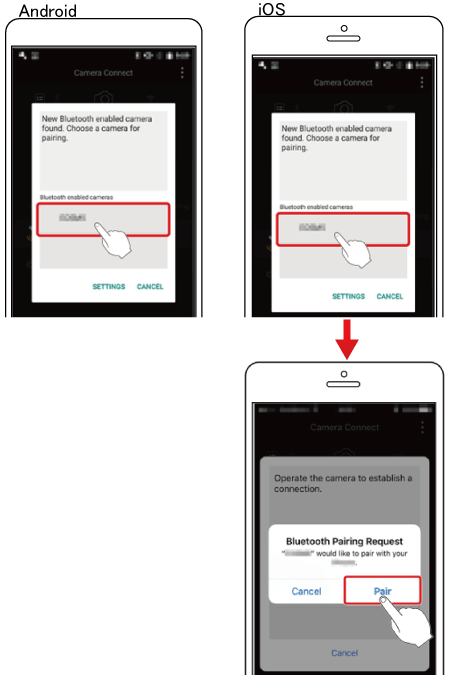
9. Turn the < > dial to select [OK], then press < >.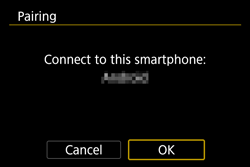
10. Choose [Images on camera] in Camera Connect.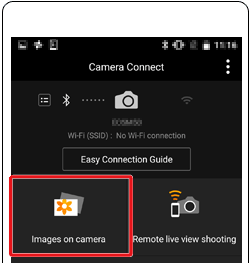
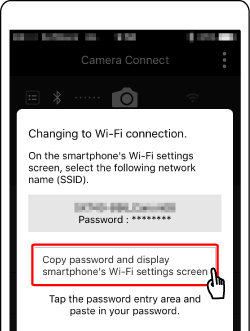
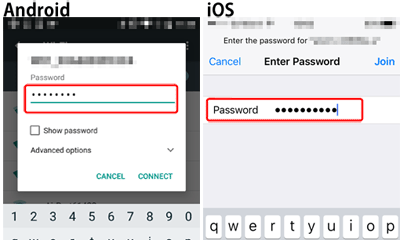
In the Wi-Fi menu, choose the SSID displayed on the camera, paste the copied password.

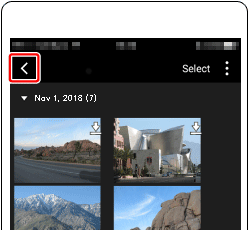
11. When the camera is connected to the smartphone, a list of the images on the camera will appear in Camera Connect. Tap [Select] appearing in the upper right of the screen.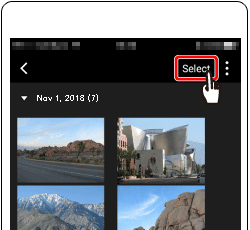
12. After the screen refreshes, choose the desired images (  ), and then touch [ ), and then touch [  ] ( ] (  ) on the bottom of the screen. ) on the bottom of the screen.
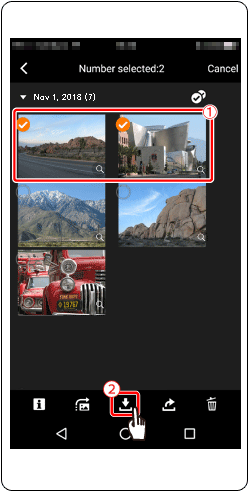
13. After the images have been saved, touch [  ] appearing in the upper right of the screen, and then touch [ ] appearing in the upper right of the screen, and then touch [  ] in the upper left of the screen to return to the menu screen. ] in the upper left of the screen to return to the menu screen.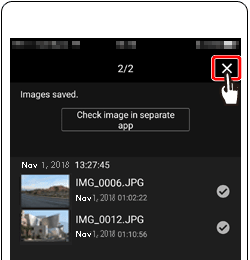

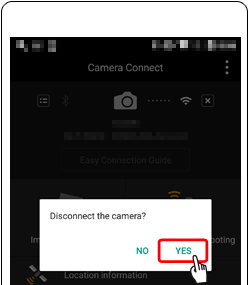
14. To end the connection, touch the [  ] icon displayed in the upper right of the screen, and then touch [YES]. ] icon displayed in the upper right of the screen, and then touch [YES].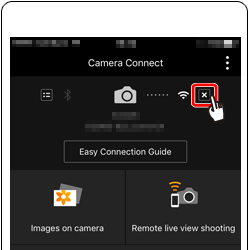
Connecting to a Smartphone via Wi-Fi from the [Wi-Fi function] Menu These steps show how to use the camera as an access point, but you can also use an existing access point.
1. Install Camera Connect.
2. Turn the < > dial to select [Wi-Fi function], then press < >.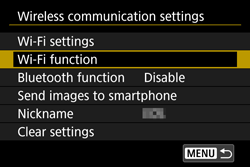
3. Turn the < > dial to select [  ], then press < >. ], then press < >.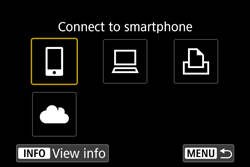
4. Turn the < > dial to select [Register a device for connection], then press < >.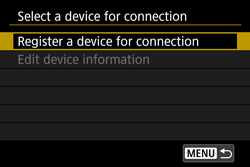
5. Turn the < > dial to select [Do not display], then press < >.
6. Check the SSID (network name) (  ) and password ( ) and password (  ). ).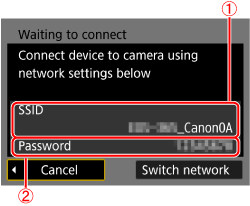
7. Turn Wi-Fi settings to ON in your smartphone, choose the SSID ( ) from step 6.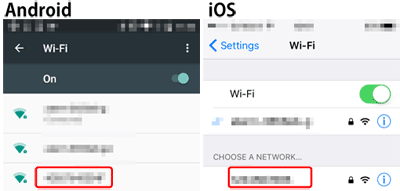
8. Touch the [  ] icon to start Camera Connect. ] icon to start Camera Connect.
9. On the camera selection screen displayed on the smartphone, choose the camera to begin pairing.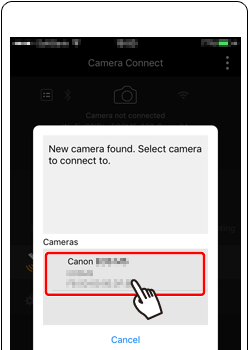
10. Turn the < > dial to select [OK], then press < >.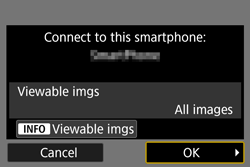
11. Touch [Images on camera] in Camera Connect.
12. When the camera is connected to the smartphone, a list of the images on the camera will appear in Camera Connect. Tap [Select] appearing in the upper right of the screen.
13. After the screen refreshes, choose the desired images ( ), and then touch [ ] ( ) on the bottom of the screen.
14. After the images have been saved, touch [ ] appearing in the upper right of the screen, and then touch [ ] in the upper left of the screen to return to the menu screen.
15. To end the connection, touch the [ ] icon displayed in the upper right of the screen, and then touch [YES].
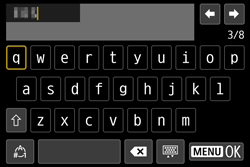
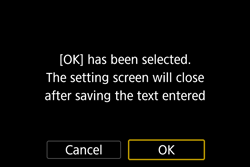
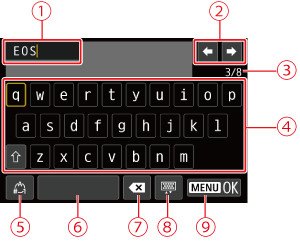
The Virtual Keyboard Operation Use the virtual keyboard operation to enter information. Note that the length and type of information you can enter varies depending on the function you are using.
|
||||||||||||||||||||
|
ID: 8204720400_EN_1
|
|||||||||||||||||||||
 icon, and camera setting procedures are indicated by the
  icon.
icon. ] high, [
  ] medium, [
  ] low, [
  ] weak.
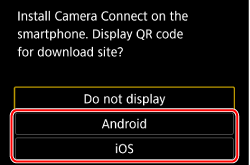
 Wi-Fi on ] is displayed on the camera.
 ] icon in the upper right of the screen, and then touch [


 > <
> <  > <
> <  > <
> <  > keys to move within
 SIMS Doc Id
8204720400