LED Error Codes - MP250 / MP270
| Article ID: ART133186 | | | Date published: 05/12/2015 | | | Date last updated: 02/04/2020 |
Description
Solution
An Error Code Is Displayed on the LED |
|
| Issue |
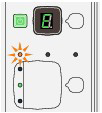
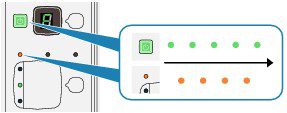
When a machine error occurs, the Alarm lamp is lit orange and E and number (error code) are alternately displayed on the LED. Check the error code displayed on the LED and take the appropriate action to correct the error.
* Depending on the error occurred, the Alarm lamp is not lit.
|
| LED Displays |
E, 0, 2 The machine is out of paper / Paper does not feed
|
| Summary |
Reload the paper in the Rear Tray correctly and also check for and remove any jammed paper or foreign object. Press the Black or Color button. |
| LED Displays |
E, 0, 3 Paper Output Tray is closed / Paper jam
|
| Summary |
If the Paper Output Tray is closed, open it. The machine resumes printing. |
| LED Displays |
E, 0, 4 / E, 0, 5 The FINE Cartridge cannot be recognized
|
| Summary |
The FINE Cartridge may not be installed properly, or the Cartridge may not be compatible with this machine. |
| LED Displays |
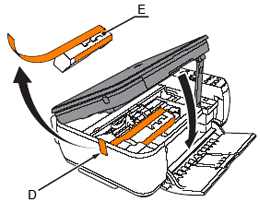
E, 0, 7 FINE Cartridge is not installed in the correct position
|
| Summary |
Make sure that each FINE Cartridge is installed in the correct position.  Installing / Replacing FINE Cartridge(s) Installing / Replacing FINE Cartridge(s) |
| LED Displays |
E, 0, 8 Ink absorber is almost full
|
| Summary |
Press the machine's Black or Color button to continue printing. |
| LED Displays |
E, 0, 9 **MP270 only** The machine has not received a response from the digital camera. The digital camera or digital video camcorder connected is not compatible with this machine. |
| Summary | Check the device connected to the machine. Printing photos directly is possible only with a PictBridge compliant device.
A communication time out occurs if an operation takes too long or if it takes too much time to send data. This may cancel printing. In such cases, disconnect and reconnect the USB cable. When printing from a PictBridge compliant device, depending on the model or brand of your device, you may have to select a PictBridge compliant print mode on the device before connecting it to the machine. You may also have to turn on your device or select Play mode manually after connecting the device to the machine. Perform necessary operations before connecting your device referring to its instruction manual. If the error is still not resolved, check if you can print another photograph. |
| LED Displays |
E, 1, 3 Ink level cannot be detected.
|
| Summary |
Ink may have run out. |
| LED Displays |
E, 1, 4 The FINE Cartridge cannot be recognized.
|
| Summary |
The FINE Cartridge may not be compatible with this machine. |
| LED Displays |
E, 1, 5 |
| Summary |
The FINE Cartridge may not be installed properly. Open the Scanning Unit (Cover) and install the FINE Cartridge properly.
|
| LED Displays |
E, 1, 6 |
| Summary |
Ink has run out. |
| LED Displays | E, 1, 9 **MP270 only** PictBridge compliant device is connected via a USB hub. |
| Summary | If a PictBridge compliant device is connected via a USB hub, remove the hub and connect it directly to the machine. |
| LED Displays |
E, 3, 0 The size of the original cannot be correctly detected or the document is too small when the Fit-to-Page copying is selected.
|
| Summary |
|
| LED Displays |
E, 3, 1 The machine is not connected with the computer.
|
| Summary | |
| LED Displays |
E, 5, 0 Scanning the print head alignment sheet has failed.
|
| Summary |
Press the Stop / Reset button to dismiss the error, then take the actions described below.
 Printing the Nozzle Check Pattern Printing the Nozzle Check PatternIf the error is not resolved, connect the machine to the computer and align the Print Head on the printer driver.
|
| LED Displays |
P, 0, 2 |
| Summary |
Cancel printing, turn off the machine. Then clear the jammed paper or protective material that is preventing the FINE Cartridge Holder from moving, and turn on the machine again.
|
| LED Displays |
P, *, * ( The letter "P" followed by a comma, then a digit, another comma and finally another digit) |
| Summary |
"*, *" depends on the error occurred.
Turn off the machine, and unplug the power cord of the machine from the power supply.
If any object is placed in front of the machine, remove it.Open the Paper Output Tray gently, then turn the power off and back on.
Turn off the machine, and unplug the power cord of the machine from the power supply for 3-5 minutes, then plug the unit back in.
Turn off the machine, and unplug the power cord of the machine from the power supply.Plug the machine back in and turn the machine back on.
If the error persists, the printer will require servicing. If your product issue was not resolved after following the steps above, or if you require additional help, please create or log in to your Canon Account to see your technical support options. Or if you still need help, visit our Canon Community by clicking the button below to get answers: 
|


 Note
Note