
Transferring Files to an FTP Server
| Article ID: ART140161 | | | Date published: 05/13/2015 | | | Date last updated: 08/17/2015 |
Description
Transferring Files to an FTP Server
Solution
| Transferring Files to an FTP Server ID : 8201867200 _ EN _ 1 | |||||||||
| Solution | You can wirelessly transfer files (recordings) directly to a computer or an FTP server. You will need a correctly configured FTP server. During the manual setup procedure, you will need to enter the FTP server's IP address, port, user name, password and file transfer destination (where the files will be transferred to). To enter text for the various settings, use the virtual keyboard 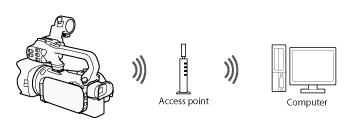
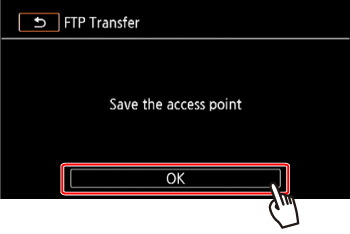
Step 1: Configuring the FTP Server 1. Set the power switch to <MEDIA>.  2. Touch [  ]. ]. 3. Touch [  ]. ].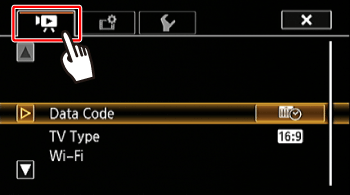 4.  Drag your finger up or down bring [Wi-Fi] into the orange selection bar, Drag your finger up or down bring [Wi-Fi] into the orange selection bar,  and touch the button. and touch the button.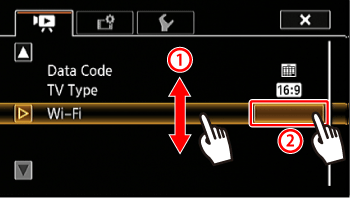 5. Touch [FTP Transfer]. 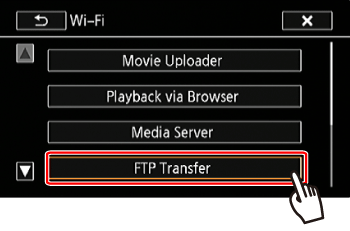 6. Touch [OK]. 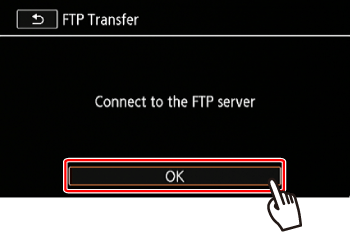 7. Configure the FTP server. Enter the FTP server's IP address for [FTP Server]. Enter the port number for [Port]. Touch [Next]. Touch [Next].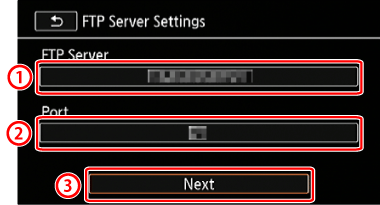
8. Enter the user name. Enter the password. Touch [Next].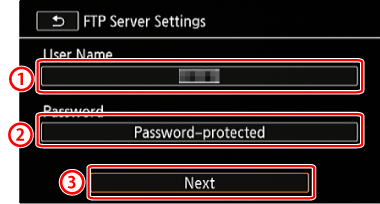 9. Enter for [Destination Folder]. Touch [Next].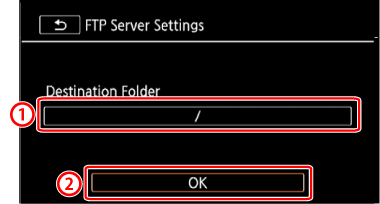
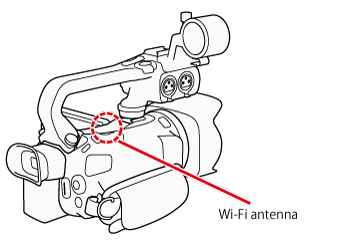
Step 2: Connect to an Access Point Using Wi-Fi Connect to an access point. If you have already completed the settings for connecting to an access point, proceed to Step 3: Transferring Files
 1. Select the desired connection method. 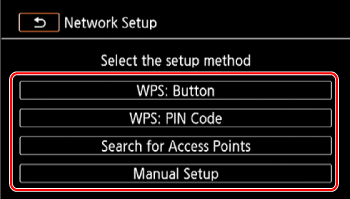 You can select from the following four connection methods. For more information on your access point, please refer to the access points instruction manual.
* WPS, which stands for Wi-Fi Protected Setup, is a standard that makes connecting to an access point easier.
If your wireless router is WPS-compatible, connecting the camcorder to it can be very easy. If you cannot successfully connect the camcorder using WPS, try using the [Search for Access Points] method. 2-a-1. [WPS: Button] method2-b-1. [WPS: PIN Code] method 2-c-1. [Search for Access Points] method 2-d-1. [Manual Setup] method
2-a-1. [WPS: Button] method Press and hold the WPS button on the access point.
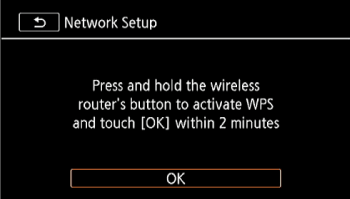 2-a-2. Within 2 minutes, touch [OK] on the camcorders screen. The camcorder will connect to the access point. 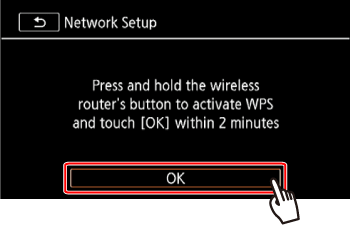 You can touch [Stop] and then [OK] to interrupt the Wi-Fi Protected Setup while it is in progress. 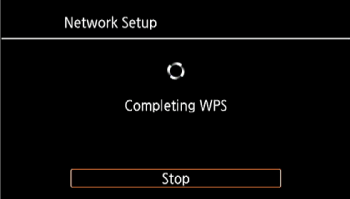 The screen will change when the setting is finished. Proceed to Step 3: Transferring Files 2-b-1. [WPS: PIN Code] method From a computer or similar device connected to the access point, use the Web browser to open the routers WPS settings screen. After the 8-digit PIN code appears on the camcorders screen, enter it into your routers WPS settings screen. 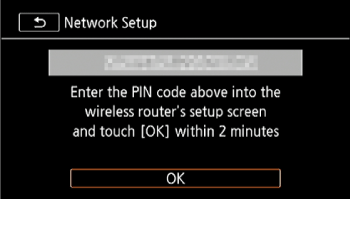 2-b-2. Within 2 minutes, touch [OK] on the camcorders screen. The camcorder will connect to the access point. 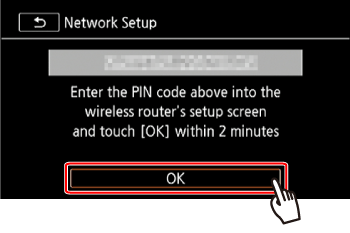 You can touch [Stop] and then [OK] to interrupt the Wi-Fi Protected Setup while it is in progress.
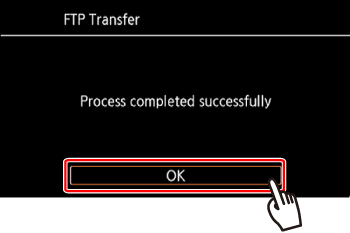
The screen will change when the setting is finished. Proceed to Step 3: Transferring Files 2-c-1.[Search for Access Points] method The camcorder will automatically detect access points in the vicinity. After you select the desired access point, you simply enter the password (encryption key) to connect the camcorder. To enter text for the various settings, use the virtual keyboard. 2-c-2. Check the access point setting information. Note the access points network name (SSID) and encryption key. 2-c-3. Select the desired access point The SSID of detected access points will be displayed. Touch [  ] / [ ] / [  ] to go through the detected access points.Touch [OK]. ] to go through the detected access points.Touch [OK].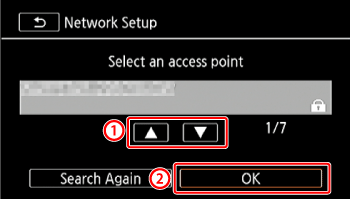 2-c-4. Enter the encryption key (password). If the access point selected in step 2-c-3 did not have a [  ] icon, this step is not necessary. In the [Encryption Key] field, enter the encryption key. Touch [OK]. ] icon, this step is not necessary. In the [Encryption Key] field, enter the encryption key. Touch [OK].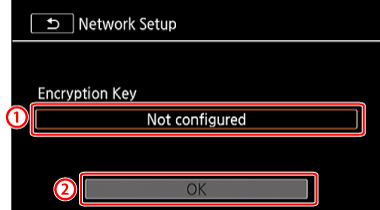 2-c-5. Touch [OK]. The screen will change when the setting is finished. Proceed to Step 3: Transferring Files 2-d-1. Manual Setup Perform this procedure to manually configure the wireless connection settings. This may be necessary, for example, if your access points network name (SSID) cannot be detected due to the stealth function being enabled. Manual setup is for advanced users of Wi-Fi networks. 2-d-2. Enter the SSID. Touch the [SSID] field. Enter the SSID and then touch [OK] > [Next].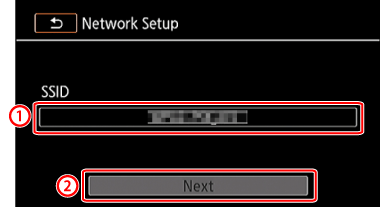 2-d-3. Select the Authentication/Encryption Method. Touch the [Authentication/Encryption Method] field. 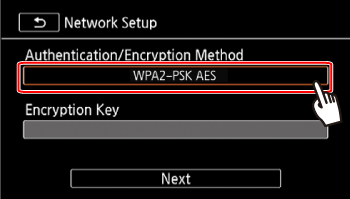 2-d-4. Touch the desired method. If you selected [OPEN WEP], the WEP index is 1.  2-d-5. Enter the [Encryption Key] In step 2-d-4., if you selected [OPEN NONE], entering the encryption key is not necessary. Touch the [Encryption Key] field, and then enter the encryption key. Touch [OK] > [Next].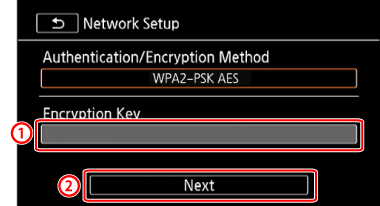 2-d-6. Select how to obtain the IP address. 2-d-7. Set the [IP Address] manually. Touch the [IP Address] field. 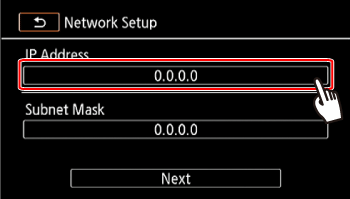 2-d-8. Touch [ ] / [ ] to change the value and then touch [OK]. Enter the following information using the procedure explained above for the IP Address. 2-d-9. Enter the Subnet Mask and touch [Next]. 2-d-10. Enter the Default Gateway and touch [Next]. 2-d-11. Enter the DNS Server information and touch [Next]. 2-d-12. Save the settings. Touch [OK]. 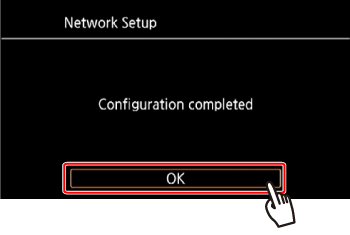 The screen will change when the setting is finished. Step 3: Transferring Files 1 Transfer Files. Touch the desired memory card. You can select memory cards. Touch [All files] to transfer all the recordings or [New files] to transfer only those recordings that have not been previously transferred. Touch [OK].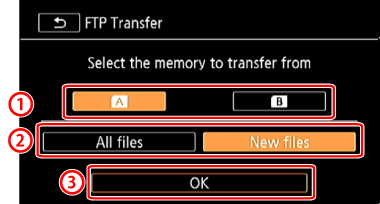 2. Once connected, the wireless transfer will begin. You can touch [Stop] and then [X] to stop the wireless transfer while it is in progress. However, depending on when you stop the operation, some files will be transferred. 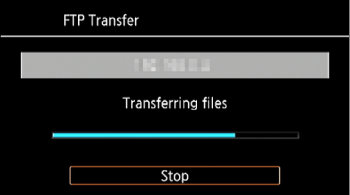 3.Touch [OK].
 This concludes the procedure for transferring files to an FTP server.
| ||||||||
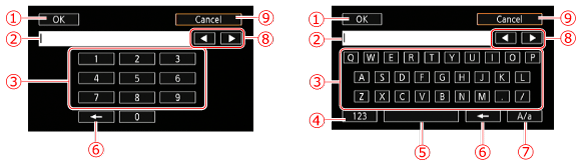
 :
:  (Press to exit after entering the information.)
  : Text field
 : Letter/number keys
 :
:  /
/  (Switch between letters and numbers/special characters.)
 : Space key
 :
:  Backspace (Delete the character to the cursors left.)
 :
:  /
/  /
/  Caps Lock. When the numerical keyboard is displayed, [#%?] switches between set 1 and set 2 of special characters.
 :
:  (Change the position of the cursor.)
 : Cancel

SIMS Doc Id
8201867200