How do I create a scanning shortcut using CaptureOnTouch v4 for my DR scanner?
Article ID: ART176507
|
Date published: 02/11/2020
|
Date last updated: 06/09/2021
Description
Did you ever have to scan specific documents using specific settings and wished you could just click on one button to begin scanning using those specific settings? Follow the steps below to create a scanning shortcut using CaptureOnTouch Pro v4.
Solution
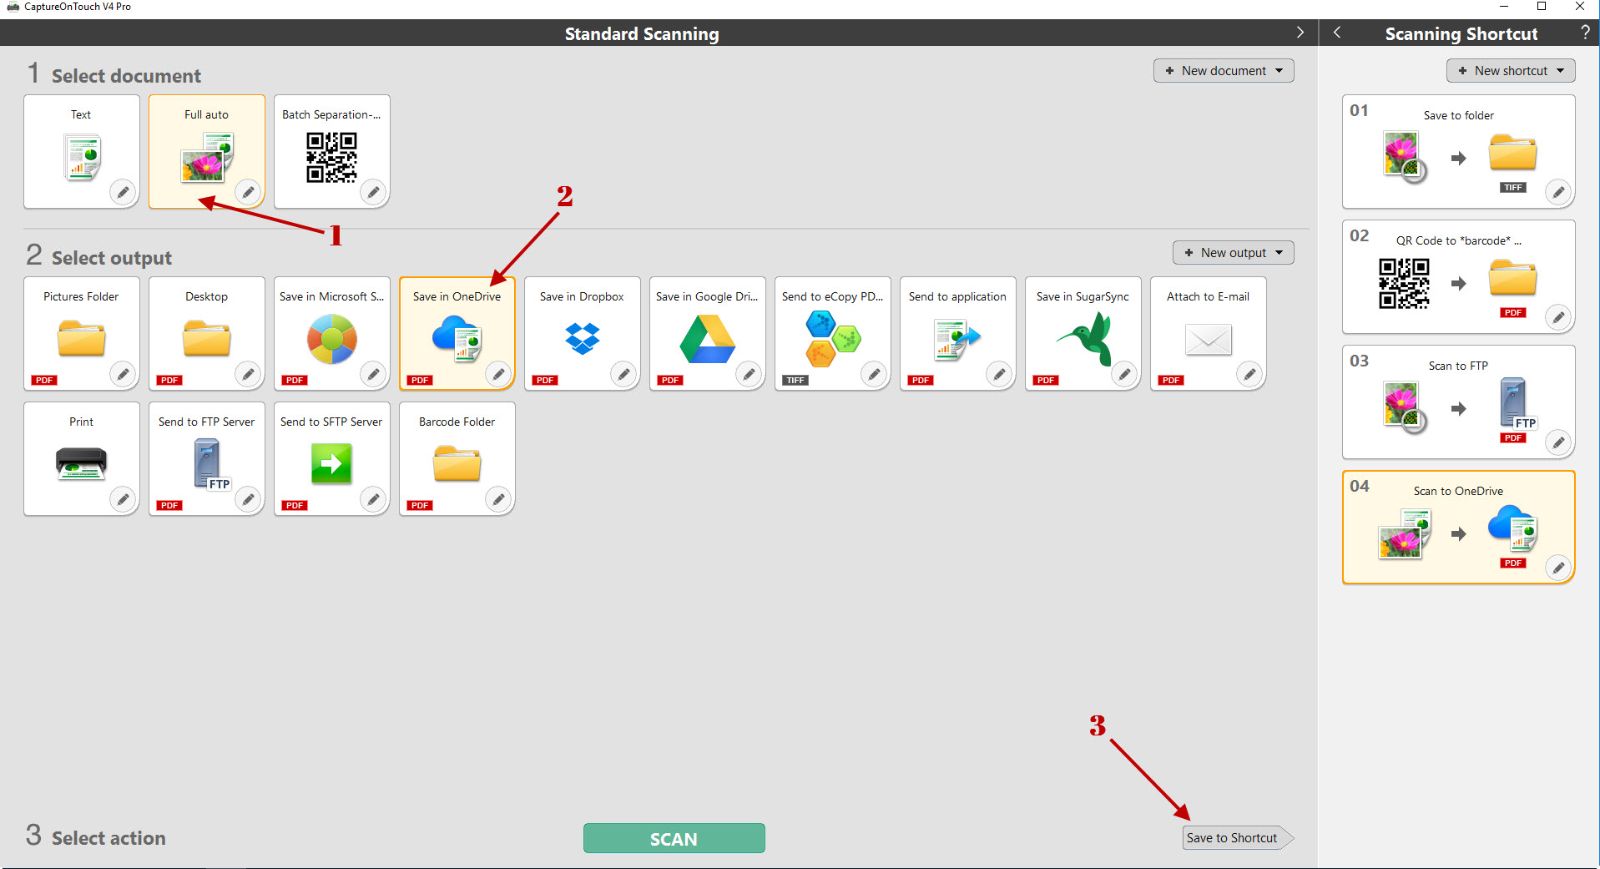
Open CaptureOnTouch (make sure you have your scanner selected first).
Select the document type by clicking on one of the icons listed in section 1 "Select document" (see step 1 below).
You can click on the pencil icon to adjust the settings that you need or, if you wish, click on "New document" to create a new set of specific settings that you require.
Select the output type you wish to you by clicking on it (see step 2 below).
You can also edit the settings of the output by clicking on the pencil icon.
Click on the "Save to Shortcut" button in the bottom right hand of the screen (see step 3 below).
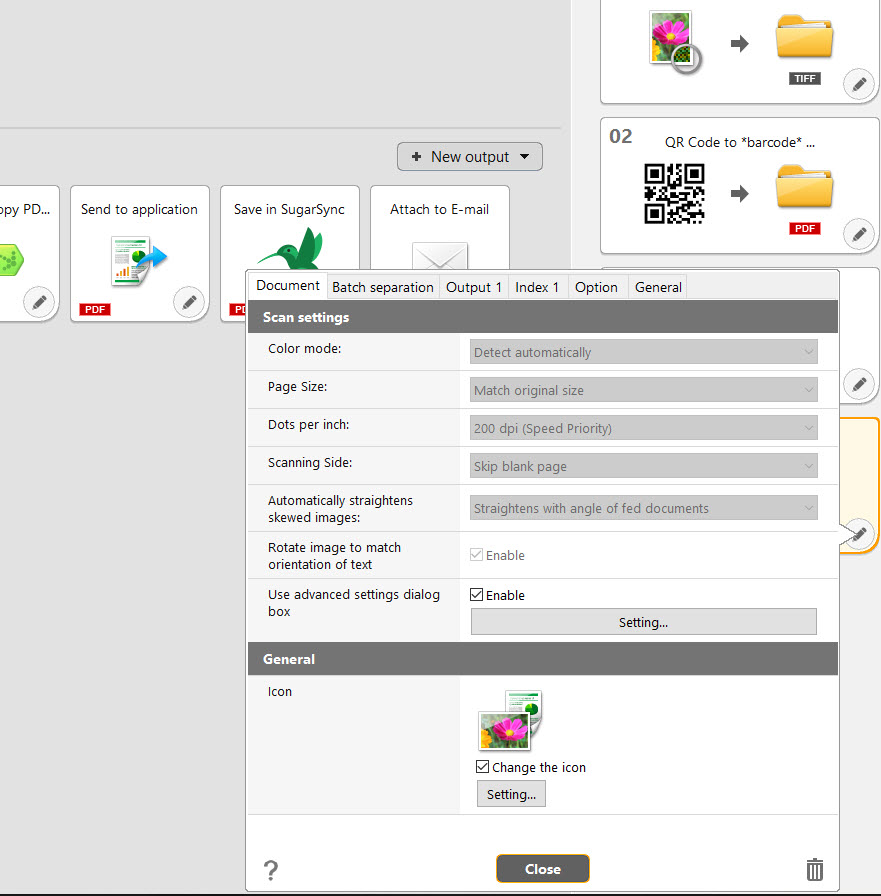
After clicking on this button a new icon will appear on the right hand of the screen under "Scanning Shortcut). Clicking on the pencil icon allows you to change any of the specific settings for this shortcut.
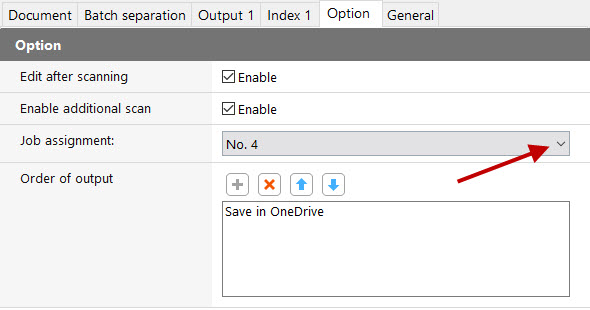
If you wish to assign a Job number to the newly created scanning shortcut, click on the pencil icon.
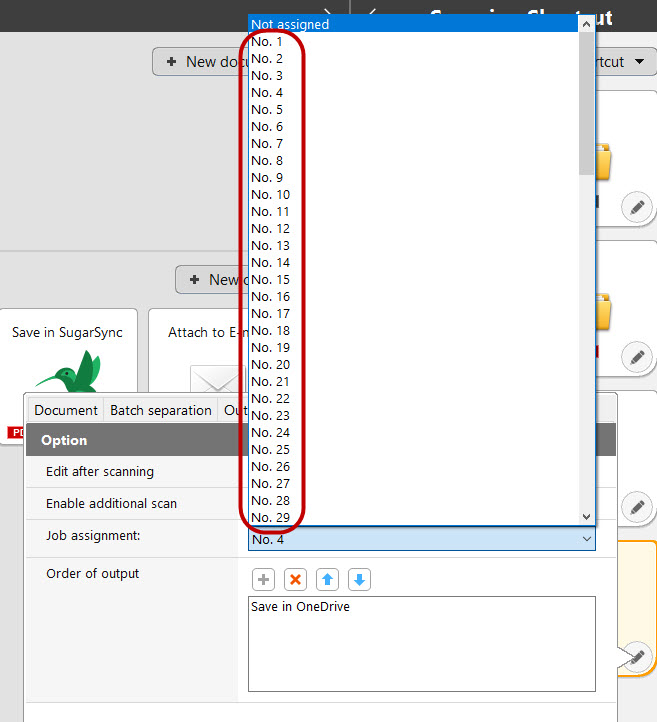
Select the "Option:" tab and then click on the Job assignment drop-down button to choose from the drop-down list.
Clicking on the "Close" button will save all of your settings.
To initiate the scan, click on the scanning shortcut button to initiate the scan.