Preparing the Camcorder
This section outlines the basic preparations for the camcoder, such as attaching the microphone holder and lens hood and adjusting the LCD screen and viewfinder
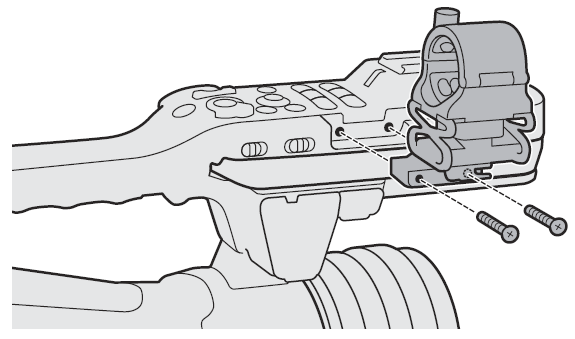
Attaching the Microphone Holder Unit
Use the supplied screws to attach the michphone holder unit to the handle
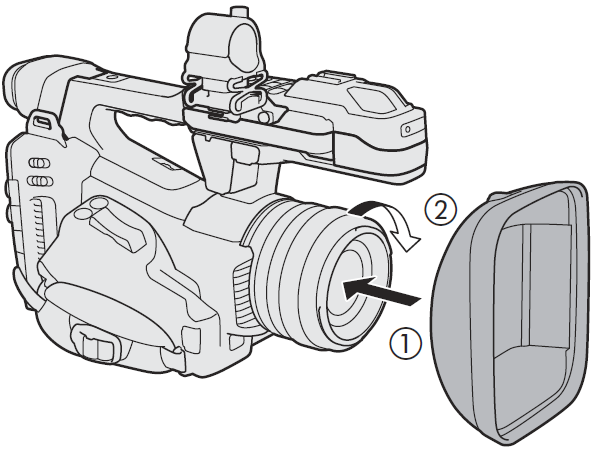
Attaching the Lens Hood
Attach the lens hood to protect the lens and reduce the amount of stray light that may hit the lens. Additionally, keeping the lens barrier closed can help avoid fingerprints and dirt on the lens.
Alway remove the lens hood and attach the lens cap when carrying the camcorder to storing it after use.
Remove the lens cap
The lenscap and lens hood cannot be used at the same time
Place the lens hood on the front of the lens with the lock screw side pointing down and turn it 90 degrees clockwise
Tighten the lock screw
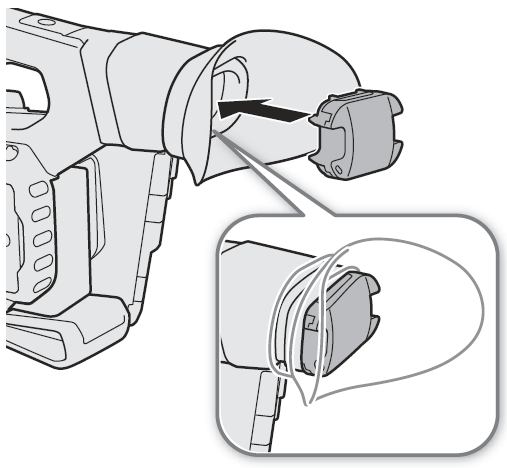
Attaching and Removing the Eye Cup
Attach the eye cup so that it covers the rubber rim of the viewfinder unit. To remove the eye cup, pull it gently in a "peeling off" motion from the bottom up
For left eye use, attach the eye cup so that the protruding par faces the opposite side
IMPORTANT
Pointing the viewfinder lens at the sun or other strong light souces may cause damage to internal components. When you are not using the viewfinder, make sure to attach the viewfinder from scratches and dirt. Attach the viewfinder cap by inseerting it into the rubber rim of the viewfinder unit
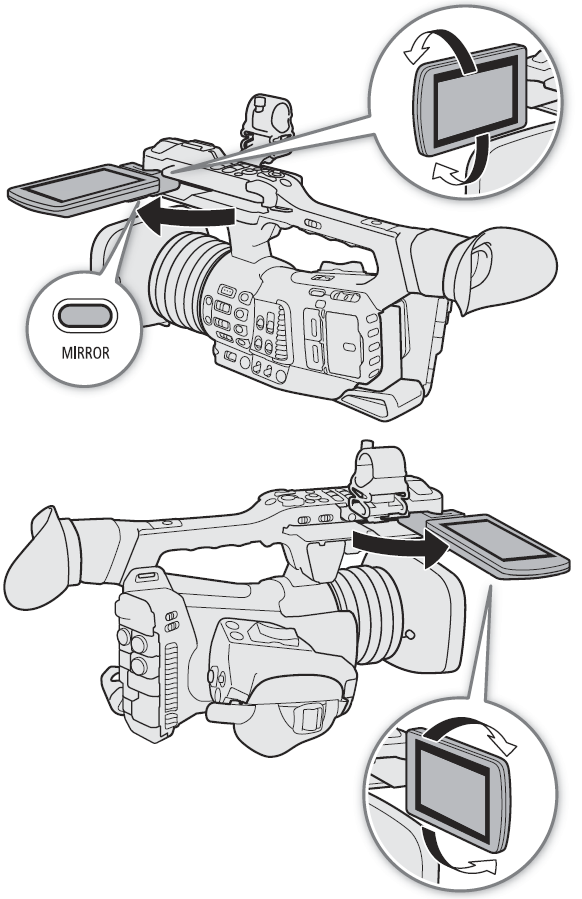
Using the LCD Screen
Pull out the LCD panel 90° to the left or right
Adjust the LCD panel to the desired angle.
Note
You can invert the image displayed on the screen according to the LCD panel's position. In mode, pressing the MIRROR button will switch between the original and the image inverted vertically in mode, it will switch between the original image and the image inverted both horizontally and vertically

.png) and turn it 90 degrees clockwise
and turn it 90 degrees clockwise .png)
.png)

 mode, pressing the MIRROR button will switch between the original and the image inverted vertically in
  mode, it will switch between the original image and the image inverted both horizontally and vertically