When transporting the printer for repairing it, follow the procedure below to prepare.
 Important
-
Make sure that the printer is turned on.
If the printer cannot be turned on, unplug it and go to step 4.
-
If an error has occurred, press printer's RESUME/CANCEL button.
After the Alarm lamp is turned off, go to step 3.
If the error is not cleared, press ON button to turn the printer off, and then unplug it. If the printer cannot be turned off, unplug it. Go to step 4.
-
Set printer to transporting mode.
Press and hold RESUME/CANCEL button, and then release button when Alarm lamp flashes 8 times. The printer is set to transporting mode and turned off. Unplug the printer.
-
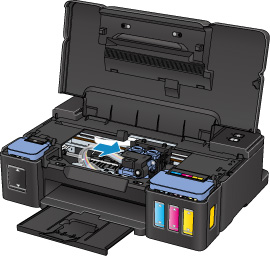
Make sure that cartridge holder has moved to far right.
If the cartridge holder is not to the right, move it to far right.
-
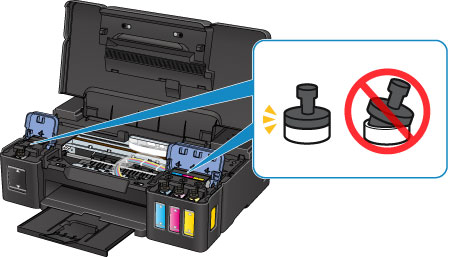
Make sure that tank caps are properly closed.
-
Retract the paper output tray and output tray extension, and then close the paper support.
-
Unplug the printer cable from the computer and from the printer, then unplug the power cord from the printer.
-
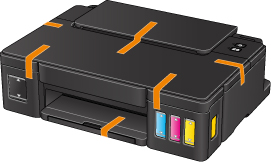
Use adhesive tape to secure all the covers on the printer to keep them from opening during transportation. Then pack the printer in the plastic bag.
-
Attach the protective material to the printer when packing the printer in the box.