How to install and connect the Compact Photo printer to a computer? (CP760/CP770 - Windows)
Article ID: ART150752
|
Date published: 05/22/2015
|
Date last updated: 12/28/2015
Description
How to install and connect the Compact Photo printer to a computer? (CP760/CP770 - Windows)
Solution
Installing the Printer Driver - CP760/CP770 (Windows)
The printer driver is software that is required to connect the printer to a computer.
Note:
The following instructions are intended for Windows Vista. The screen images and operations may differ slightly in Windows XP and Windows 2000.
When installing / uninstalling the software, please log on to the computer as an Administrator.
Do not connect the printer to the computer until the installation of the printer driver is finished.
This Printing Guide uses the [SELPHY CP760] as an example for explanatory purposes. The [SELPHY CP770] also has the same operational features.
Quit any software that is running.
Place the [Compact Photo Printer Solution Disk] CD-ROM supplied with your printer into the computer.
Click [Run SETUP.EXE] when the following window appears.
If the window above does not appear, click [Start] (
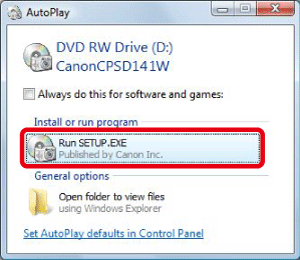
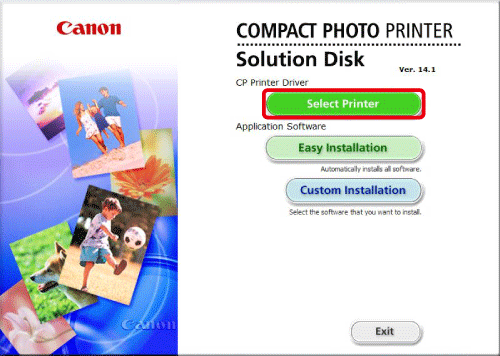
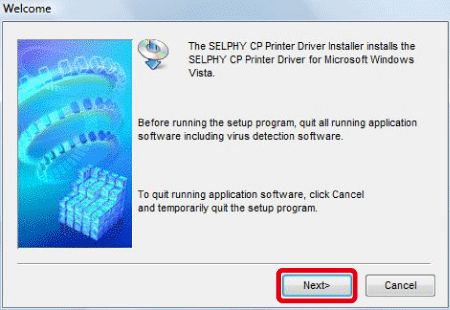
) > [Computer] or [My Computer] > [CanonCPSD141W] in this order, and double-click [setup].
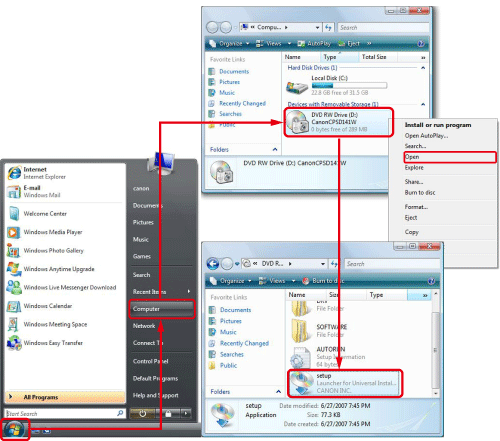
If the following window appears, click [Continue].
The following screen will appear. Select the area in which you live.
The following screen will appear. Click [English].
The following screen will appear. Click [Select Printer].
The following screen will appear. Click [SELPHY CP760] (if you are using [SELPHY CP770], ckick [SELPHY CP770] ).
The following screen will appear. Click [Next].
The following screen will appear. Click [Yes] after reading the content carefully.
The installation of the software will start.
The following screen appears.
Connect the printer to the computer with a commercially available USB cable, and then turn on the printer.