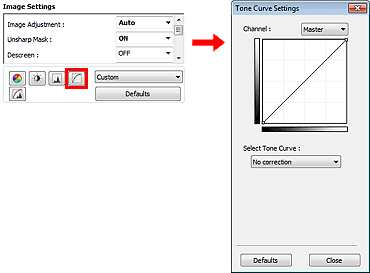
Adjusting Tone Curve
In ScanGear (scanner driver)'s Advanced Mode tab, click  (Tone Curve Settings).
 Note:
Note:
Channel
Each dot of an image is a mixture of Red, Green, and Blue in various proportions (gradation). These colors can be adjusted individually as a "channel."
Master
Adjust the Red, Green, and Blue combined.
Red
Adjust the Red channel.
Green
Adjust the Green channel.
Blue
Adjust the Blue channel.
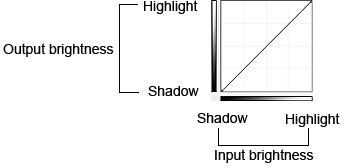
Note: Reading Tone Curves
With ScanGear, scanning images via a scanner is the input, and displaying to a monitor is the output. "Tone Curve" shows the balance of tone input and output for each Channel.
Adjusting Tone Curve
In Select Tone Curve, select a tone curve from No correction, Overexposure, Underexposure, High contrast, Reverse the negative/positive image and Edit custom curve.
No correction (No adjustment)

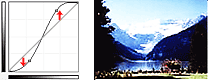
Overexposure (Convex curve)
The midtone data of the input side is stretched toward the highlight of the output side, resulting in a bright-toned image when viewed on a monitor.

Underexposure (Concave curve)
The midtone data of the input side is stretched toward the shadow of the output side, resulting in a dark-toned image when viewed on a monitor.

High contrast (S curve)
The highlight and shadow of the input side are enhanced, resulting in a high-contrast image.
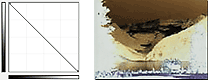
Reverse the negative/positive image (Downward-sloping line)
The input and output sides are reversed, resulting in a negative-positive inverted image.
Edit custom curve
You can drag specific points on the Tone Curve to freely adjust the brightness of the corresponding areas.
