EOS R50: Connecting to EOS Utility
| Article ID: ART182762 |
| |
Date published: 05/11/2023 |
| |
Date last updated: 08/31/2023 |
Description
Connecting to EOS Utility
Solution
|
Connecting to EOS Utility
This section describes how to connect the camera to a computer via Wi-Fi and perform camera operations using EOS software or other dedicated software. Install the latest version of software on the computer before setting up a Wi-Fi connection.
For computer operating instructions, refer to the computer user manual.
Operating the Camera Using EOS Utility
Using EOS Utility (EOS software), you can import images from the camera, control the camera, and perform other operations.
Steps on the camera (1)
-
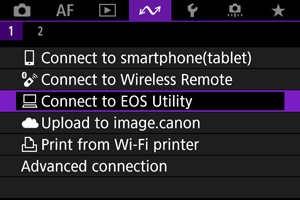
Select [ : :  Connect to EOS Utility]. Connect to EOS Utility].
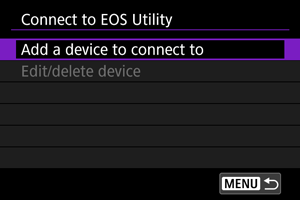
-
Select [Add a device to connect to].
-
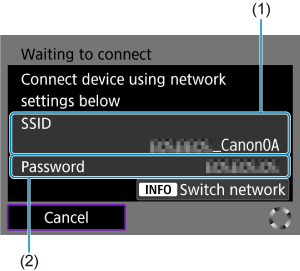
Check the SSID (network name) and password.
- Check the SSID (1) and Password (2) displayed on the camera screen.
- To establish a Wi-Fi connection using an access point, press the
 button. Follow the instructions for the connection method used. button. Follow the instructions for the connection method used.
- Connecting via WPS (, )
- Connecting manually to detected networks ()
- Connecting manually by specifying access point information ()
Steps on the computer (1)
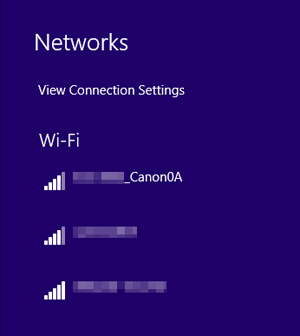
-
Select the SSID, then enter the password.
Computer's screen (sample)
Steps on the camera (2)
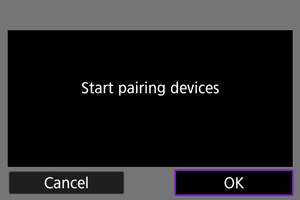
-
Select [OK].
Steps on the computer (2)
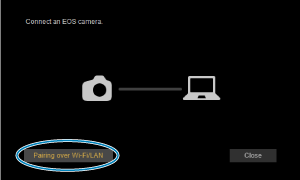
-
Start EOS Utility.
-
In EOS Utility, click [Pairing over Wi-Fi/LAN].
- If a firewall-related message is displayed, select [Yes].
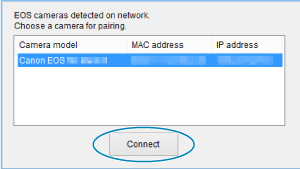
-
Click [Connect].
- Select the camera to connect to, then click [Connect].
Steps on the camera (3)
-
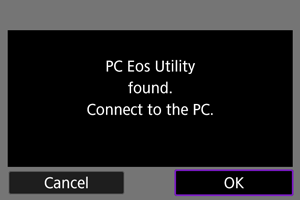
Establish a Wi-Fi connection.
- Select [OK].
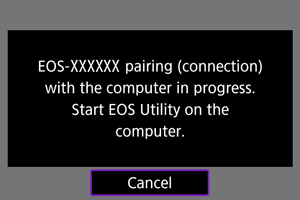
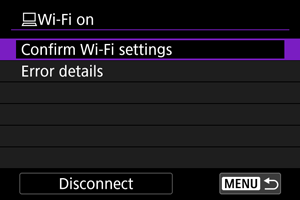
- [Wi-Fi on] is displayed on the camera screen ().
The Wi-Fi connection to a computer is now complete.
[Wi-Fi on] screen
|
SIMS Doc Id
1679067672505699528