You can set the sender camera time on up to 10 receiver cameras. Note that even after synchronization, a slight margin of error applies between sender and receiver camera time (of ±0.05 seconds, at most).
Caution
- Always use cameras of the same model to sync the time. Synchronizing the time on receiver cameras is not possible with different models of the sender and receiver cameras.
- This feature will not be available after 2038.
Preparing for Time Syncing
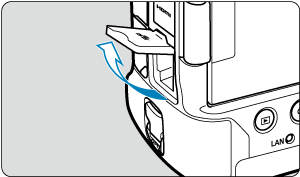
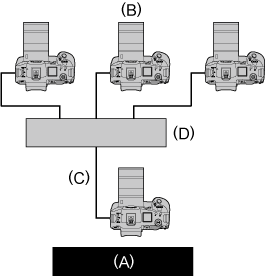
When using a single receiver camera, connect a LAN cable to the Ethernet RJ-45 terminal of the sender and receiver cameras.
When using multiple receiver cameras, connect a LAN cable from the Ethernet terminal of the sender and receiver cameras to a hub. Up to 10 receiver cameras can be connected.
Use a highly shielded Category 5e or higher STP (Shielded Twisted Pair) Gigabit Ethernet cable.
Syncing the Time
Preparing the sender camera
First, set up the camera to use as a sender.
-
On the camera, press the  button.
-
Select [ : Network settings].
-
In [Network], select [Enable].
-
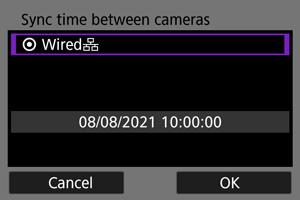
Select [Sync time between cameras].
- If the camera is already connected to another device, [Set [Connection settings] to [Disconnect]] is displayed. Select [OK] to end the connection.
-
Select [OK].
-
Select [OK].
-
Select [Sender].
- Select [OK] to go to the next screen.
- After the screen is displayed, the camera is ready.
Preparing receiver cameras
Set up cameras to use as receivers.
-
Follow steps 1–6 in Preparing the Sender Camera.
-
Select [Receiver].
- Select [OK] to go to the next screen.
-
Select [OK].
Syncing time between sender and receiver cameras
Sync the time on the sender and receiver cameras as follows.
-
Follow steps 1–6 in Preparing the sender camera and steps 1–3 in Preparing receiver cameras.
-
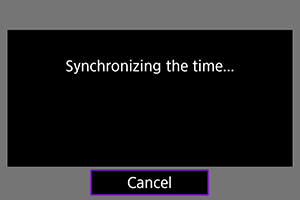
On the sender camera, select [OK].
- Check the number of receiver cameras, then select [OK].
- After the time is synchronized, the next screen is displayed.
-
Select [OK] on all of the cameras.