How to add a printer to a Macintosh computer.
| Article ID: ART166602 |
| |
Date published: 09/16/2016 |
| |
Date last updated: 09/16/2016 |
Description
Add Printer Screen
Solution
[Add] / [Add Printer]
This section describes how to add a printer to a Macintosh computer.*
*See Adding a printer by specifying its IP address to add the printer on the following cases:
- If the printer does not appear on the list
- If you add a printer by specifying its IP address
- If you add a printer on another network segment
 Note
Note
- If the printer is not detected, check the following.
- The printer is turned on.
- The firewall function of any security software is turned off.
- Wireless Connection: The printer is connected to the access point or connected directly to the computer.
- Wired Connection: The printer is connected to the network device with the Ethernet cable.
-
When Add Printer screen appears, click Add Printer.
-
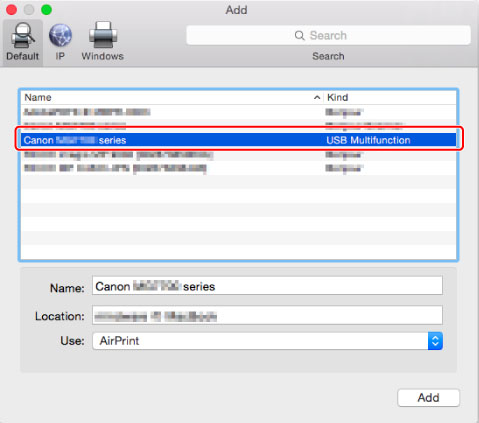
Make sure Default is selected.
-
Select printer you use on Name.
Select the printer from Kind according to the connection method.
- When you use the printer via a network: Select the printer with "Bonjour XXXX" on its name.
- When you use the printer via USB: Select the printer with "USB XXXX" on its name.
Note
- After clicking Default, it takes some time before the printer name you use is displayed.
-
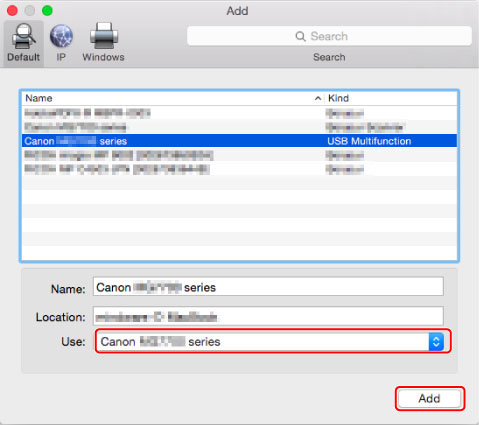
Select printer name you use from Use: and click Add.
-
Click Next on Add Printer screen.
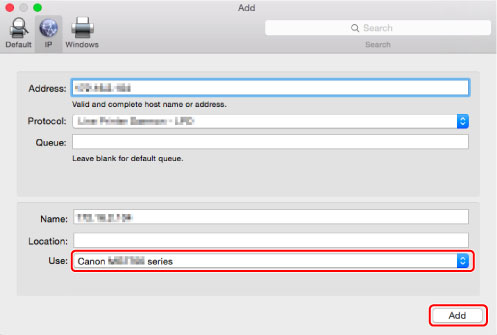
Adding a printer by specifying its IP address
-
When Add Printer screen appears, click Add Printer.
-
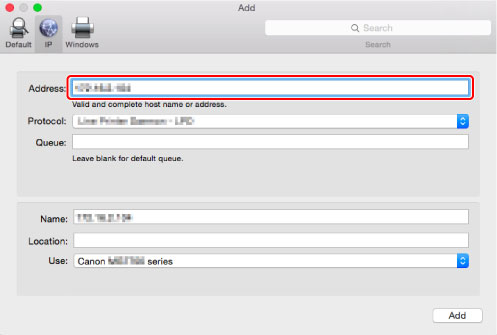
Select IP.
-
Enter printer's IP address on Address:.
-
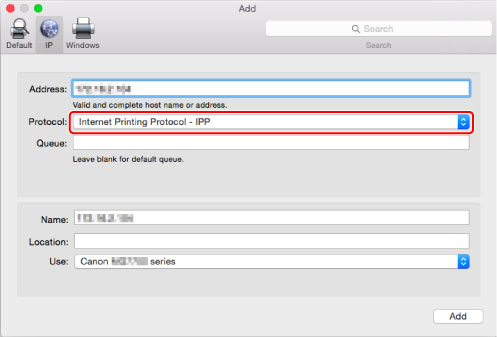
Select Internet Printing Protocol - IPP on Protocol:.
-
Select printer name you use from Use: and click Add.
-
Click Next on Add Printer screen.