If you get a message on the touch screen about low ink levels, prepare to replace the ink tank(s).
 If the print is faint or has streaks, and you know there is ink in the tank, visit maintenance procedures.
Before you start, there are a few things to know about ink.
 Cautions
-
Install replacement ink tanks right away. Don't leave the machine with tanks missing.
-
Handle ink tanks carefully. Don't drop them or press hard on them.
-
Don't touch metallic parts or other areas inside the machine. It may damage the machine and ink residue may stain your clothes or the surrounding area.
-
If the front cover is open for more than 60 minutes, the print head holder will move to the right. If this happens, close the front cover and open it again.
-
Follow local regulations when discarding used tanks.
Replace ink tanks
When needed, replace ink tanks as follows:
-
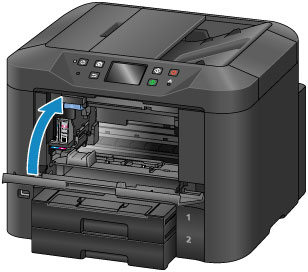
Turn on the machine and open the front cover. The tanks due for replacement display on the touch screen. The print head holder (A) moves to replacement position.
Installed ink tanks can't be removed until a replacement message appears.
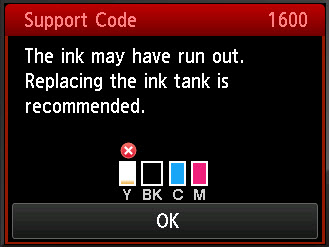
Don't touch the print head holder until it stops. If a warning about ink tank replacement appears, check the message and tap OK.

-
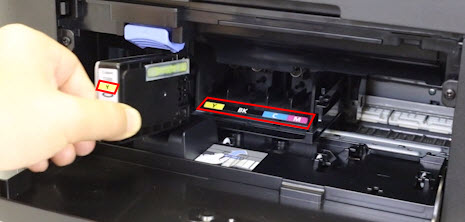
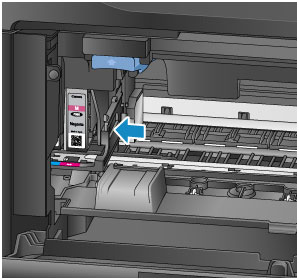
Once the ink tank for replacement is identified on the touch screen, push up the ink tank eject lever (B).

-
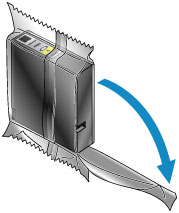
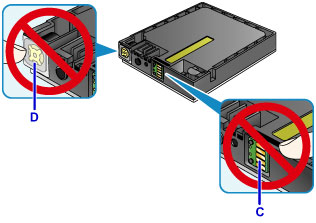
Remove the ink tank from the package. Don't touch the contact (C) or interface (D) of the ink tank.
-
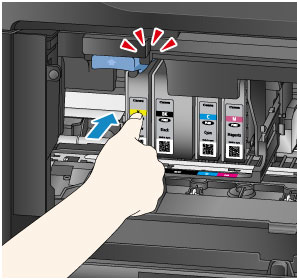
Insert the new ink tank and align it with the installation guide (E) on the machine.
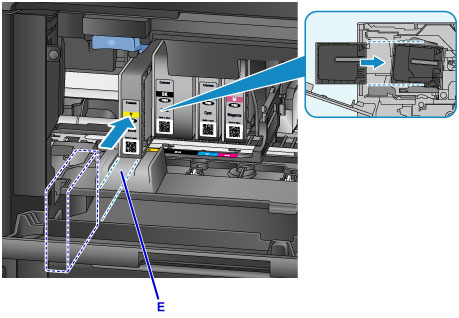
The ink tank won't fit in an incorrect guide slot. Match the label under the installation guide with the ink tank, and then install the ink tank in the correct guide slot.
-
Push the ink tank in firmly until it clicks into place.
-
Tap Exit on the touch screen. If Next displays, another ink tank can be replaced. Tap Next and start back at Step 2.
Printing isn't possible without a complete set of ink tanks installed.
-
To exit ink tank replacement, tap Next until Exit displays.
-
The print head holder moves to the standby position. Ink tanks can't be removed from this position.
-
Close the front cover.
-
After tanks are replaced, the machine starts mixing the ink automatically. Wait until mixing has stopped (about 1–2 minutes).
After installation
About ink
-
Replace used tanks with new ones. Used tanks may clog the nozzles and won't tell you when it's time for a replacement.
-
Once an ink tank is removed, the printer won't operate until a new one is installed - even if you try to re-install the old tank.
-
Install the new tank right after you remove the packaging. Otherwise, the tank will dry out and won't work correctly.
-
Use ink tanks within six months after you install them.
-
All ink colors are consumed during print head cleaning.
-
Color ink may be consumed even when printing in black-and-white.
-
Learn more about how ink is consumed.
If your product issue was not resolved after following the steps above, or if you require additional help, please create or log in to your Canon Account to see your technical support options.
Or if you still need help, visit our Canon Community by clicking the button below to get answers:

____________________________________________________________________________________________
