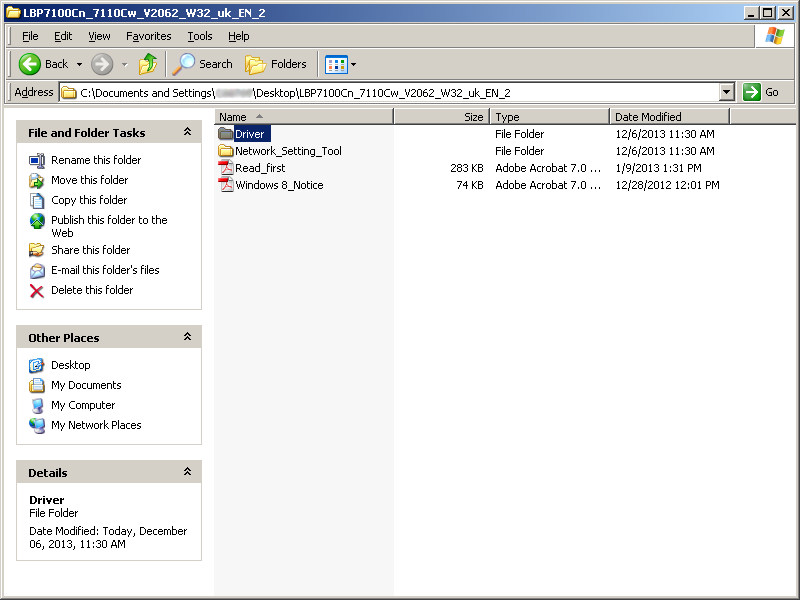
1) Open the LBP7110Cw Driver folder on your desktop.
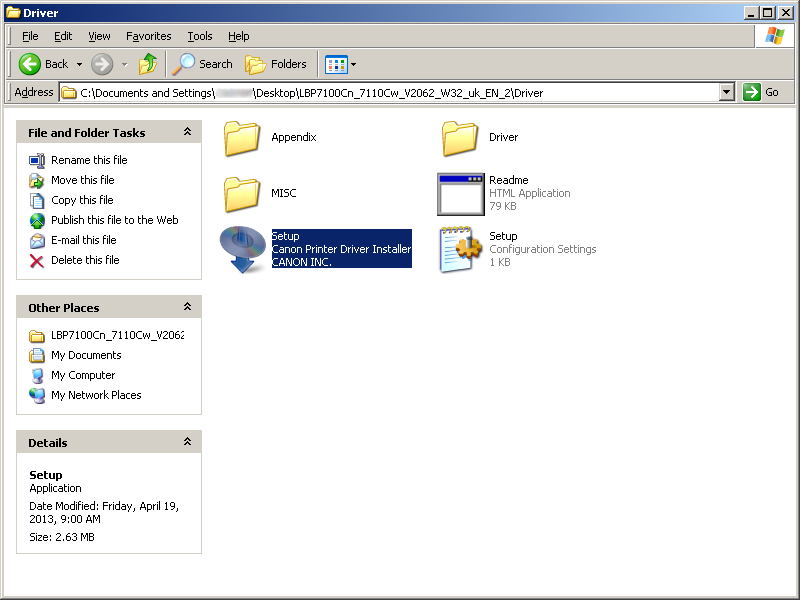
2) Open the Driver folder.
3) Double-click the [Setup] icon.
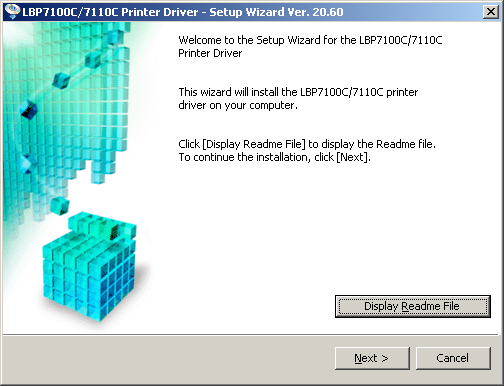
4) When the print driver Setup Wizard launches, click [Next].
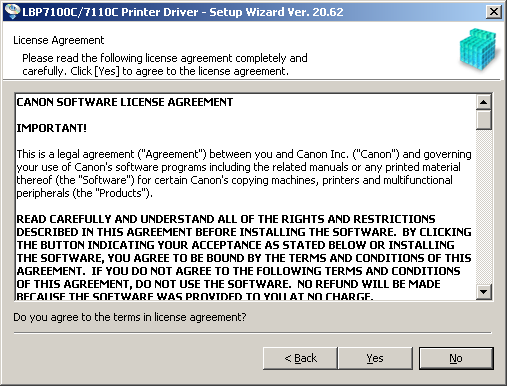
5) Click [YES] to accept the terms of the License Agreement.
6) Select the [Search for Network Printers to Install] radio button, and then click [Next].

7) Make sure that [Add Printers] is selected, and click [Next].

Your computer searches for the LBP7110Cw printer.
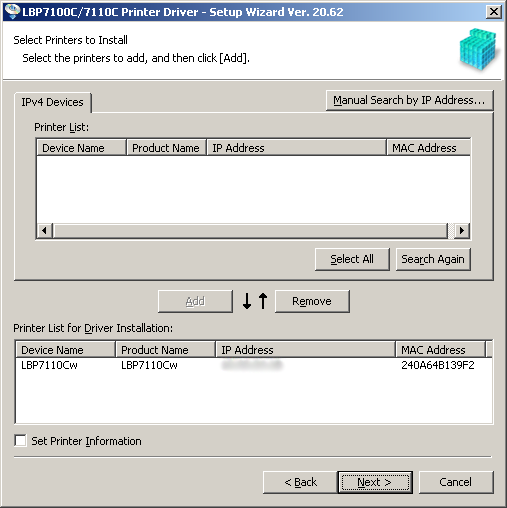
8) Select the LBP7110Cw printer from the Printer List, and then click [Add].

9) Once the printer appears in the Printer List for Driver Installation, click [Next].
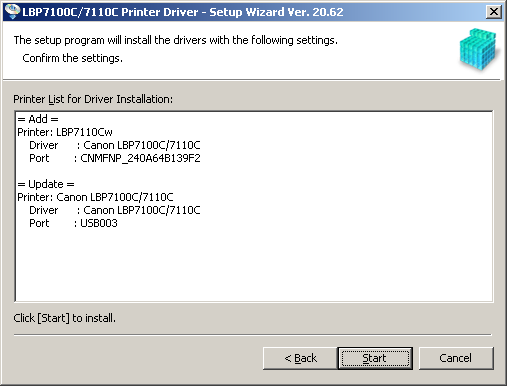
10) Click [Start] to install the driver.
11) Click [Yes] to continue.

12) Please wait until the driver installs.

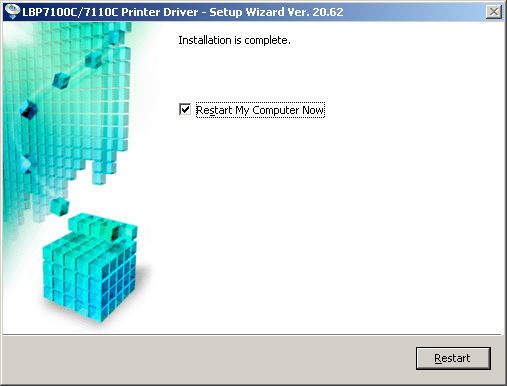
13) Select [Restart My Computer Now], and then click [Restart].
If you need further assistance in setting up your printer, please contact us at 1-800-OK CANON.
