If scan results are poor (colors in white portions, incorrect color tones throughout the entire image, etc.), calibrating the scanner may improve the quality of the scan results.
To calibrate your scanner you need to open ScanGear. You can open it from MP Navigator EX, IJ Scan Utility, or ScanGear Starter EX (for the LiDE 120 / 220 on macOS®).
Follow the steps below that match the navigation path you want to use.
 The screenshots below are from Windows, but Mac® instructions are the same and the screenshots look similar.
Open ScanGear
- From MP Navigator EX
-
From the Scan / Import Documents or Images screen, select either Auto Scan or Photos /Documents (Platen).
-
Place a check in the box above Use the scanner driver, then select Open Scanner Driver.

-
From IJ Scan Utility
Select ScanGear.

-
From ScanGear Starter EX for macOS (LiDE 120 / 220)
From the Go menu of Finder, select Applications > double-click on the Canon Utilities folder > IJ ScanGear Starter EX folder > then select the Canon IJ ScanGear Starter EX icon.
Calibrate your scanner
ScanGear launches. Follow the steps below to calibrate your scanner.
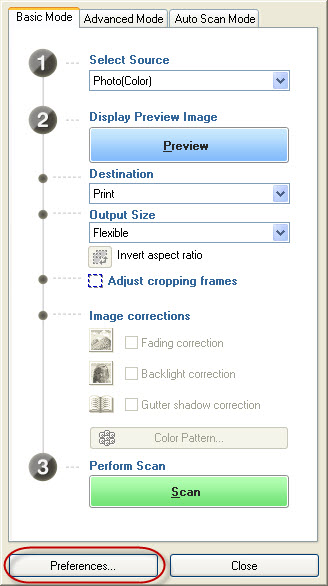
- From the Basic Mode tab, select the Preferences button at the bottom of the screen.
 While the screenshot below shows the Basic Mode tab, you can also access the Preferences button from the other two tabs (Advanced Mode or Auto Scan Mode).
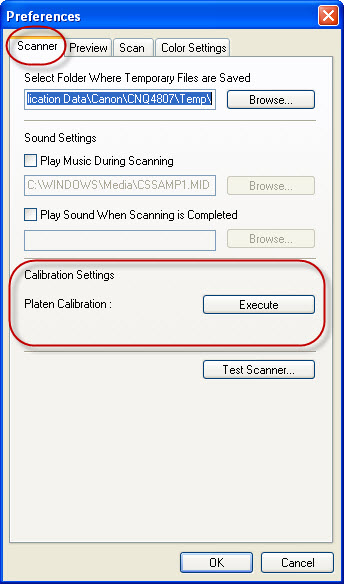
- On the Scanner tab, you'll see the Calibration options. Select Execute to start the calibration process. This takes a few minutes.
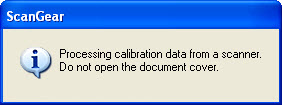
- The calibration is processing when you see this screen below. This takes a few minutes. When the window disappears, the calibration is complete.
 d
d
You can repeat the calibration up to three times if you don't get the results you desire.
